For most homeowners, a tongue-and-groove pine or cedar plank ceiling is the go-to wood ceiling accent: it balances visual warmth, manageable DIY installation, and a cost range of roughly $3–$8 per square foot for materials alone. Ceiling height, natural light, and moisture exposure are the three factors that determine whether you go with planks, exposed beams, or a hybrid approach.
Wooden ceilings add warmth and visual richness, offer insulation and acoustic benefits, and work across nearly every room in the house, though moisture-prone spaces demand careful species and finish selection to prevent warping.
Quick pros and cons at a glance:
- Tongue-and-groove planks: Clean, refined texture; DIY-friendly; works in living rooms, bedrooms, and porches. Materials cost varies; installation cost depends on professional hiring.
- Exposed or faux beams: High drama on vaulted ceilings; structural beams require professional assessment; lightweight faux beams are a DIY-viable alternative.
- Reclaimed or barnwood planks: Authentic character; best for farmhouse and rustic interiors; higher material cost and variable quality.
A wood ceiling accent is not just a design choice — it is a structural and environmental decision. Choose FSC-certified lumber and low-VOC finishes to protect both the home and the people living in it.
Key Takeaways
Tongue-and-groove pine or cedar planks remain the most practical wood ceiling accent for most homeowners, balancing cost, DIY accessibility, and visual impact when paired with the right finish and room conditions.
| Point | Details |
|---|---|
| Go-to approach | Tongue-and-groove pine or cedar at $7–$15/sq ft installed suits most rooms and skill levels. |
| Finish drives perception | Light finishes and satin sheen raise perceived ceiling height; dark matte finishes add drama but compress space. |
| Moisture is the main risk | Use cedar, cypress, or vinyl plank in kitchens, bathrooms, and basements; seal all real wood with a moisture-resistant finish. |
| Sustainability and air quality | Specify FSC-certified lumber and low-VOC finishes to protect indoor air and responsible sourcing. |
| Woodmadeillinois | Offers custom plank ceilings, faux beam installs, and design consultations across Central Illinois for homeowners ready to hire a pro. |
Table of Contents
- 12 Wood Ceiling Accent Ideas Worth Considering
- How Do You Pick the Right Style for Each Room?
- What Are Your Best Material and Finish Options?
- How to Install a Tongue-and-Groove Wood Plank Ceiling
- Carpenter Tips and Mistakes That Cost Homeowners Money
- What Most Wood Ceiling Advice Gets Wrong
- Woodmadeillinois Brings Your Wood Ceiling Vision to Life
- Sources
12 Wood Ceiling Accent Ideas Worth Considering
These twelve options span beginner-friendly to advanced, covering the full range of decorative wood ceiling styles you will encounter on design sites and in real homes.
-
Whitewashed tongue-and-groove pine. A soft, coastal look achieved by diluting white paint and wiping it across raw pine. Best for bedrooms and sunrooms with low-to-moderate ceiling heights. Beginner-friendly once the boards are up.
-
Wide-plank cedar. Boards 6–8 inches wide read rustic and grand, and cedar’s natural oils offer mild moisture resistance. Best for covered porches and living rooms with ceilings above 9 feet. The scent is a bonus.
-
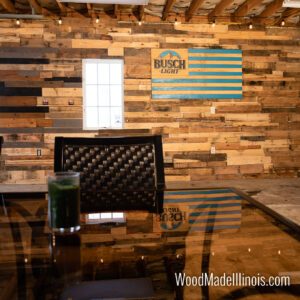
Reclaimed barnwood planks. Weathered gray tones and nail holes tell a story no new lumber can replicate. Best for farmhouse kitchens and dining rooms. Reclaimed wood delivers authenticity but comes with variable quality; inspect each board for structural integrity before install.
-
Exposed structural beams. Raw or stained timber beams left visible on a vaulted or cathedral ceiling. Best for loft-style living rooms and great rooms. Requires a structural assessment — not a weekend DIY project.
-
Slatted linear ceiling (ceiling wood slats). Narrow boards spaced 1–2 inches apart with a painted substrate visible beneath. Creates a modern, airy rhythm. Best for dining rooms and home offices. Intermediate install difficulty.
-
Herringbone or diagonal planks. Patterned diagonal installations add custom movement and can make narrow rooms feel more dynamic, but they increase material waste by 15–20% and require precise angle cuts. Advanced DIY or hire a carpenter.
-
Tray accent ceiling with wood inset. A recessed tray framed in drywall with tongue-and-groove or plywood planks laid inside. Best for formal dining rooms and primary bedrooms. Careful framing and trim work create a polished result without structural changes. Intermediate difficulty.
-
Painted black plank ceiling. Standard pine planks painted matte black for a moody, dramatic effect. Best for dining rooms, bars, and spaces with abundant natural light to counterbalance the depth. Beginner install, bold commitment.
-
Tongue-and-groove with decorative beams. Planks running perpendicular to lightweight faux beams divide the ceiling into bays. Best for living rooms and kitchens. The faux beams are hollow, lightweight, and attach with construction adhesive — no structural modification needed.
-
Plywood plank ceiling. Rip 3/4-inch plywood into 6-inch strips, sand, stain, and install like standard planks. DIY tutorials confirm plywood planks are an affordable, lightweight option that can transform a tired ceiling for a modest materials cost. Best for budget-conscious projects.
-
Vinyl or PVC plank ceiling. Engineered to resist moisture and insects. Best for bathrooms, basements, and screened-in porches where real wood would warp. Looks convincing from a distance; lacks the tactile warmth of real timber.
-
Diagonal narrow planks for small rooms. Running 3-inch boards at a 45-degree angle draws the eye outward, making a compact room feel wider. Best for small bedrooms and hallways. Requires careful layout planning before the first board goes up.
Pro Tip: Before committing to a pattern, photograph the empty ceiling and overlay a digital mock-up using a free tool like Houzz or Roomstyler. Diagonal and herringbone layouts look very different at scale than they do in inspiration photos.
How Do You Pick the Right Style for Each Room?
Three rules govern almost every good wood ceiling design decision: ceiling height, natural light, and room function. Get these right and the species and finish choices almost make themselves.
Rule 1: Ceiling height
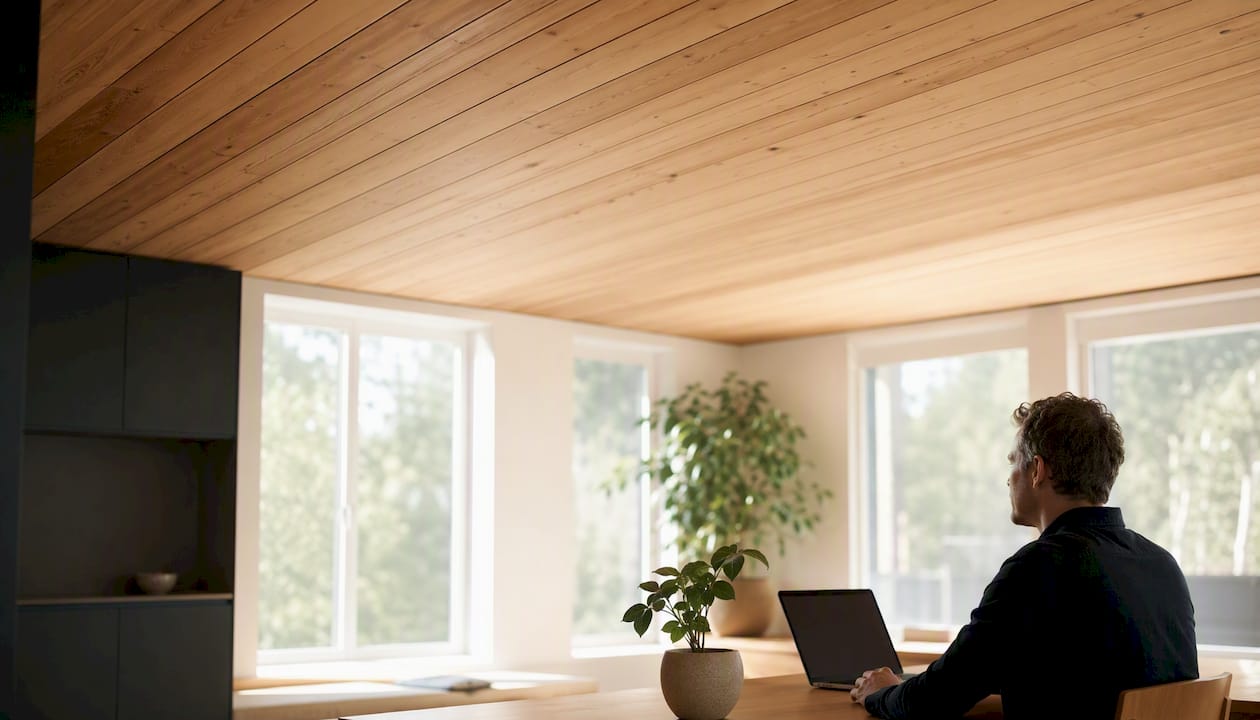
Rooms with ceilings below 8 feet should avoid wide, dark planks. Wide boards (6 inches or more) compress visual height; dark stains amplify that effect. In a low room, choose narrow tongue-and-groove boards (3–4 inches) in a light finish, or a slatted design that draws the eye along the length of the room. Designers note that plank width and profile set the room’s architectural rhythm: wide planks read rustic and grand, narrow boards read refined and airy.
Rule 2: Natural light
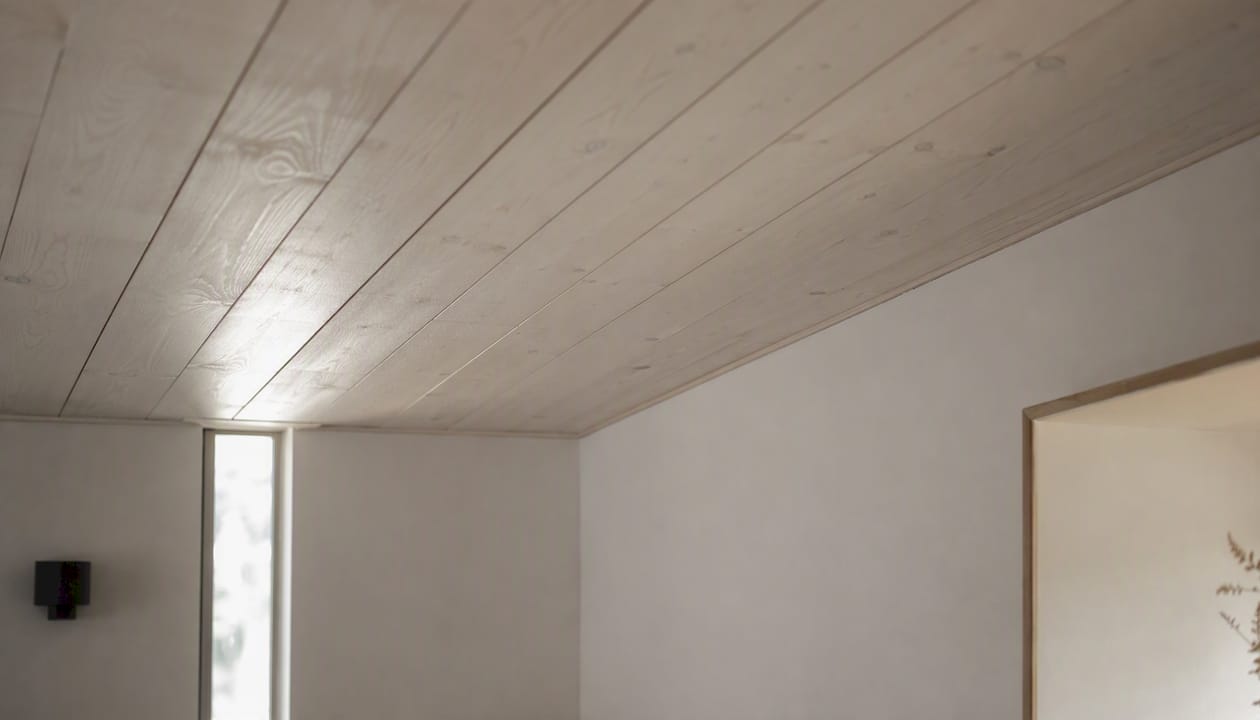
A north-facing room with limited windows cannot absorb a dark walnut ceiling without feeling like a cave. In low-light rooms, a whitewash or soft white paint on pine planks adds texture without sacrificing brightness. Light-painted plank ceilings preserve openness while darker finishes add drama — and finish sheen matters as much as color. A satin or semi-gloss poly bounces more light than a flat or matte finish.
Rule 3: Room function and moisture
Kitchens and bathrooms generate steam. Real wood in these spaces needs a moisture-resistant species (cedar, cypress, or teak) and a well-sealed finish, plus adequate ventilation. Vinyl plank is the honest choice for a bathroom ceiling where humidity regularly spikes. Covered porches sit in a middle ground: cedar or pressure-treated pine with an exterior-grade finish handles seasonal moisture well.
Room-by-room quick guide:
- Living room / dining room: Wide planks, exposed beams, or tongue-and-groove with faux beams. Any finish works; match tone to furniture.
- Kitchen: Tongue-and-groove cedar or vinyl plank. Tray accent with sealed pine works if ventilation is adequate.
- Bathroom: Vinyl plank or cedar with marine-grade sealer. Avoid oak and pine without heavy sealing.
- Covered porch / screened-in porch: Cedar or pressure-treated pine, exterior-grade finish.
- Vaulted / loft ceiling: Exposed beams or wide planks follow the roofline. Hire a pro for structural beam work.
- Bedroom: Whitewashed tongue-and-groove or diagonal narrow planks. Light finishes support restful atmosphere.
- Basement: Vinyl plank or engineered wood. Moisture and pest resistance take priority over aesthetics.
Pre-selection checklist:
- Measure ceiling square footage and note joist direction and spacing.
- Locate all light fixtures, vents, and smoke detectors before planning layout.
- Test a finish sample on a scrap board in the actual room light before committing.
- Photograph the ceiling and mock up the pattern digitally.
What Are Your Best Material and Finish Options?
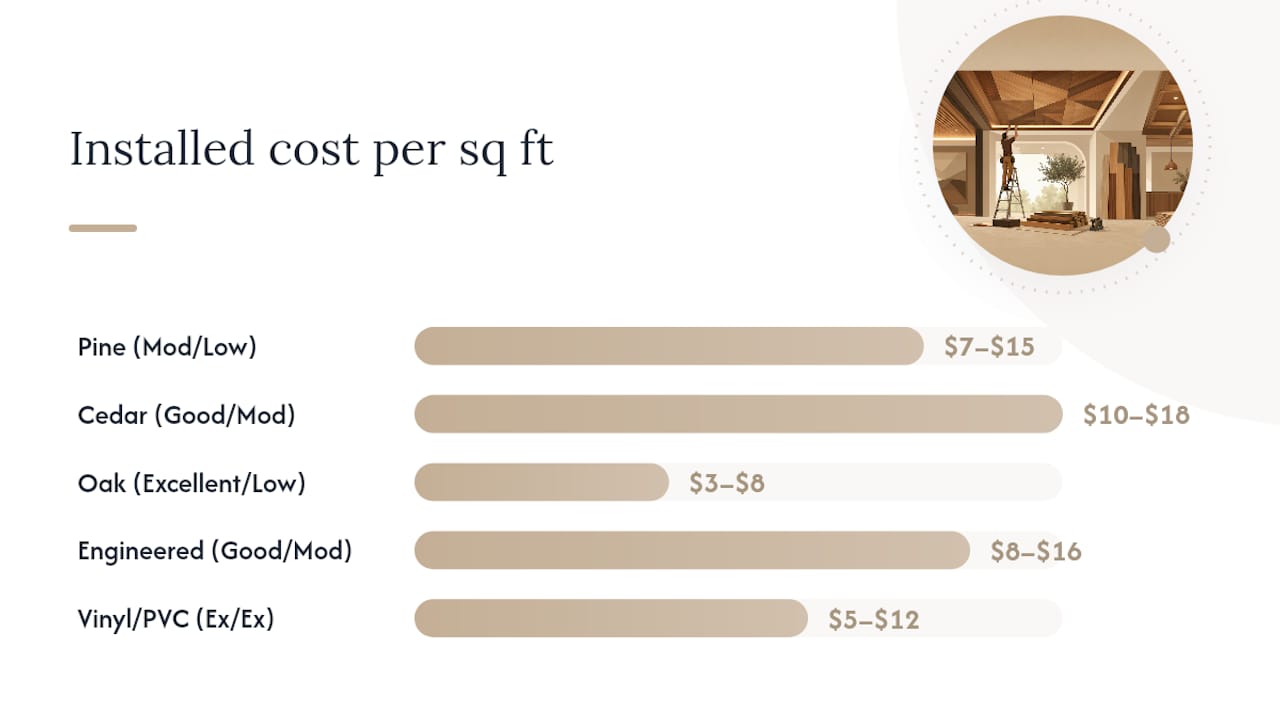
Species, engineered alternatives, and faux products each occupy a different position on the cost-durability-aesthetics triangle. The table below covers the most common choices for a decorative wood ceiling.
| Material | Cost/sq ft (installed) | Durability / Moisture Resistance | Finish Options | Best For |
|---|---|---|---|---|
| Pine (tongue-and-groove) | $7–$15 | Moderate / Low | Stain, paint, whitewash, poly | Living rooms, bedrooms |
| Cedar | $10–$18 | Good / Moderate | Natural oil, stain, exterior poly | Porches, kitchens |
| Oak | $3–$8 | Excellent / Low | Stain, satin poly | Dining rooms, formal spaces |
| Reclaimed barnwood | $3–$8 | Variable / Low | Matte sealer, wax | Farmhouse, rustic interiors |
| Engineered wood plank | $8–$16 | Good / Moderate | Pre-finished or stain | Basements, moderate humidity |
| Vinyl / PVC plank | $5–$12 | Excellent / Excellent | Pre-finished only | Bathrooms, basements, porches |
Finish notes worth knowing:
- Stain deepens grain character and comes in hundreds of tones; oil-based stains penetrate better but off-gas more than water-based versions.
- Whitewash (diluted white paint or pickling stain) softens grain without hiding it; ideal for coastal and Scandinavian interiors.
- Matte poly absorbs light and reads as more natural; satin and semi-gloss bounce light and visually raise a ceiling.
- Paint (solid color) gives the most design flexibility and the easiest touch-up; pre-primed pine painted soft white is a reliable, budget-conscious choice.
Sustainability and air quality. When sourcing real wood, look for the FSC certification mark, which verifies the lumber came from responsibly managed forests. For finishes, the EPA classifies VOCs as indoor-air pollutants and recommends low-VOC or zero-VOC products for interior projects. Water-based stains and finishes have come a long way in durability and now rival oil-based options in most residential applications.
Reclaimed wood carries a sustainability argument of its own: no new trees harvested, lower embodied energy. The tradeoff is inconsistent board thickness and the occasional hidden nail or staple that will ruin a saw blade. Budget extra time for prep.
How to Install a Tongue-and-Groove Wood Plank Ceiling
A motivated homeowner can complete a basic tongue-and-groove ceiling in a 10-by-12-foot room over a long weekend. The sequence below applies to a standard flat ceiling with accessible joists.
Tools and materials
- Tongue-and-groove planks (add 10% overage for cuts and waste)
- Stud / joist finder
- Chalk line and tape measure
- Miter saw and table saw (or circular saw with guide)
- Brad nailer (18-gauge) and finish nails
- Construction adhesive (for lightweight planks)
- Safety glasses, hearing protection, and a sturdy ladder
- Caulk and wood filler for gaps and nail holes
Step-by-step sequence
- Acclimate the wood. Stack planks in the room for 48–72 hours before install. Wood that skips acclimation will expand or contract after fastening, opening gaps or buckling boards.
- Locate and mark joists. Use a joist finder and snap chalk lines across the ceiling so every fastener hits solid framing. Joists typically run 16 or 24 inches on center.
- Install furring strips if needed. If joists run parallel to your planned plank direction, attach 1×3 furring strips perpendicular to the joists at 16-inch intervals to create a nailing surface.
- Establish a straight starting line. Measure out from the longest wall and snap a chalk line. The first board must be perfectly straight — every subsequent board references it.
- Fasten the first board. Face-nail the first board along the wall edge (this nail will be covered by trim). Blind-nail through the tongue at a 45-degree angle for all subsequent boards.
- Work across the ceiling. Stagger end joints by at least 24 inches between rows. Using construction adhesive plus brad nails for lightweight planks speeds install and reduces fastener pop.
- Work around fixtures. Cut notches for light boxes and vents before fastening each affected board. Turn off the circuit at the breaker before working near electrical boxes.
- Install trim and finish. Nail crown molding or simple casing to cover the perimeter gap. Fill nail holes, sand lightly, and apply your chosen finish in two coats.
Timeline estimate: A 10×12-foot room with a flat ceiling and no electrical complications takes roughly 12–18 hours of active work, spread across two days to allow finish drying time.
When to hire a professional: Vaulted ceilings, any work involving moving electrical fixtures, structural beam installation, or rooms with active moisture issues all warrant a licensed contractor. The cost of a professional install is real, but so is the cost of a ceiling that comes down.
Pro Tip: Apply your finish to the boards before installation, not after. Pre-finishing means you never have to cut in around trim or fight a brush into tight tongue-and-groove seams. Leave the last 2 inches of each board end unfinished so adhesive bonds properly, then touch up after install.
Carpenter Tips and Mistakes That Cost Homeowners Money
The difference between a ceiling that looks custom-built and one that looks like a weekend project usually comes down to a handful of decisions made before the first board goes up.
Common mistakes:
- Skipping acclimation. Boards installed without acclimating to room humidity will move. In a heated Illinois home, that movement can open visible gaps within one heating season.
- Ignoring joist layout. Planning a plank direction that runs parallel to joists without adding furring strips means fasteners have nothing to bite into. The ceiling will sag or pop nails within months.
- Choosing a finish that darkens the room. A dark walnut stain on a 9-foot ceiling in a north-facing room is a commitment that is very expensive to reverse. Always test a finish sample in the actual room before ordering materials.
- Skipping fire and smoke detector checks. Wood ceilings can cover or displace smoke detectors. Confirm detector placement meets local code before finishing the ceiling.
- Uniform grain and tone throughout. Pulling all boards from the same bundle produces a flat, monotonous ceiling. Mix bundles and sort boards by grain character before install to control tonal variation intentionally.
Tradecraft tips from experienced carpenters:
- Partial whitewashing (applying diluted white paint and wiping back immediately) gives more control than full whitewash. Work in 3-foot sections and adjust dilution ratio until the tone matches your sample.
- Faux beams over real timbers. Where ceiling joists cannot support the weight of solid timber beams, hollow faux beams made from MDF or polyurethane deliver the same visual effect at a fraction of the weight and cost. They attach with construction adhesive and a few screws into blocking.
- Finish sheen as a design tool. A matte finish on dark planks absorbs light and creates intimacy; a satin finish on light planks bounces light and reads as taller. Use sheen deliberately, not by default.
Pre-install decision checklist:
- Acclimate wood 48–72 hours in the installation room.
- Run a moisture meter reading on both the wood and the substructure above.
- Apply finish sample to a scrap board and view it in the room at morning, midday, and evening light.
- Take a mock-up photo with a wide-angle lens to check scale and proportion before committing.
Personalizing wood features so they integrate with your existing trim and furniture is one of the most overlooked steps in ceiling planning. A ceiling that fights the room’s existing architectural character rarely succeeds, no matter how well it is installed.
What Most Wood Ceiling Advice Gets Wrong
The standard advice on wood ceilings tends to focus on style selection: pick a species, pick a finish, install it. What that advice consistently underweights is the relationship between the ceiling and the room’s existing bones.
A tongue-and-groove ceiling installed in a room with mismatched trim profiles, the wrong door color, or no deliberate lighting plan will look like an afterthought. The ceiling is not the room’s focal point in isolation. It works when it is part of a considered whole: trim that echoes the plank profile, door and trim colors that complement rather than compete, and lighting that is planned around the ceiling material rather than retrofitted into it.
Recessed lighting, for instance, punches holes in a continuous plank ceiling and fragments its visual rhythm. Track lighting or pendant fixtures hung from a beam bay preserve the ceiling’s integrity far better. This is a decision that must be made before the first board goes up, not after.
The sustainability conversation is also more nuanced than “buy FSC wood and you’re done.” Low-VOC finishes matter as much as certified lumber, because a beautiful FSC-certified ceiling sealed with a high-VOC oil-based poly still off-gasses into the living space for weeks. Both choices belong in the same conversation.
Finally, the DIY vs. hire decision is not purely about skill level. It is about risk tolerance. A ceiling that fails structurally or develops moisture problems behind the boards is far more expensive to remediate than the original professional installation would have cost. For complex rooms, vaulted ceilings, or any project involving electrical relocation, the carpenter’s fee is the cheaper option.
Woodmadeillinois Brings Your Wood Ceiling Vision to Life
Designing a wood ceiling accent is one thing. Getting the framing, finish, and fixture integration right on a real ceiling in a real home is another. Woodmadeillinois brings over 100 years of combined carpentry experience to custom plank ceilings, faux beam installations, tray accent ceilings, and trim work across Central Illinois — with a design consultation process that starts from your room’s actual dimensions, light conditions, and existing architecture.

The team handles the decisions that trip up DIY projects: joist assessment, furring strip layout, fixture coordination, and finish selection matched to your specific room conditions. For homeowners weighing a custom carpentry project against a DIY weekend, the difference is a ceiling that looks intentional versus one that looks installed. When the project involves vaulted ceilings, electrical relocation, or structural alterations, working with trusted local carpentry experts is the straightforward choice. Reach out to Woodmadeillinois for a design consultation and get a clear scope, timeline, and cost estimate for your ceiling project.
Sources
- 20 Wood Ceiling Ideas We Love for Any Room
- What are volatile organic compounds (VOCs)? | Indoor Air Quality (IAQ) | US EPA
- FSC
- 10 Ceiling Plank Ideas for a Beautiful Home
- DIY Wood Plank and Beam Ceiling – Jenna Sue Design