If your main goal is maximizing storage, a walk-in built-in with zoned hanging and an island solves it. For a seamless, custom look, a full-wall fitted wardrobe wins. For a tight bedroom, a shallow reach-in keeps floor space intact. The rest of what follows groups these ideas by room size, then walks through the measurements and planning steps that turn a gallery photo into a built wardrobe, drawing on This Old House planning principles and our own hands-on carpentry work at Wood Made Illinois.
TL;DR:
- For closets 24 inches deep or less, skip standard rods, which need roughly 24 inches of clearance, and use shelves, slim drawers, or stacked rods.
- Set long garment rods 66 to 72 inches above the floor, and make shelves 12 to 16 inches deep, choosing deeper shelves for bulky blankets.
- Sliding or pocket doors save floor space but limit access to one section at a time; hinged doors need 24 to 30 inches to open.
- Choose modular systems for standard closets and tighter budgets; custom carpentry suits irregular rooms, sloped ceilings, or trim that must match existing woodwork.
Table of Contents
- 1. Top built-in wardrobe ideas by room size and style
- 2. Space-saving interior layouts and key measurements
- 3. Door types, access solutions, and finish ideas
- 4. Materials, construction approach, and budgeting considerations
- 5. How to plan and measure for built-in wardrobes
- 6. Craftsman perspective: how carpenters approach built-ins
- 7. Customization options for integrating technology
- 8. Maintenance and cleaning tips specific to built-in wardrobes
- 9. Timeline overview from design consultation to installation completion
- 10. Publisher perspective: why built-ins deliver long-term value
- How Wood Made Illinois can help with custom built-ins and consultations
- FAQ
- Sources
1. Top built-in wardrobe ideas by room size and style
Not every bedroom can accommodate every idea, so matching the concept to your actual square footage matters more than chasing a trend.
Full-wall fitted wardrobes turn one wall into continuous storage, floor to ceiling, with no gaps or wasted corners. The upside is a seamless, built-from-the-house look and a dramatic increase in capacity. The trade-off is cost and commitment: once it’s built in, it’s part of the room. A styling tip that pays off every time is painting the wardrobe the same color as the surrounding wall trim so the cabinetry disappears into the architecture rather than competing with it.
Around-bed built-ins borrow a hotel-room trick: overhead cabinets bridge the headboard, flanked by narrow towers on either side for hanging and folded storage. This creates a cocooned, finished feel while reclaiming floor space that a freestanding dresser would otherwise eat up.
Shallow reach-in built-ins work when depth is limited, often to 24 inches or less. The key is skipping standard hanging rods, which need roughly 24 inches of clearance for garments to hang freely, and leaning on shelving, slim drawers, and double-hang sections sized to the shallower space instead.
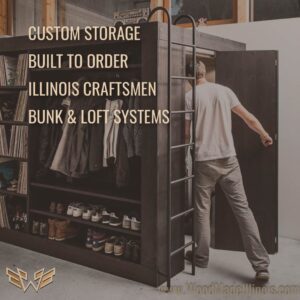
Walk-in built-in concepts make the most of a dedicated room by zoning it: one wall for long hanging, another for folded storage and drawers, a third for shoes, and if the footprint allows, a central island for folding and extra drawer storage.
Styling cues that tie these together across budgets:
- Painted, shaker-style doors with inset or recessed handles for a clean, architectural line
- Integrated LED strip lighting along shelves or inside drawers for a boutique feel
- Matching wood tones or paint colors between the wardrobe and existing trim or built-in shelving elsewhere in the room
2. Space-saving interior layouts and key measurements
Good layouts start with an inventory, not a sketch. Forbes Home recommends sorting clothing into short and long hanging piles and measuring each group before deciding how to split the space, since that split determines how much rod length versus shelving you actually need.
Once you know your inventory, these dimensions guide the layout:
- Hang long garments (coats, dresses) on a rod set around 66 to 72 inches from the floor.
- Hang short items (shirts, folded pants) on a second rod installed at a common height suitable for shorter garments, often paired with a matching rod below for double-hang sections.
- Size shelves between 12 and 16 inches deep, 12 inches for folded shirts and sweaters, closer to 16 for bulkier items like blankets.
- Leave at least a few inches of clearance between a double-hang rod and the shelf above it so garments clear without snagging.
Fittings that stretch a tight footprint further include pull-down rods for high sections, slide-out shoe shelves, pant racks, and pull-out trays for accessories. For narrow closets, a single-wall layout with stacked double-hang on one side and shelving on the other usually outperforms trying to fit rods on every wall. Where a window, vent, or door swing interrupts the space, shift shelving to that section and reserve open wall runs for hanging.
Pro Tip: Measure your tallest hanging items first, then build the rest of the layout around that one constraint rather than guessing at rod heights.
3. Door types, access solutions, and finish ideas
Door choice affects both how the wardrobe looks and how much floor clearance you give up. Sliding and pocket doors suit tight bedrooms since they need no swing radius, though they typically block full access to one section at a time. Hinged doors give full access to everything at once but need 24 to 30 inches of clearance to open.
- Mirrored doors add perceived square footage to small bedrooms and double as a dressing mirror.
- Glass-front doors show off organized interiors but demand more upkeep to stay smudge-free.
- Louvered doors improve airflow, useful for closets storing shoes or damp gear.
Finish choices follow a similar trade-off between cost and character. Painted MDF delivers a clean, uniform look at a lower price point, veneer mimics solid wood grain without the cost, and solid wood trim adds durability at the edges most likely to take daily wear. Integrated lighting and well-chosen hardware finish the look regardless of material.
4. Materials, construction approach, and budgeting considerations
Most built-ins combine materials rather than relying on one throughout. Plywood carcasses hold screws and hardware better than particleboard over time, MDF faces take paint smoothly for a furniture-grade finish, and solid wood trim adds durability exactly where hands and shoulders make contact daily.
Several features drive the final price up or down:
- Soft-close drawer slides and hinges, which add cost but cut down on slamming and wear
- Wardrobe lifts for pull-down rod access to high sections
- Integrated LED strip lighting along shelves or inside drawers
- Custom trim profiles versus simple, paint-grade boxes
Modular, prebuilt closet systems sit as a middle ground. This Old House notes they’re a cost-effective compromise between basic wire shelving and a fully custom build, worth considering when the room is a standard shape with no unusual obstacles. Fully custom carpentry earns its cost when a room has an irregular footprint, a sloped ceiling, or when you want trim and finish that match existing woodwork.
5. How to plan and measure for built-in wardrobes
A short checklist before you call a carpenter or order components saves a round trip on measurements later.
- Take inventory of garments and accessories first, sorting by hanging length and folded versus hung storage, since this is what Forbes Home identifies as the step that keeps a project sized correctly instead of overbuilt.
- Measure the full opening: width, height, and depth, and note any obstacles like windows, vents, outlets, or the swing radius a door would need.
- Decide which sections need fixed shelving and which benefit from adjustable shelves, then assign zones for daily-use items versus seasonal storage.
- Sketch the layout with dimensions noted on each section, and flag where you’ll want outlets or lighting wired in before drywall or trim goes up.
Bring that sketch to a design consultation, along with any reference photos, and the conversation moves straight to what’s buildable instead of starting from a blank page.
6. Craftsman perspective: how carpenters approach built-ins
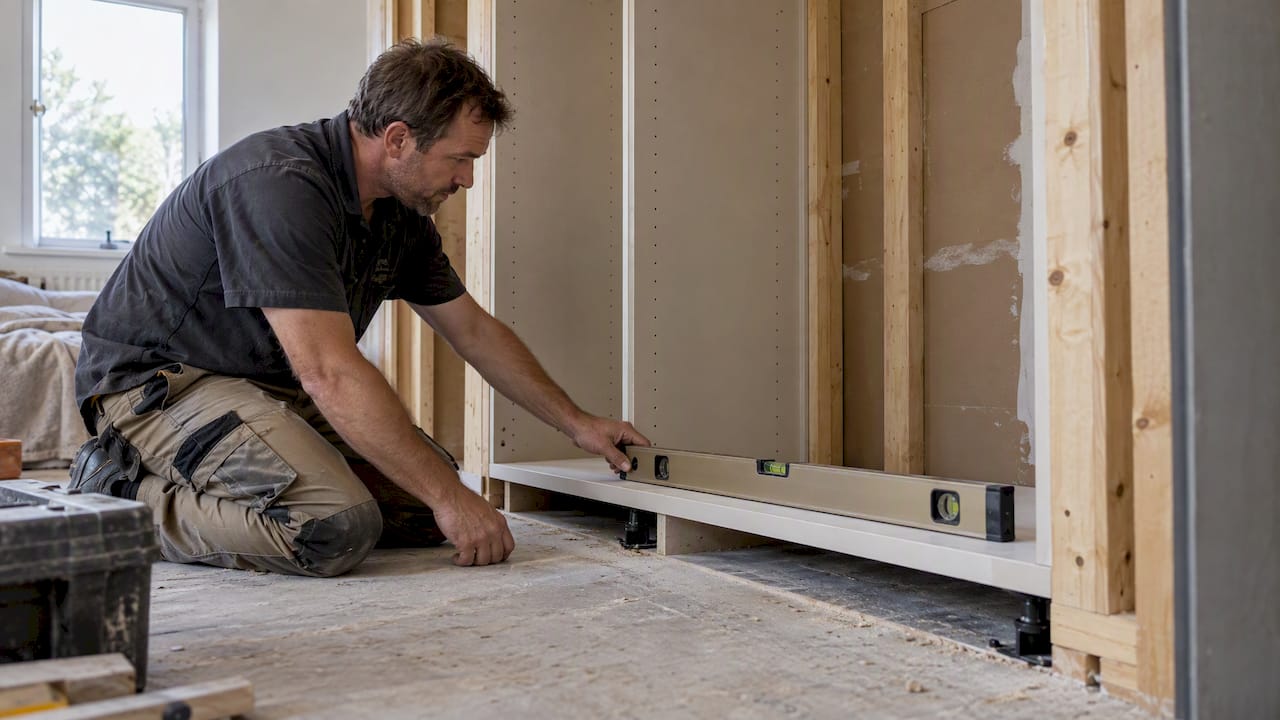
We build from the floor up: base cabinets go in first and get leveled before anything else, since This Old House notes that sequence keeps doors and trim aligned later rather than fighting an uneven platform. We anchor coat rods and heavier sections with cleats screwed into studs, not drywall anchors, because that’s what holds weight over years, not months.
For budget-conscious builds, we lean on paint-grade plywood for the boxes and reserve solid wood for trim and edges that take the most wear. When you come to a consultation, bring photos of styles you like, your own measurements if you have them, and a short list of what matters most: storage volume, a specific door style, or lighting.
7. Customization options for integrating technology
Built-in wardrobes increasingly do more than hold clothes. Charging stations built into a drawer or a dedicated cubby keep phones and watches powered overnight without cords crossing the counter. A recessed outlet inside a cabinet, paired with a small tray, handles this cleanly without any visible wiring once doors are closed.
Smart closet features are usually additions layered onto standard carpentry rather than a separate system. Motion-sensor LED lighting turns on when a door opens and off when it closes, useful for closets without a nearby light switch. Some homeowners add a small humidity sensor or dehumidifier rod in closets prone to moisture, particularly in walk-in spaces with limited airflow.
The carpentry work and the electrical work are separate trades, so plan outlet and wiring locations during the design consultation, before any boxes go in. Adding a charging drawer or a lighting circuit after the fact usually means opening up finished cabinetry, while planning it upfront costs little beyond an extra outlet box and a short conversation with your electrician.
8. Maintenance and cleaning tips specific to built-in wardrobes
Built-ins hold up well with routine care rather than heavy maintenance. Dust shelves and drawer tracks every few weeks with a dry microfiber cloth, since built-up dust is what eventually gums up soft-close slides and makes doors stick.
Wipe painted MDF and veneer surfaces with a damp, not wet, cloth, and dry them immediately. Standing water at the base of a wardrobe, especially near a baseboard, is one of the more common causes of swelling and separated seams over time.
Check hinges and drawer slides twice a year for looseness, and tighten mounting screws before they strip the surrounding wood. Mirrored or glass doors need a basic glass cleaner, applied to the cloth rather than sprayed directly onto the door, to keep moisture out of the frame edges.
9. Timeline overview from design consultation to installation completion
Most built-in wardrobe projects move through four stages: an initial design consultation, a detailed measurement and planning phase, fabrication, and installation. The consultation covers your goals, budget range, and style preferences, and it’s where a sketch like the one from your planning checklist becomes a real layout.
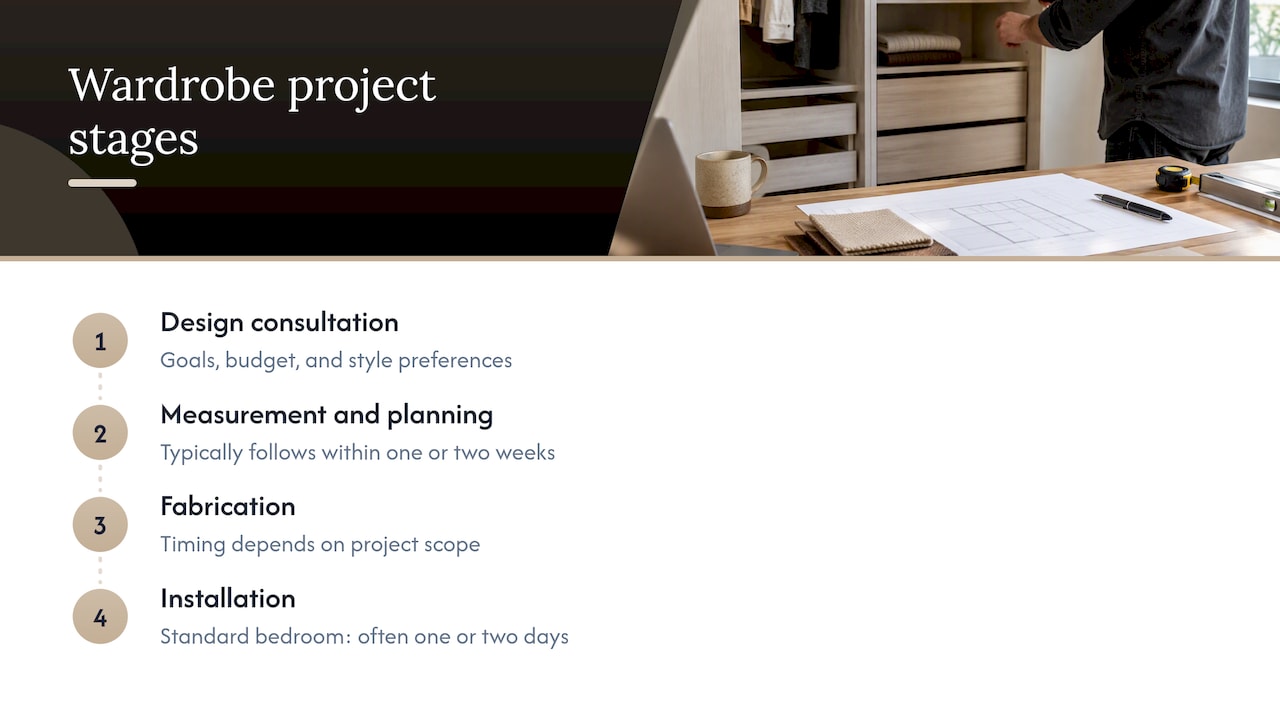
Measurement and planning typically follow within a week or two of the consultation, confirming exact dimensions and finalizing material and hardware choices. Fabrication timing depends on scope: a simple reach-in with shelving and rods moves faster than a full walk-in with an island and custom trim.
Installation itself, for a standard bedroom closet, often wraps in a day or two once materials are on-site, similar to the matched-box approach used for a typical 6-by-8-foot walk-in. Larger, fully custom projects with extensive trim work or electrical integration take longer, since each stage depends on the one before it running cleanly.
10. Publisher perspective: why built-ins deliver long-term value
Our take, after years of fitting carpentry into homes with limited space, is that a built-in earns its cost by solving a problem a dresser never fixes: wasted volume. A freestanding piece leaves air above, below, and behind it. A built wardrobe claims all of it.
We lean on personalized design consultations and creative material choices, including paint-grade plywood and pallet wood accents, to get a custom look without a custom price tag. The real value shows up years later, in a closet that still works the way it did on day one.
— Wood
How Wood Made Illinois can help with custom built-ins and consultations
We design and build custom wardrobes for Central Illinois homes, from a full design consultation through site measurement and final installation. Our Built In – Built to Order service covers reach-ins, walk-ins, and around-bed builds, sized to your room and your inventory rather than a prebuilt module.

A consultation starts with the same inventory and measurement steps covered above, so by the time we sketch a layout, it already fits your space and your budget. With over 100 years of combined carpentry experience on our team, we bring that planning discipline to every build. If you’re ready to turn a closet into usable storage, start your consultation with us.
FAQ
How much does it cost to build a built-in wardrobe?
Cost depends heavily on scope, materials, and hardware: a simple reach-in with paint-grade plywood and basic shelving costs far less than a full walk-in with soft-close drawers, a wardrobe lift, and integrated lighting. We quote project pricing individually after a design consultation and site measurement, since finishes and site conditions change the total significantly.
What’s the right rod height for a built-in closet?
Long hanging garments like coats need a rod around 66 to 72 inches from the floor, while shorter items like shirts and folded pants work well on a second rod installed at a common height suitable for shorter garments, often paired with a matching rod below for double-hang sections. Shelf depth typically runs 12 to 16 inches, with the deeper end reserved for bulkier folded items.
Should I choose a modular closet system or a fully custom build?
A modular, prebuilt system is a solid middle ground for a standard-shaped closet on a tighter budget, while a fully custom build makes more sense for irregular rooms, sloped ceilings, or when you want trim that matches existing woodwork. Companies like One Day Doors & Closets use 3D scanning for fast modular fits, which suits straightforward spaces without unusual obstacles.
How long does a built-in wardrobe installation take?
A standard bedroom closet installation often completes in a day or two once materials are on-site, though the full project, from consultation through fabrication, typically spans a few weeks. Larger walk-ins with custom trim, electrical integration, or an island take longer since each build stage depends on the previous one being finished.
Can I add a built-in wardrobe to a small bedroom?
Yes, a shallow reach-in built-in with shelving and slim drawers works well when depth is limited to around 24 inches or less, since standard hanging rods need that much clearance to hang garments freely. Sliding or pocket doors also help in tight rooms by eliminating the swing radius a hinged door would need.
Sources
For readers who want to go deeper on planning and DIY carpentry basics, the Forbes Home closet remodel guide and This Old House’s DIY closet built-ins guide cover inventory planning and hands-on construction in more detail.
- How To Remodel Your Closet? – Forbes Home
- Read This Before Redoing Your Bedroom Closet – This Old House