Built-in benches maximize an entryway because they fuse three functions into one footprint: seating, targeted storage, and a permanent architectural anchor that a freestanding piece can never quite achieve. A well-built bench gives every household member a place to sit while removing shoes, a defined spot to stash boots and bags, and a visual frame that guides the eye through the space instead of stopping it cold. The right move is simple: measure your entry first, then choose a storage type that matches how your family actually uses the front door.
Key Takeaways
Built-in benches maximize entryways by combining seating, zoned storage, and permanent architectural framing into one footprint sized to the household’s real daily habits.
| Point | Details |
|---|---|
| Match storage to routines | Choose open cubbies for daily shoes and deep drawers for seasonal gear, not decorative “fantasy” layouts. |
| Get the dimensions right | Aim for 17 to 19 inch seat height, about 15 inches of depth, and 30 to 36 inches of clearance in front. |
| Choose durable materials | Solid wood or veneered plywood with soft-close hinges and corrosion-resistant hardware holds up longest. |
| Balance the composition | Pair a low bench with a mirror or vertical lighting so small entries don’t feel flattened. |
| Hire a pro for complex builds | Woodmadeillinois scribes benches to real wall lines and zones storage around how your family actually lives. |
Table of Contents
- Why Built-In Benches Maximize Entryways Better Than Freestanding Furniture
- What Bench Types And Storage Options Should You Consider?
- How Should You Size And Place A Built-In Bench?
- Which Materials And Finishes Hold Up In A High-Traffic Entryway?
- Design Ideas That Make A Built-In Look Intentional
- Design Storage That Actually Gets Used
- When Should You Hire A Carpenter Instead Of DIYing It?
- Sources
Why Built-In Benches Maximize Entryways Better Than Freestanding Furniture
A freestanding bench takes up floor space and still needs somewhere else to put a shoe rack, hooks, and a catchall basket. A built-in does all of that in the same footprint, because it is designed around the wall, the corner, or the dead space under a staircase rather than dropped into the middle of a room. That is what makes built-ins a genuinely high-value upgrade when they are planned around circulation and daily storage needs rather than treated as an afterthought.
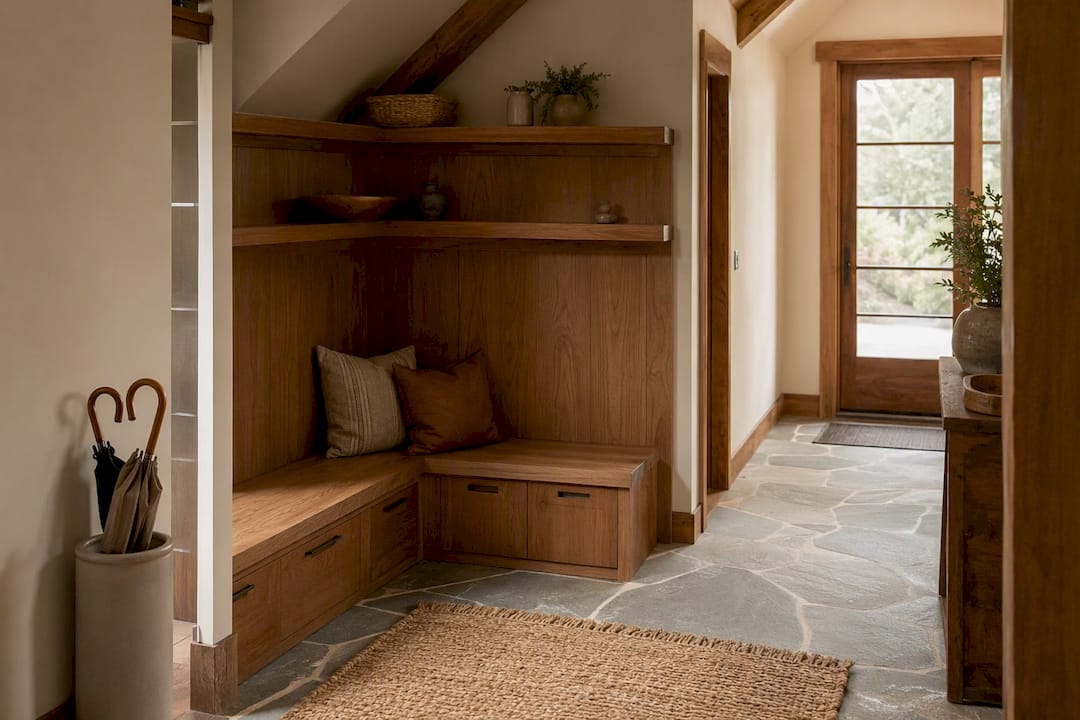
The bigger shift is behavioral. A bench positioned right at the threshold creates a landing zone, and that consistent ritual keeps shoes and bags contained at the door instead of scattered through the hallway and living room. You are not just adding a seat. You are redirecting traffic and clutter at the single point where it enters your home.
What Bench Types And Storage Options Should You Consider?
Not every entryway needs the same storage logic, and picking the wrong one is the single most common reason a beautiful built-in ends up half empty or overflowing within a month. Buying guides typically sort benches into a few base types, and each comes with a predictable trade-off between speed of access and how well it hides clutter.
- Open cubbies: fastest access, ideal for daily shoes and school bags, but visible clutter if not maintained.
- Lift-top or lidded seats: conceal everything underneath, though lifting a hinged seat every time you grab boots gets old fast in a busy household.
- Drawers and pull-outs: the middle ground: concealed but organized, good for gloves, leashes, and small gear that needs sorting rather than piling.
- Built-in shoe racks or boot trays: purpose-built for wet or muddy footwear, often paired with a slatted or perforated base for drainage.
A single adult or couple can usually get by with one lidded bench and a couple of hooks. A family of five needs a different structure entirely: zoned open cubbies so each kid has an assigned spot, plus a deep drawer for out-of-season boots. A no-shoe household leans harder on seating and a slipper cubby near the door rather than deep concealed storage. Realtor.com’s reporting on custom built-ins makes the same point from a resale angle: professionals warn against “fantasy” storage that looks great in a rendering but does not match how the household actually lives.
Pro Tip: Plan one cubby or bin per person for daily shoes before you add any decorative storage. Everything else, baskets, seasonal bins, gear drawers, comes second.
How Should You Size And Place A Built-In Bench?
Size and placement decide whether a bench gets used every day or becomes a coat-dumping obstacle. The dimensions matter more than the style, and they are not negotiable if you want the bench to actually work.
Seat height should land between 17 and 19 inches from the finished floor. That range mirrors standard chair height and keeps sitting down and standing up comfortable for most adults and older kids alike. Depth is where a lot of DIY builds go wrong: roughly 15 inches is the functional sweet spot for adult seating in a narrower entry. Go much deeper and the bench starts eating into your walking path rather than framing it. In a wider foyer, you have more room to push depth toward 18 to 20 inches, especially if the bench doubles as a landing spot for bags.
Leave at least 30 to 36 inches of clear floor in front of the bench so two people can pass without a shoulder check. That clearance matters even more near a swinging door: measure the door’s full arc before you commit to a wall, because a bench that interferes with the door swing gets used exactly zero times before someone moves it.
Placement itself often comes down to the shape of the room. Under-stair cavities, recessed wall niches, and dead corners are the classic candidates, since they convert unused space into integrated seating rather than adding to the room’s footprint. Before you sketch anything, measure the door swing, the hallway width at its narrowest point, and the distance to the nearest outlet, light switch, or thermostat that a carpenter will need to work around.
Pro Tip: Sketch your entryway from above, mark the door swing as an arc, and draw the bench footprint inside it. If the arc overlaps the bench, shift the bench or shrink its depth before you build anything.
Which Materials And Finishes Hold Up In A High-Traffic Entryway?
An entryway takes more abuse than almost any other room in the house. Wet boots, dropped umbrellas, backpacks dragged across the seat, it all adds up fast, so material choice should be driven by durability first and looks second.
- Solid wood (oak, maple, poplar) holds up best long term and takes refinishing well if it gets scratched.
- Plywood with a hardwood veneer delivers most of solid wood’s strength at a lower cost, a smart trade for larger builds.
- Painted MDF works fine on a budget for low-moisture entries, but it swells if it stays wet, so skip it in mudrooms that see snow melt.
- Marine-grade finishes or sealed exteriors are worth the upcharge in wetter climates or unheated entries.
Hardware deserves the same attention as the wood. Soft-close hinges on any lifted seat prevent slammed lids and pinched fingers. Full-extension drawer glides let you actually reach the back of a drawer instead of fishing around blind. Corrosion-resistant hooks matter more than people expect, since coat hooks near an exterior door take on moisture year-round. On finishes, a low-VOC topcoat protects wood without off-gassing in a small enclosed space, and stain-resistant upholstery on any cushioned seat saves you from replacing fabric after one muddy winter.
Design Ideas That Make A Built-In Look Intentional
A bench that looks like it was always part of the house, rather than furniture wedged into a gap, usually comes down to a repeatable formula rather than a lucky find. Design roundups keep circling back to the same simple, three-element combinations because they work in nearly any entry size.
- Bench + basket + wall feature: pair open storage with a textured wall (shiplap, a pallet-wood accent, board and batten) for a composed, layered look.
- Bench + hooks + mirror: a strong choice for narrow entries, since the mirror bounces light and visually doubles the space above the seat line.
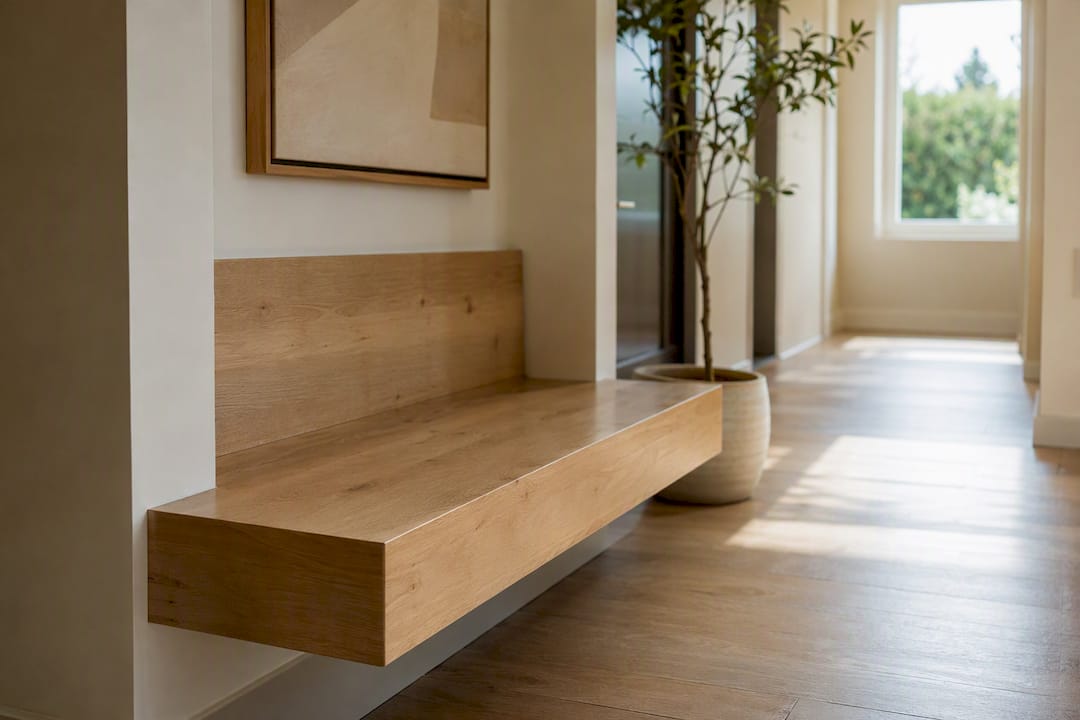
- Floating bench + runner: skip the floor-mounted base for a lighter, more modern feel, and let a runner rug define the walking path beneath it.
The horizontal line of a bench needs a vertical counterweight, or the whole wall reads flat. A mirror, a pair of sconces, or a tall vertical light fixture above the seat balances that low horizontal mass and keeps a small entry corner from feeling squeezed. For open storage, coordinated baskets with visible labels keep the look calm even when the contents are not, and dropping the upholstery to a low, simple profile (rather than a bulky cushion) keeps sightlines open in tight entries.
Design Storage That Actually Gets Used
The gap between a Pinterest-perfect bench and one your family actually uses comes down to matching storage to real routines, not aspirational ones. Open cubbies work for daily shoes precisely because they demand zero extra steps. Deep drawers work for seasonal or bulky gear precisely because they hide it. Mixing the two, rather than picking one system for everything, is what keeps a bench from turning into either a shoe pile or a black hole.
- Assign one open bin or cubby per household member for daily shoes.
- Size drawers at least 8 to 10 inches deep for boots; shallower drawers only fit slippers and sandals.
- Subdivide any bench longer than 5 feet into distinct zones rather than one long open cavity.
A single adult’s bench can be one lidded seat and a hook rail. A family of five needs zoned cubbies, at least one deep drawer, and probably a second bench section for backpacks alone. Trying to force both households into the same layout is where most DIY plans fall apart.
When Should You Hire A Carpenter Instead Of DIYing It?
Some entryway benches are weekend projects. Others are not, and knowing the difference before you start saves you a redo.
- Structural or wall changes. If the bench requires opening a wall, relocating an outlet, or tying into existing trim, bring in a professional.
- Uneven walls or tight scribing. Older homes rarely have square corners; a carpenter scribes the bench to the actual wall line so there is no gap, which a store-bought unit cannot do.
- Integrated lighting or complex drawers. Under-bench LED strips, full-extension glides, and soft-close lids all raise the skill floor considerably.
- Under-stair or custom-angle builds. These require precise templating that goes well beyond a standard rectangular bench.
A typical professional project runs through four phases: an in-home measure and design consultation, shop fabrication of the components, on-site installation, and a final finish pass. When you request estimates, ask for drawings, a materials list, hardware specs, and any site-prep allowances up front, since vague quotes are where budgets go sideways later. Willamette Carpentry’s coverage of custom bench seating backs up why the investment pays off: well-executed built-ins improve organization and add functional value that a generic storage bench from a catalog rarely matches.
A carpenter’s short take on what makes a bench last
The benches that hold up are the ones designed for how a family actually moves through the door, not the ones copied from a photo. On-site scribing to real wall lines, and storage zoned around daily habits rather than guesswork, are what separate a bench that gets used for a decade from one that gets buried under coats by spring.
How Woodmadeillinois Builds Entryway Benches That Fit Your Home
Woodmadeillinois gives you a bench sized to your exact hallway and scribed to your actual walls, not a boxed unit that leaves gaps at every corner. Our team builds custom seat heights, matched trim, and zoned storage, open cubbies where your family needs speed, drawers where you need concealment, so the layout matches your routine instead of a showroom display.

When you request an estimate, ask for a site measure, drawings showing seat height and depth, finish samples, and hardware allowances so you can compare bids apples to apples. If your project touches storage beyond the bench itself, our custom shelving work integrates cleanly with a mudroom build, and our partners at One Day Doors & Closets offer complementary insight on fitting custom joinery into tight footprints without losing circulation. Ready to see what fits your entry? Visit our trusted local carpentry experts page to start your project.
Sources
- Transform entryways and mudrooms with custom bench seating — Willamette Carpentry
- Realtor
- Entryway bench with storage: a buying guide — Curated by Hower