The triangle of space behind an attic knee wall is some of the most usable square footage in a house, and most of it sits empty. The best way to use it is to cut access into the wall, build drawers, cabinets or shelves that follow the roof slope, and insulate and air-seal everything so the new storage does not leak heat. Done well, it gives a bedroom or office the equivalent of a built-in dresser without taking an inch of floor.
This guide walks through the choices in the order you will face them: what the space can hold, how to measure it, which storage type fits, how to build drawers, how to insulate, and which safety checks come before the saw.
TL;DR
- Knee walls are commonly set between 3 and 5 feet tall, so measure height, depth and rafter spacing before you choose between drawers, doors or shelves.
- Drawers give the easiest access to everything inside. Open shelves are the simplest and least expensive. Cabinets hide clutter and hold the most.
- Insulate and air-seal the opening. Knee walls are often uninsulated and leaky, and storage doors, drawers and closets need insulation too.
- Before cutting, find out whether the wall is load-bearing and check for wires and pipes with small inspection holes.
- A carpenter can build to fit your exact roof angle, which matters more than any off-the-shelf kit.
Table of Contents
- What the space behind a knee wall can hold
- Measure before you decide anything
- Drawers, doors, cabinets or open shelves
- Building knee wall drawers and a built-in dresser
- Insulate and air-seal the storage
- Safety checks before you cut
- Planning access and budget
- Our perspective on knee wall storage
- Ready to build it with a carpenter
- FAQ
- Sources
What the space behind a knee wall can hold
A knee wall is the short vertical wall that holds up the roof rafters where the ceiling slopes down in a finished attic room. Behind it sits a wedge of space, usually unconditioned, running to the eave. Homeowners put it to work in several ways. According to the Bungalow Club’s overview of knee wall uses, the space can hold shelves or cabinets, dead storage for items that are not very temperature sensitive, a desk, pull-out shelves or closets, or even a pet kennel.
That range is useful because it tells you the first decision is not drawers versus doors. It is how you will use the space day to day:
- Daily use (clothes, kids’ toys, bedding in rotation): drawers or a built-in dresser.
- Seasonal use (holiday decorations, luggage, extra linens): small access doors into a deeper cavity.
- Display or reference (books, art, a record collection): open shelves.
- Work (a low desk or craft station): a recessed nook with shelving above.
If you want the finished look of furniture rather than a hole in a wall, our piece on built-in dresser wall designs for odd walls shows how the same thinking applies to slopes, alcoves and awkward corners.
Measure before you decide anything
Every good knee wall project starts with a tape measure and a pencil. This Old House advises measuring the available height and depth and checking for rafters before you plan the build. We would add a few measurements that save trouble later:
- Wall height. As noted, knee walls usually fall between 36 and 60 inches. A 36-inch wall behind a bed gives you a dresser-height opening. A 60-inch wall can take hanging space.
- Depth to the eave. Measure from the back of the wall surface to the point where the roof deck meets the floor. This is your maximum drawer or shelf depth at floor level.
- Stud and rafter spacing. Openings that land between framing members are far simpler than ones that require cutting a stud.
- Floor condition. Note whether the floor behind the wall is finished subfloor, loose boards or exposed joists.
- Clear path for the pull. A drawer needs room in front of it to open. Check the furniture layout in the room, not just the wall.
The slope matters most for shelving. D and G Flooring recommends horizontal shelves that follow the slope, with the tallest shelf against the knee wall where headroom is greatest and progressively shorter shelves extending toward the eave. That approach uses the awkward space instead of fighting it.
Drawers, doors, cabinets or open shelves
Each format trades convenience, capacity and cost differently.
| Option | Best for | Strength | Watch for |
|---|---|---|---|
| Drawers | Daily clothing, toys, linens | Everything is visible and reachable | Weight rating of the slides |
| Access doors | Seasonal and bulky items | Deep cavity, simple to build | Reaching to the back |
| Cabinets | Mixed storage, concealed clutter | Dust protection, large capacity | Door swing in a tight room |
| Open shelves | Books, display, baskets | Lowest cost, bright and airy | Dust, visual clutter |
The Bungalow Club notes that open shelves are relatively inexpensive and common, while built-in drawers or cabinets also appear often but cost more because of added design and materials.
Why drawers earn their keep
Martha Stewart’s comparison of drawers and cabinets points out that drawers let you see and reach all contents without digging, and that without a vertical divider they use every inch of space. The same source quotes a Block Renovation design manager cautioning that drawers may not support as much weight as cabinets, so you should check the carrying limits of the slides. In an attic, where people tend to load drawers with sweaters and books, that is worth taking seriously. Specify full-extension slides rated well above the load you expect.
Where open shelves and cabinets win
Furnfull’s comparison of cabinets and open shelving finds open shelves win on daily access, light and looks, while cabinets win on dust protection, clutter concealment and how much fits. Its depth guidance is practical for knee walls too: shelves 8 to 10 inches deep cover most books, bowls and baskets, and 12 inches clears a dinner plate. Go deeper and items drift to the back and disappear.
Our view: use a mix. Put drawers where you reach every day, open shelving at the tall end of the wall, and small insulated doors for the deep corners where seasonal boxes live. Multiple smaller access doors beat one big one because you can reach every part of the cavity without crawling in. For a similar approach in a child’s bedroom, see our notes on kids room built-ins, and for another way to hide drawers in dead space, toe kick drawers.
Building knee wall drawers and a built-in dresser
There are two sound routes: fit a dresser into the wall, or build carcases to fit the framing.
Route one: a dresser set into the wall
This Old House describes this method in four moves: trim a dresser to fit, cut out the wallboard, screw support braces behind the knee wall, then set the chest on the sill and slide it into the opening. If the dresser is too deep, the guide has you slice off its upper rear corner so it clears the roof rafters as it slides in. It is a clever way to get drawers fast, and the finished front looks like furniture sitting in an alcove.
Route two: carcases between the studs
Fine Homebuilding’s case study on a workaround approach to kneewall built-ins describes cabinets built to fit between stud bays. That avoids altering existing framing while reclaiming the attic triangle as bookcases with a bottom drawer anchored in each bay. The practical lesson: when framing is complicated, or you want to avoid engineering changes, building the boxes in a shop and fitting them into the existing bays can be the cleaner path.
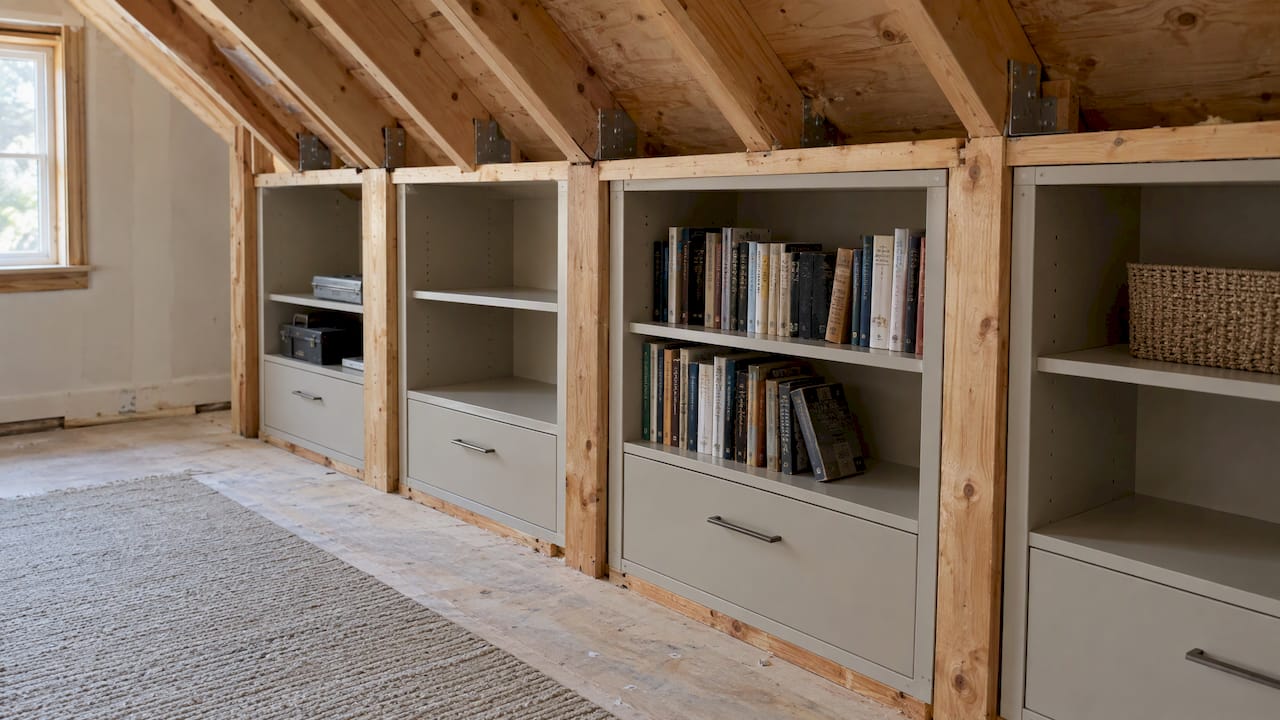
It is also the route where a carpenter earns the fee. Roof slopes are rarely perfectly square, rafters wander, and old houses settle. Scribing a face frame to a wavy plaster wall or an out-of-plumb stud takes experience, and it is what separates a built-in that looks original from one that looks bolted on. Our guide on fitting built-in wardrobe storage into 24 inches covers the same discipline of designing around a tight envelope.
Insulate and air-seal the storage
This is the step most homeowners skip, and it is the one that decides whether the finished room is comfortable. The Pacific Northwest National Laboratory’s building science brief on attic kneewalls says knee walls are often uninsulated and leaky. It recommends filling wall cavities with batt, blown fiberglass or cellulose, or spray foam, at an R-value that meets or exceeds the exterior wall requirement for your climate zone. Doors should be insulated and air-sealed, closets or drawers insulated, and open joist cavities beneath knee walls sealed.
What this means for storage:
- Your access doors need weatherstripping and rigid insulation, not a bare plywood panel.
- A drawer box set into the wall needs insulation around its back and sides so it is not a hole in the thermal boundary.
- Block the base of the wall and seal the joist bays beneath it.
The U.S. Department of Energy’s spray foam job aid states the goal as knee walls framed to prevent thermal bypass and sealed to prevent air leakage between conditioned and unconditioned space. It calls for air-sealing all joints, cracks and penetrations, including the connection between interior surfaces and framing, and for durable backing in large gaps before foam goes on. Efficiency Vermont’s quality standards manual adds that when a knee wall is part of the thermal envelope, its insulation should be enclosed on all six sides and touch a durable interior air barrier.
Some programs set explicit numbers. Oregon’s weatherization standards, for example, require a minimum of R-21 for knee walls adjoining attics and rigid material to seal air leaks, with blocks at the base of the wall. That is one state’s program, not an Illinois rule, so confirm the requirement for your home with your local building department.
If you choose spray foam, the DOE aid says it should be separated from living space by a thermal barrier such as 1/2-inch drywall, and that attics used for storage or occupancy need that thermal barrier rather than just an ignition barrier. Spray foam is also a job for a trained installer, not a weekend project.
Safety checks before you cut
Treat the wall like a patient before surgery.
- Is it load-bearing? This Old House says to determine whether the knee wall is load-bearing and to consult a licensed contractor or structural engineer if you are unsure. Many knee walls simply brace rafters, but some carry real load, and in a historic home you cannot assume.
- What is inside? Find the studs, drill small inspection holes and look with a flashlight for wires or pipes. If anything has to move, call an electrician or plumber.
- What is the material? Older plaster, insulation or textured finishes in pre-1980 homes may contain hazardous materials. If you suspect asbestos, read up on asbestos testing and removal basics and have a sample tested before you disturb anything.
- Is the attic ventilated? Efficiency Vermont’s manual notes that proper attic ventilation is essential for durability and moisture control, and that ventilation must be installed where local code requires it during retrofits. Never let new insulation block soffit airflow.
- Permits. Ask your local building department whether a permit applies before you start. Peoria-area projects that touch framing, wiring or insulation commonly involve inspection.
Planning access and budget
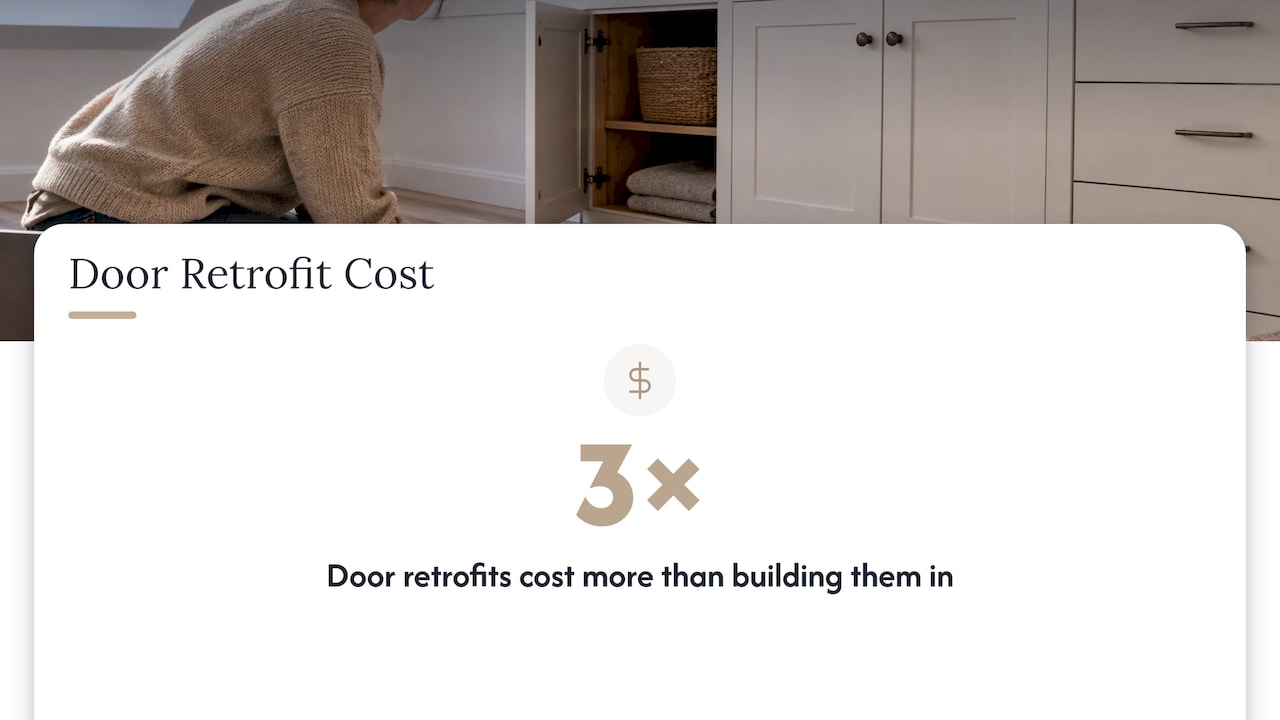
Plan access before you close up the wall. Builds and Buys, a cost-guide site, advises that retrofitting doors costs about three times more than building them in, and recommends several access doors rather than one large door. That matches our field experience: it is far cheaper to frame a door opening while the wall is open than to cut one into finished drywall and insulation later.
Budget drivers are consistent from house to house: the number of drawers (slides and boxes add up), the species and finish of the fronts, whether doors are insulated, how much wall is rebuilt, and whether electrical or HVAC changes are involved. Because every roof is different, we price knee wall built-ins per project after seeing the space rather than quoting a flat figure.
Our perspective on knee wall storage
Most attic storage fails for the same reason: it was designed as an afterthought. A pile of boxes pushed behind a little door is not storage, it is a place where things go to be forgotten.
We think about a knee wall the way we think about any built-in. Start with how the family lives, then shape the wood to the room. Drawers where you reach daily, shelves where you want to see things, and insulated doors where the deep seasonal items go. The slope of the roof becomes the design, not the obstacle.
Our team brings more than 100 years of combined carpentry experience to this kind of fitting work, and we use design consultations to settle height, depth and layout before any wall is opened. That planning is what keeps a small renovation quick and within budget.
Wood
Ready to build it with a carpenter
If you would rather have knee wall drawers or cabinets measured, built and fitted to your roof line, that is what we do for homes and small businesses across Central Illinois. Our custom built-in carpentry covers built-in storage, home office installations and creative renovations, starting with a design consultation. The project is billed per project, and we do not publish a price for built-ins because each opening is different.

Bring photos and rough measurements of your attic wall and we will talk through the options. You can also see related work in our custom shelving projects.
FAQ
How tall should an attic knee wall be for storage?
Knee walls are usually set between 3 and 5 feet, per Toolwick’s planning guidance. The right height depends on your roof pitch and span. Taller walls mean more headroom in the room and a larger access opening behind them.
Can I put drawers in an existing knee wall?
Yes. One approach is to trim a dresser to fit, cut the wallboard and set the chest into the opening on braces, as This Old House explains. Another is to build cabinets that fit between the stud bays. Either way, confirm the wall is not load-bearing first.
Do I need to insulate knee wall storage?
Yes. Knee walls are often uninsulated and leaky, and the PNNL guidance calls for insulated, air-sealed doors and insulated drawers or closets. Seal the open joist cavities beneath the wall as well.
What can I safely store behind a knee wall?
Items that are not very sensitive to temperature, such as linens, luggage and decorations, according to the Bungalow Club. Keep documents, electronics and anything fragile in the conditioned part of the house.
Sources
- Creative Solutions: Uses for Knee Wall Spaces
- How to Install Knee-Wall Storage, This Old House
- Attic Storage Ideas DIY, D and G Flooring
- Knee Wall Stud Height and Attic Storage Calculator, Toolwick
- Knee Wall Construction Cost Guide, Builds and Buys
- Kitchen Drawers vs. Cabinets, Martha Stewart
- Storage Cabinet vs Open Shelving, Furnfull
- A Workaround Approach to Kneewall Built-Ins, Fine Homebuilding
- Insulating Attic Kneewalls, PNNL
- Insulate an Attic or Knee Wall With Two-Part Spray Foam, ENERGY.GOV
- Low Income Weatherization Assistance Program, Oregon
- Quality Standards Manual, Efficiency Vermont
- Asbestos in Popcorn Ceilings: Test, Paint or Remove