Here are 8 high-impact accent wood wall ideas homeowners can put to work immediately, whether you’re planning a weekend DIY project or calling in a professional carpenter.
-
Vertical slat wall — Best for living rooms and home offices; frames a TV or desk backdrop cleanly. DIY with pine furring strips in one day; pre-made slat panels run $300–$600 for a standard 10’×8’ wall.
-
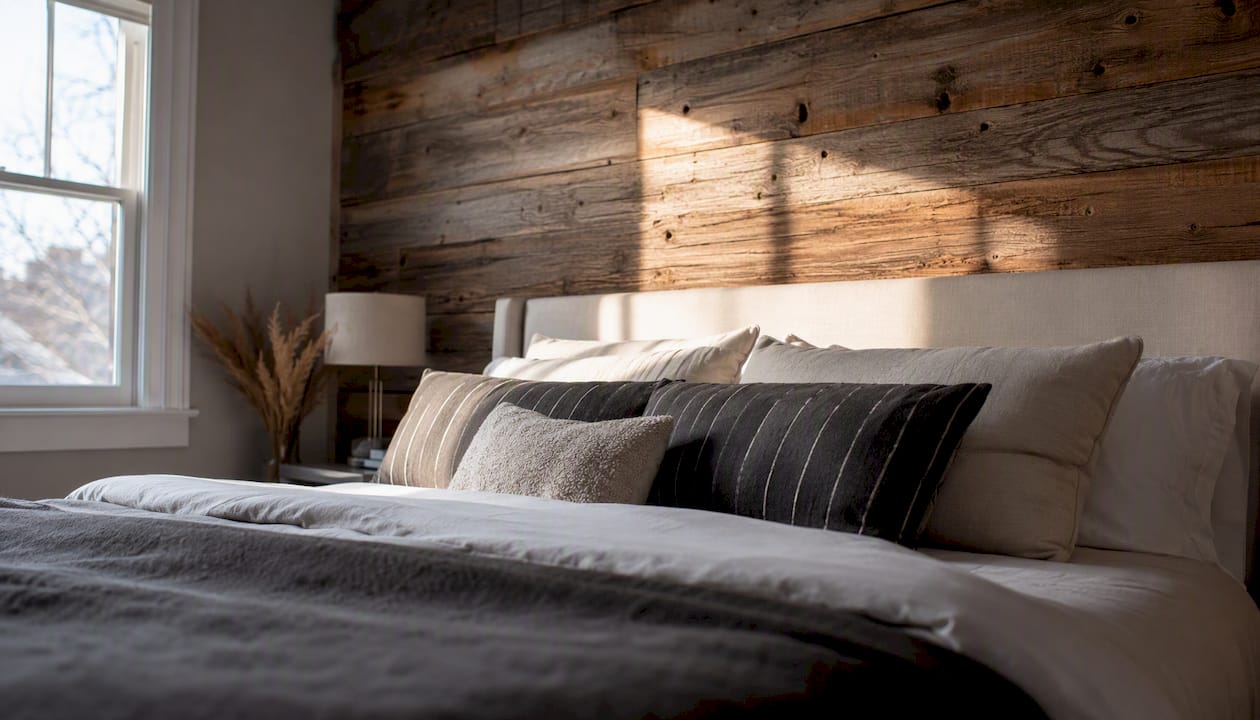
Reclaimed plank wall — Best for bedrooms and dining rooms seeking warmth and patina. Requires extra prep (nail removal, pest inspection); typically a pro install for structural flatness.
-
Shiplap — Best for farmhouse, coastal, or transitional living rooms. DIY-friendly; horizontal boards install quickly over drywall.
-
Herringbone/chevron — Best as a fireplace surround or dining room focal point. Moderate DIY skill required; cutting angles adds time.
-
Board and batten — Best for entryways and hallways; adds architectural weight to plain walls. One of the most forgiving DIY installs.
-
Live-edge slab feature — Best as a single dramatic statement in a living room or master bedroom. Almost always a pro install due to weight and substrate requirements.
-
Floating slat TV wall — Best for modern living rooms; slats run floor-to-ceiling behind the screen. The Spruce notes that pairing wood with art or furniture amplifies the statement.
-
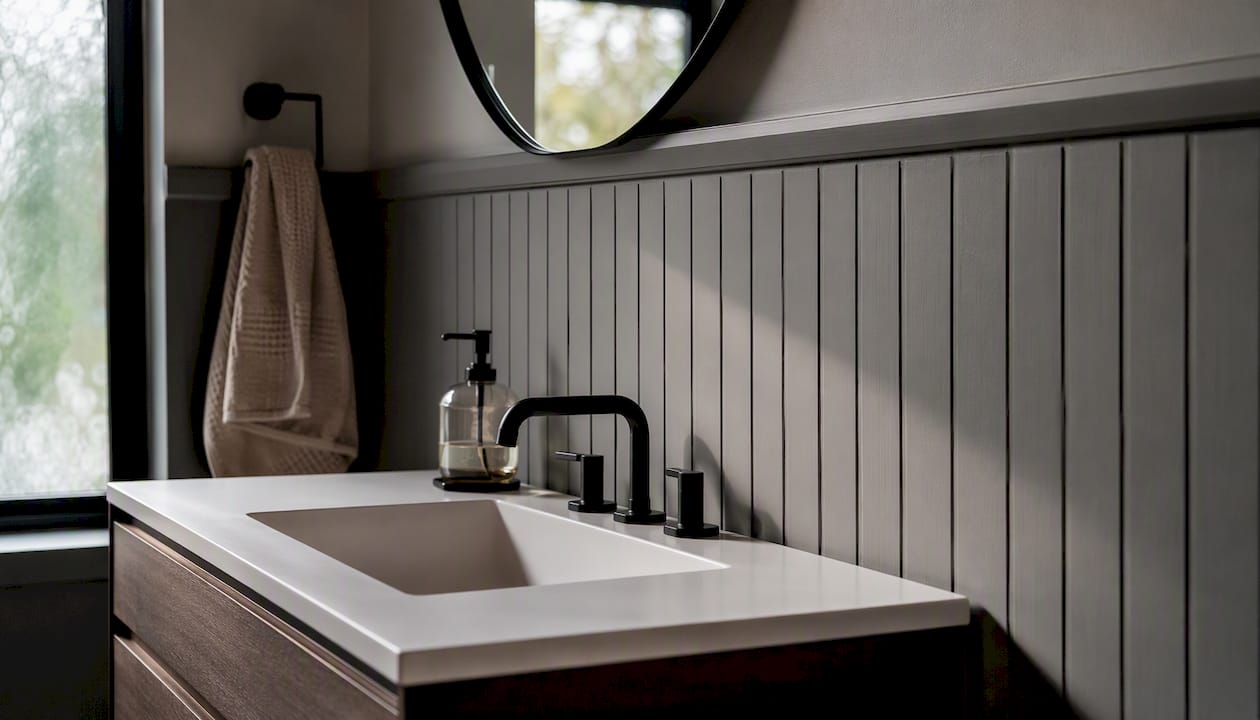
Partial wainscoting/beadboard — Best for bathrooms, kitchens, and dining rooms; a half-wall treatment that adds texture without overwhelming a small space.
Woodmadeillinois installs all eight of these styles across Central Illinois, from quick pallet wood builds to fully custom live-edge feature walls.
Key Takeaways
The most durable, visually effective wood accent wall comes from matching species and finish to the room’s moisture level, lighting, and existing tones — not from choosing the most popular style.
| Point | Details |
|---|---|
| Match species to the room | Use Ipe or teak in wet areas; white oak or walnut in living rooms and bedrooms; pine for budget DIY builds. |
| Seal before installation | Apply finish before mounting and recoat every 3–7 years; inspect annually in kitchens and bathrooms. |
| Contrast with the floor | Choose a wall tone slightly lighter or darker than existing floors to avoid a flat, monolithic look. |
| Use orientation intentionally | Vertical slats raise perceived ceiling height; horizontal treatments widen a room — match direction to the room’s proportions. |
| Woodmadeillinois for pro builds | Custom accent wall installations across Central Illinois, from pallet wood to live-edge, with design consultation included. |
Pro Tip: Before ordering lumber, cut a single sample slat, apply your chosen finish, and pin it to the wall for 48 hours. Check it in morning light, afternoon light, and with lamps on — the same board can look like three different colors across a day.
Table of Contents
- What are the main wood accent wall styles, and which fits your home?
- Room-by-room wood accent wall ideas and what to consider in each space
- Which wood species and finishes hold up best in each room?
- How orientation, scale, and spacing change the way a room feels
- How to seal, clean, and maintain a wood accent wall over time
- A carpenter’s perspective on choosing the right wood accent wall
- Woodmadeillinois builds accent walls in Central Illinois — here’s how it works
- Sources
What are the main wood accent wall styles, and which fits your home?
Wood feature walls fall into a handful of distinct visual families. Knowing what separates them saves you from choosing a style that fights your existing trim, flooring, or furniture.
Shiplap
Horizontal boards with a small reveal gap between each course. The visual effect is clean, linear, and slightly casual — a natural fit for farmhouse, coastal, and transitional interiors. Shiplap reads well at both full-height and half-wall (wainscoting) scale. It’s one of the most DIY-accessible styles: boards go up fast, and minor wall imperfections hide behind the overlapping profile. The main limitation is directionality — horizontal lines widen a room but can lower a ceiling visually if the room is already short.
Vertical and horizontal slat walls
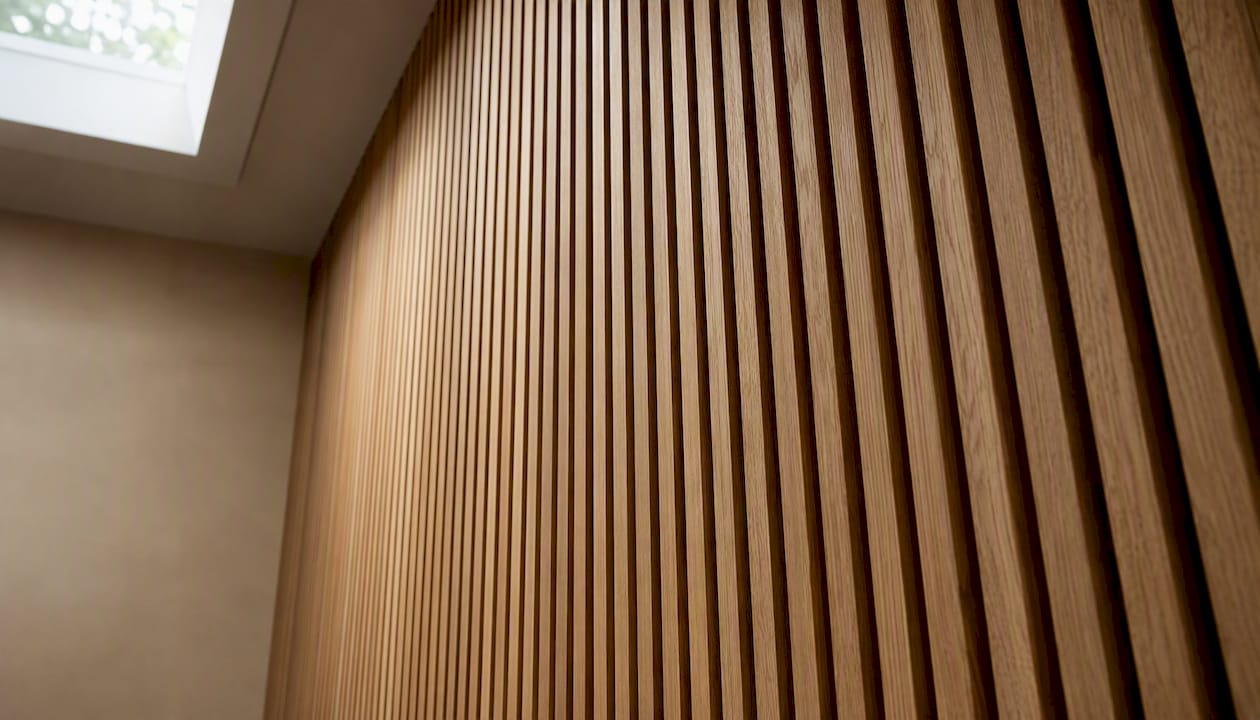
Slats are narrow strips of wood (or MDF) mounted with deliberate gaps between them. The gap-to-slat ratio defines the whole look: a 2" slat paired with a 1" gap is a widely used proportion that preserves rhythm without looking like a sauna. Vertical slats draw the eye upward and are the go-to for TV feature walls; horizontal slats read more like a modern take on shiplap. Both orientations work in living rooms, bedrooms, and home offices.
Pros/cons at a glance:
| Style | Visual weight | Cost range (materials) | DIY-friendly? | Maintenance |
|---|---|---|---|---|
| Shiplap | Medium | $1–$3/sq ft | Yes | Low |
| Vertical slats | Light–medium | $2–$5/sq ft | Yes (pine) | Moderate (dusting) |
| Reclaimed planks | Heavy | $5–$15/sq ft | Moderate | Moderate–high |
| Herringbone/chevron | High | $4–$10/sq ft | Moderate | Low–moderate |
| Board and batten | Medium | $1–$4/sq ft | Yes | Low |
| Beadboard | Light | $1–$3/sq ft | Yes | Low |
| Live-edge paneling | Very high | $15/sq ft | No | Moderate |
Reclaimed plank walls
Reclaimed wood brings something no new lumber can replicate: genuine age, varied grain, and a surface that tells a story. The tradeoff is preparation time. Every board needs nail removal, a pest and moisture inspection, and often some flattening before it goes on a wall. The Spruce recommends sealing reclaimed wood thoroughly before interior use to prevent long-term moisture and pest issues. For bedrooms and dining rooms, the payoff in character is worth the effort.
Herringbone and chevron
Both patterns use angled cuts to create a V-shaped or zigzag motif. Herringbone staggers the joints; chevron meets them at a point. Either works beautifully as a fireplace surround, a dining room focal wall, or a bathroom vanity backdrop. The cutting precision required puts this in the moderate-to-advanced DIY category.
Board and batten
Flat panels (the “board”) with vertical strips (the “batten”) covering the seams. The result is a structured, architectural look that suits entryways, hallways, and formal dining rooms. It’s forgiving to install and pairs naturally with painted finishes rather than natural wood tones.
Beadboard
Narrow vertical grooves pressed or routed into panels. Traditionally associated with cottage and Victorian interiors, beadboard has found a second life in modern kitchens and bathrooms as a half-wall treatment. It accepts paint readily and tolerates moderate humidity better than most solid-wood options.
Live-edge paneling
A single live-edge slab or a series of book-matched panels mounted as a feature wall. The organic, uncut edge of the wood becomes the design element. This is the highest-cost, highest-impact option on the list — and the one most likely to require professional installation due to weight, substrate preparation, and the precision needed to make irregular edges look intentional.
Quick styling pairings by style:
- Shiplap: white or soft gray paint, black iron hardware, linen upholstery
- Vertical slats: matte black or charcoal wall behind, walnut or white oak finish, floating console
- Reclaimed planks: warm amber lighting, leather or worn-canvas furniture, exposed metal accents
- Herringbone: marble or stone surrounds, brass fixtures, neutral linen
- Board and batten: crisp white paint, wainscoting cap rail, classic millwork trim
- Live-edge: minimal furniture, concrete or stone floors, single large pendant light
Room-by-room wood accent wall ideas and what to consider in each space
Living room
A vertical slat wall behind the TV is the most requested living room feature wall right now. Run the slats floor-to-ceiling, paint the wall behind them a dark charcoal or near-black so the gaps read as shadow rather than unfinished drywall, and mount the TV flush to the surface. Painting the backing darker and adding a floating console helps the screen blend into the composition rather than dominate it. Avoid clustering art on a textured slat wall — one large piece or a minimal shelf arrangement works far better.
For a living room wood accent wall, budget DIY with pine furring strips runs roughly $150–$200 for a 10’×8’ wall; first-time install takes about one full day including prep and staining.
Do/don’t for living rooms:
- Do plan TV mount blocking into the substrate before slats go up.
- Do run slats to the floor or finish with baseboard to avoid an unfinished look.
- Don’t use reclaimed wood directly behind a TV without sealing — off-gassing from old finishes can be an issue in enclosed spaces.
Bedroom
Reclaimed planks or a simple slat headboard wall are the two strongest bedroom choices. The headboard wall treatment — slats or planks running from floor to ceiling behind the bed — replaces a traditional headboard entirely and gives the room a hotel-suite quality. Pair with warm-toned stain and minimalist bedroom decor to keep the look restful rather than busy.
Pro Tip: In a bedroom with low natural light, choose a lighter stain (natural oak, honey pine) rather than a dark walnut. Dark solid panels in a dim room can make the space feel noticeably smaller.
Kitchen
Wood in a kitchen needs to be moisture-tolerant and sealed properly. Beadboard or shiplap as a backsplash behind open shelving works well when sealed with a water-based polyurethane. Avoid raw or lightly finished wood directly behind a cooktop — grease and steam will degrade the finish quickly. Wood countertops paired with a matching wood accent wall create a cohesive, warm kitchen aesthetic when the tones are coordinated but not identical.
Bathroom
For bathrooms, species selection matters more than style. Architectural Digest recommends Ipe and teak for wet areas because of their natural moisture resistance. Engineered wood panels with a sealed surface are a more budget-friendly alternative. A half-wall beadboard treatment behind a vanity is the lowest-risk bathroom application — it stays above the splash zone and adds texture without requiring a moisture-rated species. See Woodmadeillinois’s bathroom woodwork guide for material and finish specifics.
Entryway and hallway
Board and batten is the natural choice here. It adds architectural weight to a narrow, often plain entry without consuming visual space. A half-wall treatment (36"–42" high) with a painted cap rail reads as formal wainscoting; full-height battens feel more contemporary. Either version installs quickly and holds up well to the scuffs and humidity fluctuations that entryways see.
Home office
Acoustic slat panels — wood slats mounted over a felt or acoustic foam backer — serve double duty in a home office: they look sharp on a video call background and reduce echo. Floating slat systems in walnut or white oak are a popular choice. Keep the wall behind the slats a neutral dark tone so the wood reads cleanly on camera.
Dining room and stair/closet niches
A herringbone or chevron feature wall behind a dining table creates a strong focal point without requiring the entire room to commit to the pattern. For stair walls and closet niches, reclaimed planks or simple shiplap fill awkward angles and irregular surfaces better than any other style — the natural variation in reclaimed wood actually makes imperfect geometry look intentional.
Which wood species and finishes hold up best in each room?
Species by room and budget
Species choice is the decision that most homeowners underestimate. The wrong wood in the wrong room doesn’t just look off — it fails structurally over time.
- Bathrooms and wet areas: Ipe and teak. Both are naturally dense and moisture-resistant, which is why design pros reach for them in spa-like wet spaces.
- Living rooms and bedrooms: White oak, walnut, and maple. All three are durable, finish-flexible, and widely available through U.S. lumber yards. White oak in particular has become the dominant choice for modern and transitional interiors.
- Budget-conscious installs: Pine and birch. Both accept stains well and cost a fraction of hardwood. Pine furring strips are the backbone of most DIY slat walls.
- Veneer and engineered panels: A practical middle ground — real wood face on a stable substrate. They resist warping better than solid wood in rooms with seasonal humidity swings, and they’re lighter to handle.
Solid vs. engineered vs. reclaimed
Solid wood has the most character and the longest lifespan when properly maintained, but it moves with humidity. Engineered panels offer dimensional stability at a lower price point, which makes them a strong choice for large walls or rooms with HVAC fluctuations. Reclaimed wood brings irreplaceable patina but demands the most prep: nail removal, pest and moisture inspection, flattening, and sealing before any board touches a wall.
Finishes: stains, paint, sealers, and specialty treatments
Clear water-based polyurethane is the most forgiving finish for DIYers — it dries fast, cleans up with water, and holds up well in living areas. Oil finishes (like Rubio Monocoat or Osmo Hardwax-Oil) penetrate the wood rather than sitting on top, giving a more natural look but requiring reapplication every few years. Ebonizing — treating wood with a vinegar-and-steel-wool solution — creates a dramatic near-black finish on oak and is a low-cost way to achieve a high-end look. Painted finishes on board-and-batten or beadboard are the easiest to touch up over time.
Rough cost and timeline guide:
Installation tips:
- Always attach slats and planks to a plywood backer or locate studs — drywall alone won’t hold long-term.
- Paint the wall behind slats first in a dark or matching tone so gaps read as intentional shadow, not bare drywall.
- Measure from the center of the wall outward for symmetry; partial slats at both edges look far better than a full slat on one side and a sliver on the other.
- Plan electrical outlet and TV mount locations before the first slat goes up — retrofitting is expensive.
- Add a 10–15% waste factor to your material order for cuts, rejects, and future repairs.
Pro Tip: Before staining or sealing, test your chosen finish on a scrap piece of the same species and let it cure for 24 hours. Wood stain looks dramatically different wet versus dry, and the color shift varies by species.
For budget-friendly pallet wood builds, Woodmadeillinois’s pallet wood wall service covers sourcing, prep, and installation in Central Illinois.
How orientation, scale, and spacing change the way a room feels
The direction and proportion of wood on a wall are not decorative details — they’re optical tools. Used deliberately, they can make a ceiling feel taller, a narrow room feel wider, or a large open space feel more grounded.
The core rule: vertical lines draw the eye upward; horizontal lines draw it sideways. A room with 8-foot ceilings benefits from vertical slats or tall board-and-batten. A wide, low-ceilinged room can use horizontal shiplap to lean into its proportions rather than fight them.
Slat proportions that work:
- 1.5"–2.5" slat width with gaps roughly half the slat width is the most reliable ratio for a balanced, rhythmic look.
- Narrower slats (under 1.5") with tight gaps start to read as a solid surface and lose the layered shadow effect.
- Wider slats (over 3") with proportionally larger gaps can work in high-ceiling rooms but feel heavy in standard 8-foot spaces.
Full-height vs. half-height:
- Full-height treatments (floor to ceiling) maximize the vertical pull and work best for TV walls, bedroom headboard walls, and home office backdrops.
- Half-height treatments (36"–48") read as wainscoting and suit formal rooms, entryways, and bathrooms where a full wall of wood would feel oppressive.
Dark vs. light tones in low-light rooms:
In north-facing or low-light rooms, dark solid panels absorb what little light is available and can make the space feel noticeably smaller. Lighter wood tones or spaced slat systems preserve an airy feel by letting wall color show through the gaps. This is one of the most common mistakes in wood wall planning — choosing a finish based on a well-lit showroom sample, then installing it in a dim room.
Quick layout rules:
- Vertical slats for TV walls, home offices, and rooms under 9-foot ceilings.
- Horizontal treatments for wide rooms or to add a casual, relaxed feel.
- Use a single accent wall rather than all four walls to avoid a cabin-like enclosure effect.
- In small rooms, limit wood to one wall and keep the finish lighter than the floor.
- Pair wood walls with warm ambiance lighting — directional sconces or recessed lights angled at the wall surface bring out grain texture and depth.
Pro Tip: Tape off the wall with painter’s tape at your planned slat and gap widths before buying any lumber. Live with the proportions for a day in different lighting conditions — morning, afternoon, and evening — before committing.
How to seal, clean, and maintain a wood accent wall over time
Seal before the wall sees any traffic or humidity — that’s the single most important maintenance decision you’ll make. A properly sealed surface resists moisture, dust adhesion, and UV fading for years; an unsealed one starts degrading within months in any room with normal humidity fluctuation.
Sealing and recoating schedule:
- Inspect the finish annually, looking for dull patches, micro-cracks, or areas where water no longer beads.
- Water-based polyurethane typically needs a light recoat every 5–7 years in living areas; oil finishes every 2–4 years depending on traffic and humidity.
- Bathrooms and kitchens warrant inspection every year and recoating on the shorter end of those ranges.
Cleaning sealed vs. painted wood:
- Sealed natural wood: dust with a microfiber cloth; wipe with a barely damp cloth for smudges; avoid all-purpose spray cleaners with ammonia or bleach.
- Painted board-and-batten or beadboard: a lightly damp sponge handles most marks; touch up paint chips with the original color kept in a labeled jar.
- Slatted walls accumulate dust in the gaps. A soft brush attachment on a vacuum handles this faster than any cloth — run it along the slats every few weeks.
Moisture and ventilation precautions:
- In bathrooms, run the exhaust fan during and for 15 minutes after every shower.
- Never install raw or lightly finished wood directly behind a sink or in a steam shower without a moisture-rated species and a full-coverage sealer.
- In kitchens, keep wood walls away from direct steam paths; a range hood that vents outside (not recirculating) dramatically extends finish life near a cooktop.
Pro Tip: Keep a small amount of your original stain or finish in a labeled container. Spot repairs on a sealed wall are nearly invisible when the finish matches exactly — but nearly impossible to blend when you’re guessing at the original color.
Do/don’t maintenance checklist:
- Do dust slatted walls monthly with a vacuum brush attachment.
- Do reapply finish at the first sign of dullness rather than waiting for visible damage.
- Don’t use steam cleaners on any wood wall surface.
- Don’t ignore a small water stain — it signals a sealing failure that will spread.
- Do keep interior humidity between 35–55% to minimize wood movement and finish cracking.
A carpenter’s perspective on choosing the right wood accent wall
Every wood accent wall project starts with the same three questions: What does the light do in this room? What does the floor already say? And what do you want the wall to do for the space — add warmth, create focus, or define a zone?
At Woodmadeillinois, a site visit before any material is ordered is standard practice. Lighting review matters more than most homeowners expect — a finish that looks rich and warm in a south-facing room can read flat and dark in a north-facing one. Matching the wall tone too closely to existing floors is a common misstep; Architectural Digest’s guidance to choose a slightly lighter or darker tone for contrast is advice the team applies on every project. Typical lead time from consultation to installation for a standard slat or pallet wood wall is one to two weeks; live-edge and reclaimed installations with custom prep run two to four weeks. The goal is always a wall that looks like it belongs — not like it was added.
Woodmadeillinois builds accent walls in Central Illinois — here’s how it works
Some projects are genuinely great DIY candidates: a shiplap wall in a bedroom, a simple board-and-batten entryway, or a peel-and-stick panel in a rental. Others benefit significantly from professional hands — structural substrate work, electrical accommodation for TV mounts, live-edge installations, integrated shelving, and any moisture-rated kitchen or bathroom build where the wrong material choice costs far more to fix than to get right the first time.

Woodmadeillinois offers custom accent wall installations across Central Illinois, including pallet wood walls, vertical slat systems, reclaimed plank builds, board-and-batten, and live-edge feature walls with integrated shelving. The team brings over 100 years of combined carpentry experience to every project, with personalized design consultations that cover material selection, finish matching, and TV or outlet planning before a single board is cut. Estimates are provided after a site visit; most standard accent wall projects carry a one-to-two-week lead time from signed agreement to completed installation. To get started, book a consultation or browse completed accent wall projects for ideas.
Sources
- Wood Slat Wall Ideas for Living Rooms That Actually Work » EasyCozyHome
- Wood Accent-Wall Ideas for a Budget-Friendly Makeover | Architectural Digest
- 50 Wood Accent Wall Ideas That Aren’t Dated – The Spruce
- From Ordinary to Extraordinary: Your Complete DIY Guide to Creating a Magazine-Worthy Wooden Accent Wall in Your Living Room – DIY-DREAMS
- DIY Living Room Accent Wall with Wood Slats