A finished built-in bench should sit 17 to 19 inches high, run 16 to 20 inches deep for mudroom use, and open through a hinged lid, front doors, or drawers, depending on how you access what’s inside. Before you cut a single board, gather your tools, confirm your stud locations, and build a scrap mockup. Then follow one sequence: frame the box, anchor it to the wall, install the seat top, add hardware, and finish.
- Tools: circular or table saw, drill/driver, pocket-screw jig, stud finder, level, clamps
- Materials: 2×4 framing lumber, 3/4" plywood, hinges or slides, wood screws, wall anchors
- Prep: full-size cardboard or scrap mockup before cutting finish stock
- Confirm seat height (17–19") and seat depth against your space
According to The Spruce, a typical mudroom bench height is close to standard dining-chair proportions, which is why it feels instantly familiar to sit on.
Key Takeaways
A built-in storage bench succeeds when seat height, depth, anchoring, and hardware are all planned and mocked up before any finish material gets cut.
| Point | Details |
|---|---|
| Confirm dimensions first | Target 17–19 inches seat height and 16–20 inches depth before cutting anything. |
| Build a mockup | A scrap mockup catches most layout and clearance errors before you commit finish-grade material. |
| Add support on wide spans | Center supports or cleats prevent sagging on any bench wider than 3 to 4 feet. |
| Anchor into studs | Screw cleats into wall studs and scribe end panels for a true built-in look. |
| Hire Wood Made Illinois for the install | Wood Made Illinois offers a design consultation and custom cut list for homeowners who want a professional install instead of a DIY build. |
Table of Contents
- Built-In Bench Storage Checklist: Tools, Materials, and Cut List
- How Do You Measure and Mock Up a Bench Before Building It?
- Step-by-Step Build Sequence for a Storage Bench
- Which Seat-Top Material and Hardware Should You Choose?
- How Do You Anchor a Built-In Bench to the Wall?
- What’s the Right Finish Process for a Built-In Bench?
- How Should You Organize the Inside of a Storage Bench?
- What Does a DIY Built-In Bench Cost and Take to Build?
- What Do Experienced Carpenters Do Differently on a Bench Build?
- A Note From the Bench
- Get Help From Wood Made Illinois for a Custom Built-In Bench
- Sources
Built-In Bench Storage Checklist: Tools, Materials, and Cut List
Get your tools staged before you touch lumber. A circular saw or table saw handles the plywood breakdown, a pocket-screw jig speeds up carcass assembly, and a stud finder keeps your anchoring honest. Add a drill/driver, clamps, a combination square, and a level. Safety glasses and hearing protection aren’t optional extras. If you’re routing edges or scribing panels, a router and a jigsaw round out the kit.
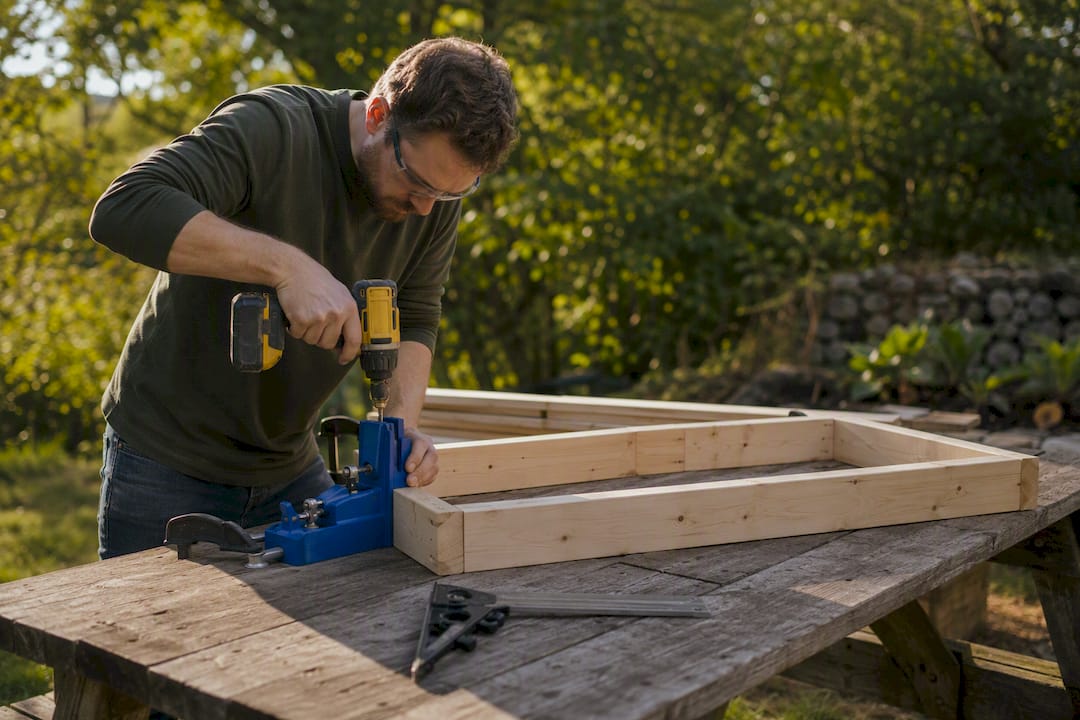
For materials, match the grade to the job. Hardwood frames paired with plywood lids balance durability against cost, and 3/4" Baltic birch plywood is the standard choice for seat tops and lids because it stays flat and takes paint or clear finish well. Use construction-grade 2x4s for the internal frame and 1/2" or 3/4" plywood for the box sides and back panel.
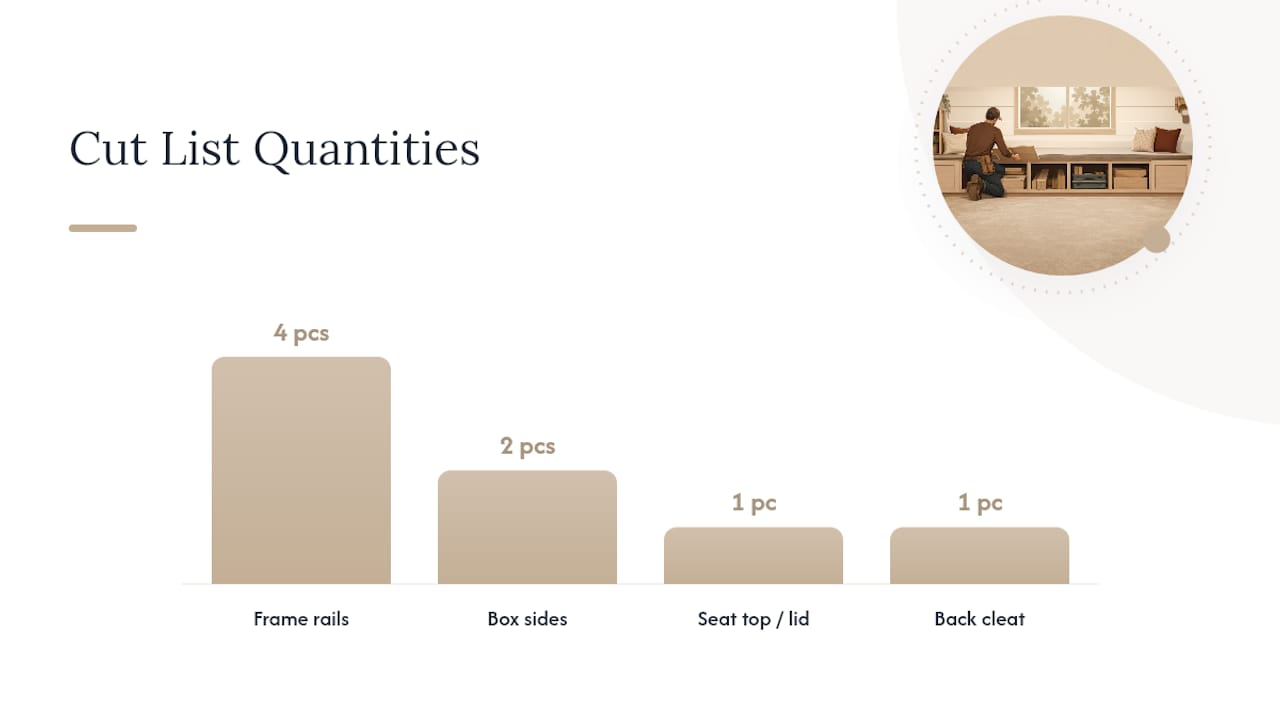
Your cut list turns final dimensions into shop-ready numbers. A simple table works:
| Part | Material | Quantity | Dimensions |
|---|---|---|---|
| Frame rails | 2×4 | 4 | Length of bench |
| Box sides | 3/4" plywood | 2 | Depth x height |
| Seat top/lid | Baltic birch plywood | 1 | Length x depth |
| Back cleat | 2×4 | 1 | Length of bench |
Pocket screws and plywood carcasses remain a fast, reliable path to a durable storage bench for anyone building their first one. Choose soft-close hinges or gas-spring lid supports rated for your lid’s weight, plus wall anchors sized for your stud spacing.
How Do You Measure and Mock Up a Bench Before Building It?
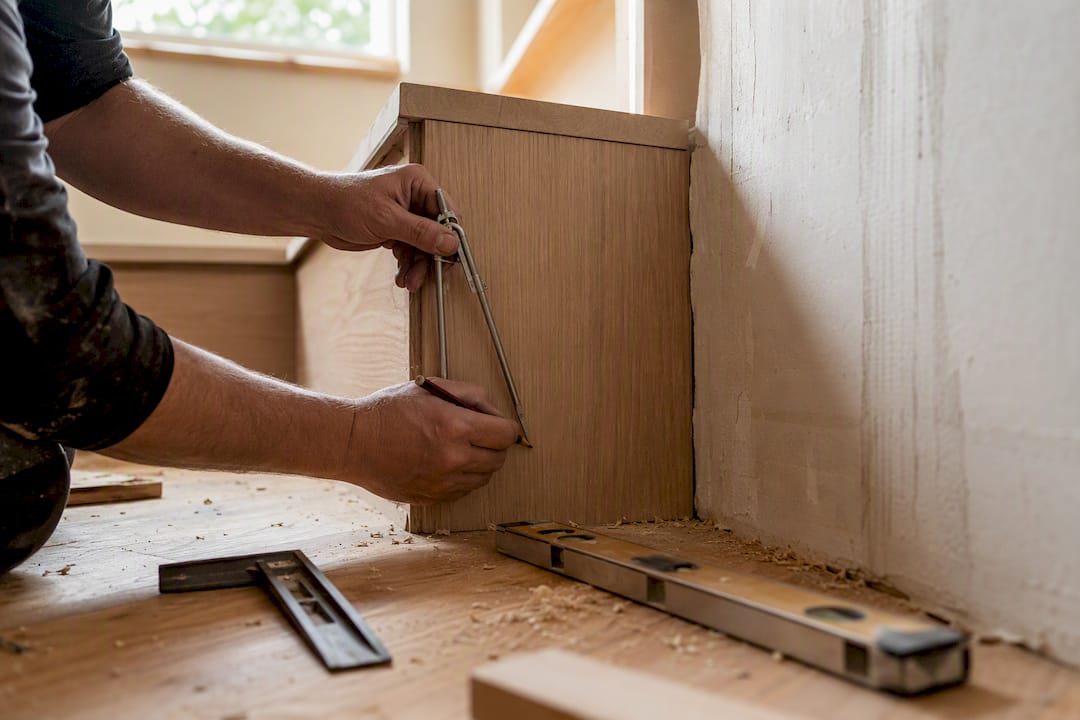
Get the dimensions locked before you cut anything expensive. Seat height should land between 17 and 19 inches, matching standard bench proportions; mudroom builds typically settle around 18 inches. Depth depends on the job: 16 to 20 inches works for an entry or mudroom bench, while a window seat meant for lounging often runs deeper, sometimes 22 inches or more.
Run through this sequence before finalizing your cut list:
- Measure the full width of the opening, then subtract clearance for any door swing or adjacent trim.
- Decide on cushion thickness, if you’re adding one, and subtract that from your target seat height so the finished surface still lands at 17 to 19 inches.
- Mark stud locations on the wall with tape so you know where your blocking needs to align.
- Check the baseboard height and depth. You’ll either notch around it or plan to remove and reuse it.
- Set a straightedge or level across the floor at the bench’s footprint to catch any dip or slope in the subfloor.
- Build a full-scale mockup from scrap plywood or even cardboard, then sit on it, open it, and walk past it.
That last step matters more than it sounds like it should. A simple full-scale frame mockup captures roughly 80 percent of design errors before you’ve committed good material to a mistake. Sightlines, knee clearance, and door swing are all things a drawing can hide and a mockup can’t.
Pro Tip: If your walls aren’t perfectly flat (and most aren’t), plan to scribe the end panels rather than caulk a gap. A scribed panel that follows the wall’s actual contour is what makes a bench read as built-in instead of furniture shoved into a corner.
Step-by-Step Build Sequence for a Storage Bench
Build from the inside out. Start with a 2×4 skeleton, then sheath it in plywood, then layer on the finish pieces last.
- Cut and assemble the internal frame first, squaring every corner as you go.
- Dry-fit the plywood panels against the frame before driving a single screw, checking for gaps or racking.
- Join panels with pocket screws or dados; both hold up well in a storage bench carcass.
- Add a center support or cleat for any span wider than 3 to 4 feet. Plywood alone tends to flex under a loaded storage cavity that width.
- Leave a section of the back panel open or removable so you can reach studs during installation.
- Slide the box into place, check level and plumb, then mark blocking points.
Before you move to trim and finish, run this checklist:
- Confirm the carcass is square (measure corner to corner both ways)
- Check that reveal gaps around any door or lid opening are even
- Verify the seat top sits level front to back and side to side
- Test that hinges or slides operate without binding
Pro Tip: Dry-fit everything twice. Once with clamps only, once with screws snugged but not fully driven. That second pass catches the small misalignments that clamps alone can hide.
Which Seat-Top Material and Hardware Should You Choose?
Your seat top takes the most abuse, so material choice matters. A solid wood top looks sharp and wears well but costs more and can move seasonally. Plywood with a hardwood veneer splits the difference: stable, mid-cost, and paintable. An upholstered top adds comfort but needs a durable fabric if it’s going in a mudroom.
| Access type | Best for | Installation complexity |
|---|---|---|
| Hinged lift-top with gas springs | Deep storage, infrequent access | Moderate |
| Front doors | Frequent access, lower items | Moderate to high |
| Drawers | Frequent access, organized items | High |
| Tilt-out trays | Shallow items, quick grab | Low to moderate |
- Space soft-close hinges evenly, typically two per lid up to about 36 inches wide, three beyond that
- Match gas-spring lid supports to the lid’s actual weight, not a guess
- Check the manufacturer’s weight rating before loading the lid with anything heavy
- Keep reveal gaps consistent (around 1/8 inch) around doors and drawer fronts for a clean look
How Do You Anchor a Built-In Bench to the Wall?
Anchoring is what separates a real built-in from a heavy piece of furniture that happens to sit against a wall. Screw through the back cleat directly into wall studs whenever possible, using screws long enough to bite at least 1.5 inches into solid framing. Where a stud isn’t available, use a rated wall anchor sized for the load.
- Locate and mark every stud behind the bench’s footprint with a stud finder.
- Predrill pilot holes in your cleats and face frame to avoid splitting.
- Set the bench in place, shim under the base to level it, and check seat height again before driving final screws.
- Scribe the end panels if the wall isn’t flat. A scribed edge follows the wall’s contour and closes the gap without relying on caulk.
- Tie in baseboard by either building it up around the new bench or removing and reusing the existing piece.
- Use shims generously; a warped subfloor is more common than a level one
- Recheck seat height after shimming, since even a small lift changes the feel
- Save any removed baseboard for reuse rather than buying new trim
What’s the Right Finish Process for a Built-In Bench?
Sequence matters here. Fill nail holes and seams first, sand smooth, prime, then paint or clear-coat. Install most trim before the final coat, but wait to attach any removable seat top or cushion until the finish has fully cured.
- Fill and sand all screw holes and seams.
- Prime bare wood, especially plywood edges, which absorb finish unevenly.
- Caulk trim seams with a paintable, flexible caulk rated for high-movement joints.
- Apply a sealer coat, then two to three coats of a durable topcoat like water-based polyurethane, sanding lightly between coats.
- Use a scrub-resistant paint on interior storage surfaces that will see shoes or wet gear
- Choose upholstery fabric rated for abrasion if you’re adding a cushion
- Wipe down the bench interior monthly to avoid dirt buildup over time, a habit Better Homes & Gardens recommends for any storage bench in daily use
How Should You Organize the Inside of a Storage Bench?
Start by auditing what you actually plan to store, then design the interior around that list rather than guessing. Shoes and gear want shallow, front-access cubbies. Linens and seasonal items do better in a deep lift-top cavity.
- Sort items into categories: daily-use, seasonal, and bulky.
- Assign each category a zone: cubbies for daily-use, deep storage for seasonal.
- Add dividers cut from 1/2" plywood, fastened with pocket screws or simple cleats.
- Removable fabric baskets simplify cleaning and add flexibility if needs change
- Small vents or gaps in the base help prevent odor buildup in shoe storage
- Front-access doors suit frequent grabbing; top-access lids suit less frequent, bulkier storage
- Modular dividers let you reconfigure the space later without rebuilding anything
What Does a DIY Built-In Bench Cost and Take to Build?
A straightforward weekend build runs 12 to 20 hours total: a few hours for design and measuring, a day for framing and carcass assembly, and the rest split between hardware installation and finish work.
| Build tier | Material and hardware cost | Typical hours |
|---|---|---|
| Budget | Basic plywood, standard hinges | 12–14 |
| Mid-range | Baltic birch, soft-close hardware | 15–17 |
| Premium | Hardwood frame, upholstery, gas springs | 18–20 |
- Skipping the mockup is the single most common mistake, and it’s the one that causes the most rework
- Getting the seat height wrong throws off comfort and makes the whole bench feel off
- Failing to add center support on a wide span leads to sagging within months
- Rushing scribing on an uneven wall leaves a gap no amount of caulk fixes cleanly
What Do Experienced Carpenters Do Differently on a Bench Build?
Craftsmen lean on a handful of habits that prevent expensive redos. A full-size mockup remains the cheapest insurance in the entire project. For anything wider than 3 to 4 feet, add a center support or cleat; a plywood-only box without internal framing tends to flex once it’s loaded with linens or shoes.
- Target interior moisture content that matches your home’s conditions before installing drawers, so fit stays consistent through the seasons
- Use dados for fixed dividers, mortise-and-tenon or domino joinery for structural carcasses, and dovetails if you’re building drawers meant to last decades
- Leave slightly more clearance around drawer fronts than feels necessary; wood movement will close that gap over a humid summer
Pro Tip: Dovetailed drawers cost more time upfront, but they outlast pocket-screwed boxes by years in a bench that sees daily use.
A Note From the Bench
Most clients ask for a hinged lift-top over drawers, mainly because it’s simpler to build and forgiving if the framing isn’t perfectly square. Drawers look cleaner but punish sloppy joinery fast. If you’re facing a wide span, a wall that’s badly out of plumb, or storage that needs to tie into electrical or venting, that’s the point to call in a professional rather than push through it solo.
Get Help From Wood Made Illinois for a Custom Built-In Bench
If measuring, scribing, and squaring a carcass isn’t how you want to spend your weekend, Wood Made Illinois builds and installs custom bench storage for homes across Central Illinois, and the whole process starts with a design consultation, not a guess. A carpenter surveys your space, confirms stud locations and wall irregularities you might miss, and hands you a cut list built around your actual room instead of a generic template.

That survey turns into a scoped install timeline, so you know exactly when the bench gets built and set in place, scribed edges and all, with home organization systems tailored to your space. If you’d rather see project examples and rough budget ranges first, browse custom carpentry project ideas for a sense of scope. Ready to get a plan moving? Reach out through Wood Made Illinois’s carpentry team to schedule a design consultation and get a built-in bench that fits your space on the first try.
Sources
- Making mock-ups (Woodcraft)
- Tips for designing functional built-in bench seats (ToolsRadar)
- 22 Best Mudroom Bench Ideas for Stylish Storage (The Spruce)
- Storage bench project (Popular Woodworking)
- 10 Built-In Storage Ideas That Bring Good Design to Practical Pieces (Livingetc)