For the most professional on-camera presence, choose a physical backdrop over a virtual one, whether that’s a muted accent wall, a single large art piece, or a textured wood slat wall. Physical backgrounds read as more trustworthy and authentic than any digital blur ever will. Your best options include a mid-tone painted wall, curated built-in shelving, peel-and-stick wallpaper, and a wood slat accent wall. Renter-friendly or custom-built paths exist for nearly every budget.
TL;DR:
- Use a single large art piece on a mid-tone painted wall or textured accent wall for a trustworthy and professional appearance on camera.
- Incorporate materials like felt-backed slat walls or peel-and-stick wallpaper, which photograph well and are renter-friendly options for quick upgrades.
- Proper lighting involves positioning the camera at eye level, adding front and back lights, and avoiding backlighting or direct window glare for best image quality.
- Soft, muted colors in matte or eggshell finishes, especially dark tones like navy or green, create contrast and project authority without distraction.
- Regularly refresh your backdrop every six months by dusting, swapping art pieces, or updating styling elements to maintain a current and professional look.
Table of Contents
- Top 10 Home Office Backdrop Ideas That Work on Camera
- How Do You Set Up Lighting and Framing for Video Calls?
- Which Materials and Finishes Photograph Best?
- What Should You Show (and Hide) on Shelves?
- What Are the Fastest Renter-Friendly Backdrop Fixes?
- When Should You DIY vs. Hire a Carpentry Pro?
- How Does Color Psychology Affect Viewer Perception on Video Calls?
- How Can You Add Personal Branding Without Overdoing It?
- How Do You Manage Background Noise Distractions?
- Which Materials Actually Improve Audio Quality Behind You?
- How Do You Maintain a Backdrop Over Time?
- A Practical Take on Camera-Ready Design
- How Wood Made Illinois Builds Backdrops That Last
- Sources
Top 10 Home Office Backdrop Ideas That Work on Camera
A good backdrop earns its place by doing two jobs at once: it needs to look intentional on a webcam, and it needs to hold up to daily scrutiny once the novelty wears off. Here are the approaches worth testing first.
- Minimal painted wall with one large art piece. A single mid-tone wall paired with one anchor piece, sized to roughly a moderate portion of your desk width, reads far more professional than a gallery wall crammed with small frames, according to design guidance from Bruzzen. Budget: low, mostly the cost of paint and one framed print.
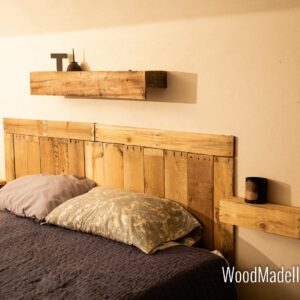
- Vertical wood slat accent wall. Slats add real depth and texture that flat paint can’t fake on a webcam, and the shadow lines they cast give your background visual structure without clutter. Budget: mid to high, depending on whether you DIY it or hire it out.
- Curated built-in shelving. Open shelves styled with a handful of objects, spaced with intention, look composed on screen. Overstuffed shelves look like a moving box explosion.
- Textured grasscloth or matte peel-and-stick wallpaper. Warmth without shimmer. Avoid anything metallic or high-gloss, since camera sensors tend to blow those out under typical desk lighting.
- Fabric or stretched acoustic panels. These double as sound control and visual texture, which matters more than most people realize until they hear their own echo played back on a recorded call.
- Freestanding slat screens or portable panels. For renters or anyone who shares a space, a portable slat screen gives you a real backdrop that folds away when the workday ends.
- Board-and-batten paneling. A classic look that photographs cleanly and works especially well in a room with awkward proportions or a low ceiling.
- Single deep-tone wall in navy, forest green, or charcoal. Current design trends favor these “restorative dark” tones because they create contrast against skin tone and clothing without competing for attention, per Sunaofe’s Zoom room guide.
- Reclaimed or pallet wood feature wall. Warmer and more textured than standard slats, this option adds a lived-in, craftsman feel that stock photo backgrounds can’t replicate.
- A single oversized aluminum print or canvas. One 24×36 print, properly centered, beats five small ones every time, a point echoed in Bruzzen’s wall decor guidance.
Most of these ideas fall into one of two camps: paint-and-decorate projects you can finish in a weekend or built structures that need real carpentry. Knowing which camp your idea belongs to before you start saves you from a half-finished slat wall three weekends in.
How Do You Set Up Lighting and Framing for Video Calls?
Getting your backdrop to actually perform on camera comes down to a short checklist, not guesswork.
- Position your camera at eye level, roughly 2 to 6 feet from the wall behind you. Too close and the wall looks flat; too far and the room swallows you.
- Add a key light in front of your face, ideally a softbox or ring light at a 45 degree angle, so your features are lit evenly.
- Place a small warm accent light behind you, aimed at the wall rather than the camera. This creates separation between you and the backdrop, which reads as depth rather than a flat cutout, according to Your House & Garden’s setup guide.
- Avoid windows or bright light sources directly behind you. Backlighting silhouettes your face, which is the single most common video call mistake.
- Size your artwork to fill roughly a third to two thirds of the frame, and stick to the rule of three when arranging shelf objects.
- Add a soft surface somewhere in frame (a felt panel, a fabric wall hanging, a rug) to cut echo before it becomes a distraction.
Pro Tip: Test your setup by recording a 30 second clip and watching it back on your phone, not your laptop screen. Small lighting and framing issues are far more obvious on a smaller screen than they are while you’re staring at your own webcam preview.
Which Materials and Finishes Photograph Best?
Camera sensors are unforgiving about certain finishes, and the difference between a backdrop that reads as polished and one that reads as amateur often comes down to material choice, not design taste.
- Mid-tone, muted colors like sage, teal, and navy in an eggshell finish photograph reliably across different lighting conditions and webcam qualities.
- Glossy or metallic finishes create glare and hot spots under desk lamps and ring lights. Skip them entirely for anything directly behind your camera.
- Vertical wood slats add texture and, when paired with a felt backer, reduce echo and improve microphone clarity at the same time they improve the visual.
- Peel-and-stick wallpaper and aluminum prints are renter-friendly, install quickly, and photograph cleanly since neither one relies on wet finishes that can shine under light.
Rough cost bands run from low (paint, roughly a weekend project) to low-mid (peel-and-stick wallpaper) to mid (prefab slat kits or DIY paneling) to mid-high (professional paneling and built-ins). One detail worth knowing before you shop: felt-backed slat walls solve two problems in a single install, since the same material that adds texture on camera also absorbs sound in the room.
What Should You Show (and Hide) on Shelves?
Shelves are the easiest part of a backdrop to get wrong, mostly because people style them for living in the room, not for how they read through a compressed webcam feed.
- Use the rule of three: group objects in threes with visible negative space between clusters, rather than filling every inch of shelf.
- Remove shiny or reflective items (glass frames, metallic vases) since they catch light unpredictably and pull the eye away from your face.
- Keep intimate family photos off client-facing shelves. A single piece of art or a plant reads as professional; a photo wall reads as personal.
- Center your main art piece at camera-eye height, not at standing eye height, since those are rarely the same point once your camera is mounted on a monitor.
- Stack books at varying heights with one or two objects on top for visual weight, but stop before it looks like a display case.
Good shelf lighting matters just as much as the objects on it. A single warm accent light angled across the shelf face creates shadow and depth, while flat overhead lighting flattens everything into a distraction-free blur, which is not the effect you want either.
What Are the Fastest Renter-Friendly Backdrop Fixes?
If you’re not ready to commit to anything permanent, several options give you a real upgrade in a weekend or less.
- Peel-and-stick wallpaper installs in an afternoon and costs relatively little, making it the fastest way to test a textured accent wall without commitment.
- Removable fabric panels mount with adhesive strips or a simple frame, take under an hour, and double as light sound dampeners.
- Freestanding slat screens need zero wall damage and can be repositioned for different rooms or moves.
- Large framed prints on picture-hanging strips go up in minutes and can be swapped seasonally without a single nail hole.
A basic DIY acoustic panel, a wood or foam frame with batting and fabric stretched over it, takes an afternoon to build and noticeably tightens up audio in a bare room.
When Should You DIY vs. Hire a Carpentry Pro?
Paint, peel-and-stick wallpaper, floating shelves, and small fabric panels are solid DIY territory for most homeowners with a weekend and basic tools. Where it gets trickier is anything structural or permanent.
- Hire a professional for integrated built-ins, finished wood slat walls with recessed lighting, or any acoustic installation meant to last for years, not months.
- Weigh finish quality. A crooked slat wall is far more visible on a 4K webcam than in person.
- Consider your timeline. Custom installs take longer to plan but rarely need redoing.
- Think about resale value. A well-built accent wall adds to a home’s appeal; a rushed DIY slat job sometimes has to be torn out.
At Woodmadeillinois, our team brings over a century of combined carpentry experience to projects like custom accent walls, pallet-wood feature walls, and built-in shelving designed specifically with video calls in mind.
Pro Tip: If you’re on camera daily for client-facing work, a permanent built solution almost always pays for itself in the time you’d otherwise spend adjusting a temporary setup every morning.
How Does Color Psychology Affect Viewer Perception on Video Calls?
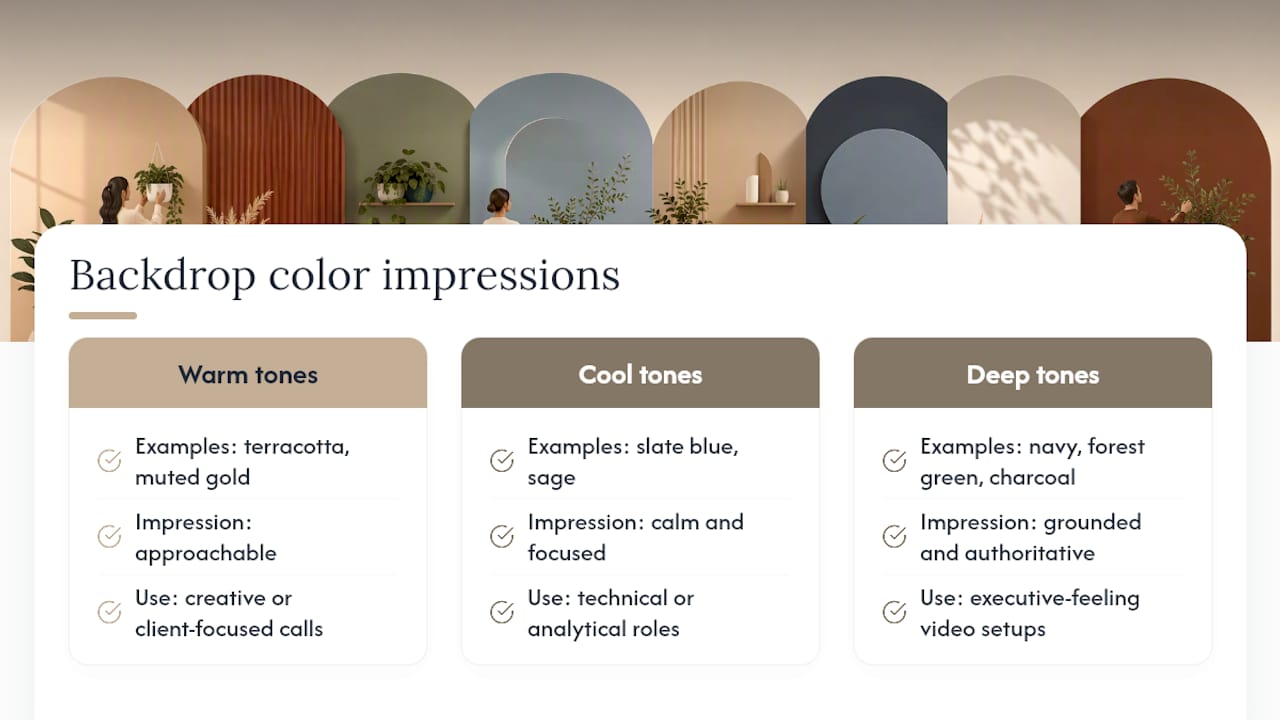
Color behind you shapes how viewers judge your competence and mood before you’ve said a word. Deep, muted tones like navy, forest green, and charcoal tend to read as grounded and authoritative on screen, which is part of why design guides increasingly point toward these “restorative dark” palettes for executive-feeling video setups.
Warmer tones like terracotta or muted gold suggest approachability, useful if your calls lean creative or client-relationship focused rather than formal. Cooler tones like slate blue or sage tend to read as calm and focused, a solid default for technical or analytical roles where you want the backdrop to disappear into the background of the conversation rather than compete with it.
What you should avoid is anything high-saturation or high-contrast directly behind your head. Bright white walls tend to wash out webcam exposure settings, forcing your camera to darken your face to compensate. Busy patterns or clashing colors pull viewer attention away from your expression, which matters more than most people think in calls where reading tone and reaction is half the point.
The safest bet across nearly every profession is a muted, mid-tone color in a matte or eggshell finish. It gives your camera something stable to expose around, flatters most skin tones, and avoids sending an unintended emotional signal before the meeting even starts.
How Can You Add Personal Branding Without Overdoing It?
Your backdrop is a quiet chance to reinforce who you are professionally, but it works best as a whisper, not a billboard. A single piece of art in colors that echo your brand palette does more than a wall covered in logos or framed certificates ever will.
If you run a business or a personal brand, consider one subtle element: a small plant that matches your brand’s aesthetic, a piece of art from a medium relevant to your field, or a color palette on the wall that quietly matches your website or marketing materials. The goal is coherence, not advertising.
Avoid anything that looks like a trade show booth. A backdrop stacked with awards, framed logos, or promotional material reads as trying too hard, and it distracts from the conversation you’re actually there to have. One well-chosen object says more than five branded ones.
Texture can carry branding too. A wood slat wall says something different about you than a smooth painted wall, even if neither includes a single logo. Natural materials tend to suggest craftsmanship and stability, which is part of why they’ve become a popular choice for consultants, designers, and anyone in a trust-driven field.
How Do You Manage Background Noise Distractions?
Visual polish means little if your audio is full of echo, hums, or household noise bleeding through every call. The fixes usually split into two categories: sound you can eliminate at the source, and sound you can absorb before it reaches your microphone.
Start with the obvious sources. Close doors and windows, turn off HVAC vents pointed directly at your desk, and mute notifications on every device in the room. A surprising number of professionals never think to move their desk away from a shared wall with a laundry room or kitchen until the noise shows up on a recorded call.
For sound that’s harder to control, absorption matters more than most people expect. Hard, flat surfaces like bare drywall or glass bounce sound and create echo, while soft, textured, or broken-up surfaces absorb it. This is one more reason a textured backdrop, whether it’s wood slats, fabric panels, or a bookshelf, tends to outperform a bare wall for both looks and audio.
A directional microphone helps too, since it picks up less ambient room noise than a laptop’s built-in mic. Combined with a few well-placed soft surfaces, most home offices can cut noticeable echo without any structural changes at all.
Which Materials Actually Improve Audio Quality Behind You?
Soundproofing a home office completely is expensive and usually unnecessary for video calls. What actually matters is reducing reflected sound near your desk, and a few material choices do that efficiently.
Felt-backed wood slat walls handle this well, since the felt layer behind the slats absorbs sound while the slats themselves add visual texture, solving both problems in a single install. Stretched fabric acoustic panels work similarly and can be added to almost any wall without construction.
Rugs and curtains matter more than people assume. A hard-floored room with bare windows bounces sound aggressively, while a rug under your desk and heavier curtains nearby soften it considerably. Even a bookshelf, densely packed with books of varying sizes, acts as a rough diffuser that breaks up reflected sound.
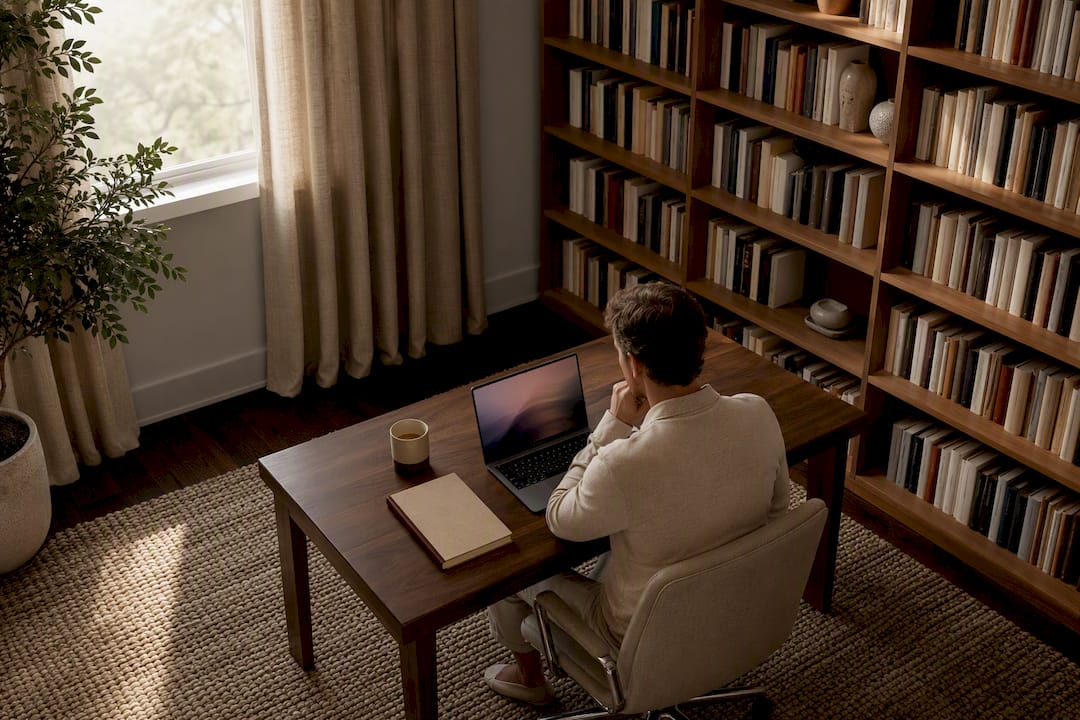
Avoid large expanses of glass, tile, or bare drywall directly behind or beside your desk if audio quality matters for your work. If you can’t avoid it, a single well-placed fabric panel or a floor-to-ceiling curtain often solves most of the problem without a full renovation.
How Do You Maintain a Backdrop Over Time?
A backdrop is not a one-time decision. Paint fades under direct sun, peel-and-stick wallpaper edges can lift after a year or two, and shelf styling that looked sharp in January can feel stale by fall.
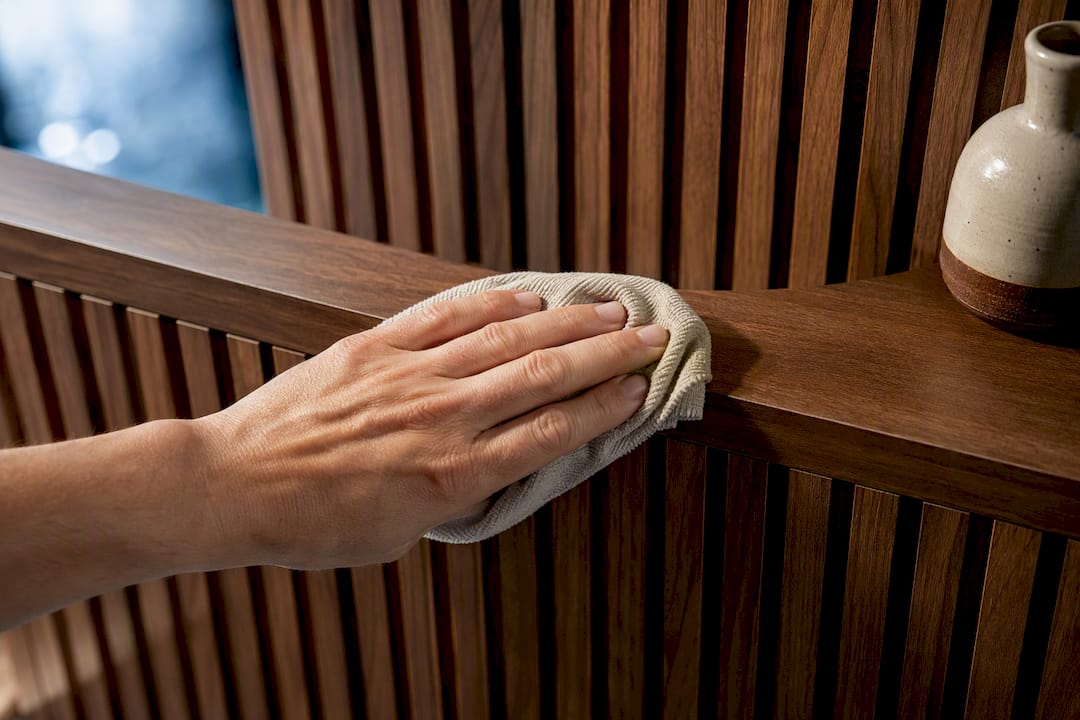
Plan for a light refresh every six months or so: dust shelves, swap a seasonal object, and check that any peel-and-stick edges are still adhered. Wood surfaces, whether slats or built-ins, benefit from an occasional wipe with a dry or slightly damp cloth, since dust shows up clearly under direct lighting and reads as visual noise on camera.
If your role or brand shifts, your backdrop should shift with it gradually rather than all at once. Swapping one piece of art or repainting a single wall keeps the space feeling current without a full renovation every time your work changes. Permanent installs like wood slat walls or built-ins age the best of any option here, since well-finished wood generally only improves in character over years rather than looking dated the way trend-driven decor sometimes does.
A Practical Take on Camera-Ready Design
Most people over-invest in the wrong half of their backdrop. They obsess over the perfect art piece while ignoring that their camera is a foot too low, or they buy an expensive ring light and put it behind a wall that reflects glare straight into the lens. The backdrop and the setup around it are one system, not two separate projects.
The quickest win we consistently see clients discover is pulling the desk just a few feet from the wall and adding one warm light behind them. It changes everything before a single material decision gets made.
— Wood
How Wood Made Illinois Builds Backdrops That Last
If you’ve tried the paint-and-wallpaper route and want something more permanent, Wood Made Illinois is the local option for a backdrop that’s built once and finished right, not reworked every time trends shift. We handle custom wood accent walls, pallet-wood feature walls, built-in shelving with integrated cable management, and acoustic paneling designed specifically for rooms where video calls happen daily.

Most projects follow the same flow: a design consultation to walk through your space and camera setup, a design phase where we map out slat spacing, shelving, or lighting integration, and installation that typically wraps within a few weeks depending on scope. For readers tackling shelving or closet-adjacent storage alongside their backdrop, One Day Doors & Closets is a solid resource for organization systems that pair well with a built accent wall.
If you’re ready to stop rearranging temporary fixes and want a wall that photographs well for years, start with our trusted local carpentry experts page and request a consultation.
Sources
For deeper detail on the ideas covered here, see Decorilla’s home office background guide on physical versus virtual backdrops, D and G Flooring’s accent wall guide on wood slats and acoustics, Bruzzen’s wall decor guide on art sizing, Your House & Garden’s setup guide on lighting, and Google Meet’s help documentation on virtual background limitations.
- Home Office Background Ideas to Always be “Zoom Ready” — Decorilla
- Office Accent Wall: Complete Guide for Homeowners — D and G Flooring
- Home Office Wall Decor Ideas That Make You Want to Work — Bruzzen
- 20 home office background ideas for professional video calls — Your House & Garden