Most wooden windows in Naperville can be repaired rather than replaced. Decay almost always starts with moisture at the sill, the joints or the glazing putty, and it can be cut out, consolidated or rebuilt once the water source is fixed. Peeling paint alone does not mean the wood is gone. This guide shows you what to look for, what a proper repair involves, how to maintain the window afterward, and when the job belongs with a professional carpenter.
TL;DR
- Moisture is the main cause of decay in wood windows. Check sills, joints, bottom-rail corners and glazing putty first.
- Probe suspect wood with an awl or screwdriver. If it is soft and crumbly, the rot is real. If only the paint is failing, the wood underneath is often sound.
- Small surface repairs can be a homeowner job. Extensive rot, sash alignment and hardware problems call for a carpenter.
- Windows in homes built before 1978 may carry lead paint, so sanding and scraping need lead-safe practices.
- Inspect every year, before winter, and repaint before the paint film fails.
Table of Contents
- Signs your wooden windows need attention
- How to tell rot from a paint problem
- What a proper wood window repair involves
- DIY repair or a carpenter?
- Repair or replace?
- Maintaining wood windows through Naperville seasons
- What affects the cost of wooden window repair
- Getting help with your windows
- FAQ
- Sources
Signs your wooden windows need attention
A failing window rarely announces itself with one dramatic event. It gives a series of small signals, and they are easiest to read in early spring and late fall, when you can see the effects of a Midwest winter or summer storm season.
The National Park Service, in its guidance on repairing historic wooden windows, lists the warning signs worth watching: water entering around the frame, glazing putty that is cracked, loose or missing, paint failure, and deterioration at the sill, the sill-to-jamb joints, the corners of the bottom rail and the muntin joints.
In practice, walk each window with a flashlight and check:
- The sill. Look for standing water, dark staining, or a surface that has lost its slope and now holds water instead of shedding it.
- The bottom corners of the sash. Water collects where rails meet stiles. This is the first place rot usually shows.
- The glazing putty. Cracked or missing putty lets rain behind the glass and into the wood.
- Interior clues. Condensation, mildew, or peeling and blistering paint inside can point to excess moisture in the home. University of Minnesota Extension lists these as symptoms of moisture problems, which means the cause may be humidity, not just the window.
- Operation. A sash that sticks, rattles or will not stay open may have swollen, shrunk or loose joints, or failed hardware.
This Old House, drawing on a rot-repair specialist, adds discoloration, warping, fungal growth, a musty smell and soft, punky wood to the list, and notes that wood an awl or screwdriver penetrates easily needs prompt attention.
How to tell rot from a paint problem
The distinction saves homeowners thousands of dollars. Paint can fail long before wood does. The National Park Service cautions that blistering or peeling paint should not be mistaken for proof the wood is beyond saving, since the wood beneath is frequently sound.
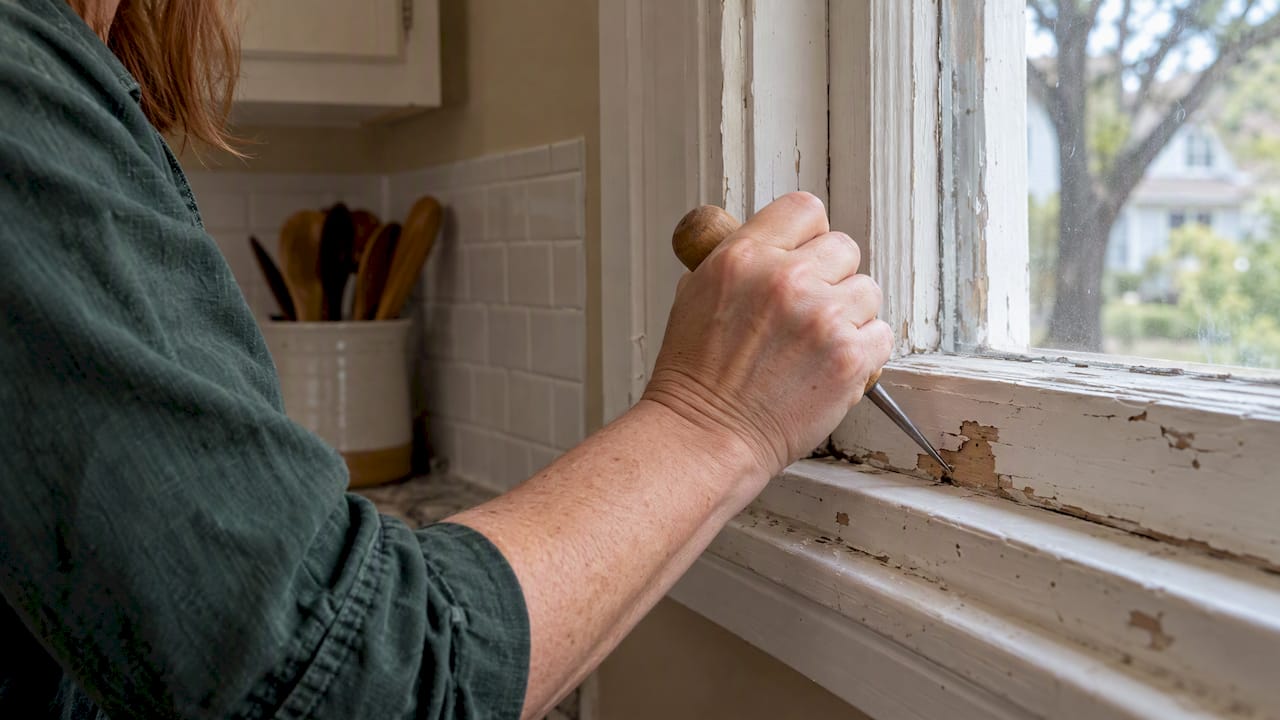
To test it, press a sharp tool into the wood at the sill, the bottom rail and the jamb corners. The Society for the Protection of Ancient Buildings recommends probing with a bradawl or penknife: soft, friable wood indicates wet rot. Firm wood that resists the point, even under flaking paint, usually needs only scraping, priming and repainting.
What causes the rot
Wood decays where it stays wet. University of California researchers explain that decay fungi use the wood as food where it contacts water, such as trapped rain or condensation, and especially at joints that trap water and dry slowly. The National Park Service reaches the same conclusion: moisture is the primary contributor, often entering through cracked glazing putty or pooling on the sill. The SPAB note adds cracked paint, trapped moisture and damp adjoining masonry to the list of causes.
This matters because a repair that ignores the water source is temporary. Fill rotted wood, leave the failed putty, and the same corner will soften again.
What a proper wood window repair involves
The steps vary with the damage, but a sound repair follows a consistent order.
- Find and correct the water source. The Park Service stresses that all repairs must focus on stopping water infiltration. That can mean reglazing, reshaping a sill so it sheds water, sealing a joint or fixing a gutter that soaks the wall above.
- Remove failed paint and putty. Repairs involve some paint removal, then priming bare wood and repainting, per the same guidance. In an older home, this step is where lead safety applies (see below).
- Dry the wood. Never fill or paint over damp wood.
- Cut out or consolidate the decay. Light surface rot can be treated with epoxy consolidant and filler. Deeper decay is cut out and replaced with a matching wood patch (a Dutchman repair) or a rebuilt joint.
- Reglaze and reseal. Fresh glazing putty bedded properly keeps water off the wood behind the glass.
- Prime and paint. Prime every bare surface, including edges, and carry the paint slightly onto the glass to seal the putty line.
- Restore operation. Adjust or replace cords, weights, sash locks and weatherstripping so the window opens, closes and seals.
We handle this kind of work on our wood window restoration projects, and our approach to window dry rot repair follows the same order: stop the water, then rebuild the wood.
DIY repair or a carpenter?
The U.S. Department of Energy’s Building America guideline on wood window repair draws a clear line. Homeowners can often fill small surface-level rot with epoxy or apply basic weatherstripping. Structural repairs involving extensive rot, complex hardware problems or sash alignment should go to a professional, both for safety and so the window functions afterward.
| Situation | Reasonable for a careful homeowner | Better with a carpenter |
|---|---|---|
| Small soft spot in paint-film area, wood otherwise firm | Yes, with epoxy and filler | If it keeps returning |
| Cracked or missing putty | Often | If glass is large, old or fragile |
| Worn weatherstripping | Yes | Rarely |
| Rot at sill, jamb or bottom-rail joint | No | Yes |
| Sash out of square, sticking, hardware failed | No | Yes |
| Upper-story windows | No | Yes, for ladder and fall safety |
| Painted surfaces in a pre-1978 home | Be careful | Often, for lead-safe practice |
Lead paint in older Naperville homes
Many of Naperville’s older neighborhoods have homes built before 1978, when lead-based paint was still common. The EPA’s Renovation, Repair and Painting Rule requires that anyone paid to disturb painted surfaces in pre-1978 housing be certified in lead-safe work practices. The rule in general does not cover homeowners working on their own homes, but EPA recommends hiring a lead-safe certified contractor if you plan a project in a pre-1978 home. The Department of Energy guideline likewise says work on old wood windows should follow state and federal laws for hazardous materials.

Dry scraping and power sanding old window paint are the worst ways to make dust. We explain how to protect both the windows and your household in our guide on preserving historic windows while managing lead paint safely.
Repair or replace?
The tempting answer after one bad winter is to replace everything. The evidence points the other way more often than window salespeople admit. SPAB advises that old wood windows should not be condemned on surface appearance alone, and that limited decay can be repaired to bring a window back to sound working condition.
Energy is the usual worry. The Department of Energy guideline notes that for single-glazed wood windows, almost any retrofit strategy can provide a cost-justifiable improvement. Adding a storm window or secondary glazing creates an insulating air space that cuts radiant heat transfer and raises the interior surface temperature of the window system. For a house that sees cold Illinois winters, that is a meaningful comfort gain without discarding original sashes.
Replacement starts to make sense when:
- the frame itself is structurally gone, not just a corner or the sill;
- rot has spread through most of the sash members and the jamb;
- the opening has been damaged by a larger water problem that must be rebuilt anyway.
If you are weighing the two, ask for the repair option in writing alongside the replacement quote, so you can compare like for like.
Maintaining wood windows through Naperville seasons
Maintenance is a marathon, not a sprint. Paint is the skin that protects the bones of the window, and it only works while it is intact.
Once a year, in fall before the heating season:
- Inspect every window for the signs listed above. SPAB recommends detailed inspections at least annually, or as often as redecoration, including a check for defects and inadequate fall on sills.
- Clean out sill and track debris so water drains.
- Touch up chipped paint right away, at the bottom rail and sill first.
- Check caulk and weatherstripping, and replace what has cracked or hardened.
Every few years:
- Repaint exterior surfaces before the film fails. General home-repair guidance puts the interval at roughly three to five years depending on exposure, with south and west faces typically wearing faster.
- Re-putty glazing that has shrunk or cracked.
- Lubricate or service hardware and sash cords.
Year-round:
- Keep indoor humidity under control. Condensation on the glass in winter is a signal to look at ventilation, not just the window.
- Keep gutters and downspouts clear so rain does not run down the wall and onto the sill.
- Trim shrubs that hold moisture against the wall.
What affects the cost of wooden window repair
There is no single Naperville price for window repair, and we do not publish one for it, because the scope of work decides the figure. The factors that move a quote are consistent:
- How much wood is affected. A patched corner is a different job from a rebuilt sill and jamb.
- Window count and access. Second-story and large windows add labor and equipment.
- Glass and glazing. Original wavy glass is worth protecting, which takes more time than replacing it.
- Lead-safe requirements. Pre-1978 homes need containment and cleanup that add steps.
- Finish. Stripping, priming and repainting to match trim affects the total.
- Hidden damage. Rot behind trim or at the wall frame is often found only once work begins.
The best way to get a number you can rely on is an on-site look. Ask any contractor what is included for each window: wood repair, glazing, paint, hardware and cleanup.
Our perspective
Old wood windows are built from dense, tight-grained lumber that is hard to buy today, and most of what ails them is a maintenance problem, not an age problem. We have more than 100 years of combined carpentry experience on our team, and that experience keeps pointing us toward the same approach: find the water, repair the joint, protect the wood, and keep the original sash working.
We design repairs to be practical for the household that lives with them. That means personalized design consultations before work begins, clear scope on each window, and finishes that match the character of your home. Quick turnaround and cost-effective solutions matter to us because a window left open to the weather costs more every month.
If your windows are failing, a conversation about what can be saved is usually worth having before anyone talks about tearing them out.
Wood
Getting help with your windows
If your windows show rot at the sill or joints, stick, or sit in a house built before 1978, we can look at them with you. Our team does custom carpentry for homes and small businesses, including wood window repair and restoration, and you can see the kind of work we do on our wooden window repair service page. Tell us your address so we can confirm whether your project falls inside our service area.

For an overview of everything we build and repair, visit Wood Made Illinois.
FAQ
How often should wooden windows be inspected?
At least once a year, and ideally every fall before the heating season. Look at the sills, the bottom corners of the sashes, the glazing putty and the paint film. Catching a small crack early costs far less than rebuilding a rotted joint.
Can a rotted wooden window be repaired?
Often, yes. Limited decay can be cut out, consolidated with epoxy or patched with matching wood, as long as the source of moisture is fixed first. Windows with extensive rot in the sash, sill and jamb together are harder to save and may need major rebuilding.
Is peeling paint a sign I need new windows?
Not by itself. The National Park Service notes that paint failure does not mean the wood underneath is in poor condition. Probe the wood with an awl. If it is firm, scraping, priming and repainting may be all you need.
Is it safe to scrape paint off old windows myself?
Only with care. If your home was built before 1978, the paint may contain lead, and dry scraping or sanding creates hazardous dust. EPA recommends hiring a lead-safe certified contractor for projects in pre-1978 homes, and certified renovators are required for paid work.
Sources
- Preservation Briefs 9: The Repair of Historic Wooden Windows, National Park Service
- Controlling moisture problems in your home, University of Minnesota Extension
- Repair of Wood Windows, SPAB technical advice note
- Appendix E: Wood decay, University of California
- How To Identify and Repair Rotting Wood, This Old House
- Measure Guideline: Wood Window Repair, Rehabilitation, and Replacement, U.S. Department of Energy
- Lead Renovation, Repair and Painting Program, U.S. EPA