For most bar-height installations, the right bar top overhang dimensions land between 8" and 12" on the guest side and approximately 11" on the bartender’s interior side. Those two numbers are the backbone of every comfortable, functional bar build. The recommended guest overhang range of 8–12" shifts based on stool height, bar depth, and whether guests are eating full meals or nursing a drink — but staying within that window keeps knees clear and posture natural. For home bars, 8" is the practical floor; anything less forces guests to perch awkwardly. Commercial and restaurant bars typically push toward 10"–12" to accommodate a wider range of body types and stool styles.
The single rule-of-thumb worth memorizing: counter height = stool seat height + 10"–12". That gap is your seat-to-underside clearance, and it drives the overhang calculation more than any other variable.
Quick-reference numbers:
- Home bar, guest side: 8"–10" overhang
- Commercial/restaurant, guest side: 10"–12" overhang
- Bartender interior overhang: ~11"
| Spec | Target |
|---|---|
| Guest overhang (home) | 8"–10" |
| Guest overhang (commercial) | 10"–12" |
| Bartender interior overhang | ~11" |
| Standard finished bar height | 42"–44" |
Key Takeaways
A guest overhang of 8"–12" paired with an 11" bartender interior overhang and a finished bar height of 42"–44" covers the vast majority of home and commercial bar builds correctly.
| Point | Details |
|---|---|
| Guest overhang range | Target 8"–10" for home bars; 10"–12" for commercial or restaurant builds. |
| Bartender interior overhang | Hold ~11" on the service side to keep staff reach comfortable and underbar equipment accessible. |
| Seat-to-top clearance rule | Counter height should exceed stool seat height by 10"–12" for comfortable seating. |
| Support thresholds | Add brackets or corbels beyond 12" for wood tops; beyond 6" for 2 cm stone; beyond 12" for 3 cm stone. |
| Woodmadeillinois bar builds | Custom solid wood bars sized to your stool, space, and material — designed and installed across Central Illinois. |
Table of Contents
- What are the standard bar top overhang dimensions at a glance?
- How do you calculate the right overhang from stool height?
- When does your overhang need brackets or corbels?
- How many seats fit, and which stool width works best?
- What ADA and commercial code requirements apply to bar tops?
- A measurement checklist to hand your carpenter or fabricator
- What the Woodmadeillinois team has learned from real bar builds
- Woodmadeillinois builds custom solid wood bars sized exactly to your space
- Sources
What are the standard bar top overhang dimensions at a glance?
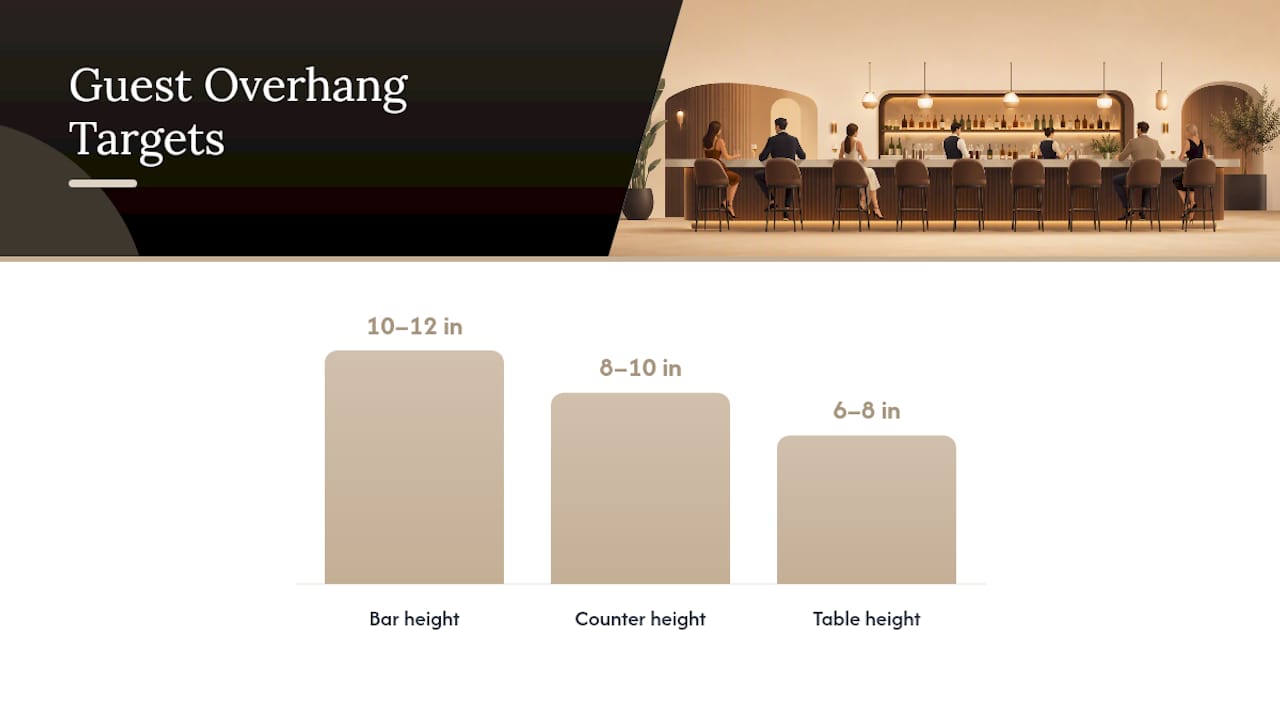
The table below covers the three most common counter heights used in bar and kitchen builds, paired with their matching overhang targets, stool seat heights, and whether structural support is typically required.
| Counter type | Finished height | Guest overhang target | Stool seat height | Support usually required? |
|---|---|---|---|---|
| Bar height | 42"–44" | 10"–12" | 28"–30" | Yes, beyond 12" |
| Counter height | 36" | 8"–10" | 24"–26" | Often, beyond 10" |
| Table height | 28"–30" | 6"–8" | 17"–19" | Rarely |
How “overhang” is measured: it runs from the finished face of the bar cabinet or base to the outer edge of the top. That is the number your fabricator needs, not the total top depth.
Commercial bar tops commonly run 24"–30" in total depth, with the 11" bartender interior overhang carved out of that dimension on the service side. The guest overhang is whatever remains after subtracting the cabinet depth and bartender side.
A note on stone and large cantilevers: if your overhang exceeds the material’s unsupported threshold — especially for quartz or granite slabs — consult your stone fabricator or a structural engineer before finalizing dimensions. Slab warranties can be voided by unsupported spans.
How do you calculate the right overhang from stool height?
The formula is straightforward, and working through it once protects you from the most common sizing mistake on the job site.
Quick formula: Overhang = (Counter height) minus (Stool seat height) minus (Desired knee clearance)
For a standard 42" bar with 30" stools, the seat-to-underside gap is 12" — right at the comfortable minimum. Hardwoods Incorporated’s fabrication guidance recommends a guest overhang minimum of 8.5" and up to 10" for taller users, which translates directly from that 12" clearance target.
Step-by-step process:
- Measure stool seat height from the floor to the top of the seat cushion or seat pan.
- Subtract stool seat height from finished counter height to get your vertical clearance. Target 10"–12" for comfortable seating; 12" is the sweet spot for bar-height builds.
- Determine knee clearance needed. Dining use needs 15"–18" of horizontal knee space; casual drinking tolerates slightly less.
- Set overhang depth so knees clear the bar face by at least 15" when guests are seated naturally.
- Confirm the bartender side at ~11" before locking in the total top depth.
Worked example: A 42" finished bar with 30" stools gives 12" of vertical clearance. A 10" guest overhang keeps knees well clear of the cabinet face for most adults. That same top, at 27" total depth, leaves 11" on the bartender side — a textbook commercial layout.
Taller users benefit from the full 12" overhang; kids or mixed-use family bars can work at 8"–9". If you are designing for a range of users, target 10" and choose stools with adjustable-height mechanisms.
When does your overhang need brackets or corbels?
Think of the bar top as a diving board: the longer the unsupported span, the more stress concentrates at the fulcrum. Wood handles that stress differently than stone, and the thresholds matter.
Practical material limits:
- Solid wood tops (1.5"–2" thick): unsupported overhangs up to 12" are generally stable with proper grain orientation and breadboard ends; beyond 12", add corbels or hidden steel brackets.
- 2 cm stone slabs: support is typically required beyond 6" of unsupported overhang; these thin slabs are brittle under point loads.
- 3 cm stone slabs: the threshold rises to roughly 12" before support is required, though fabricators vary on this.
- Live-edge slabs: treat like solid wood but account for irregular grain; always consult the fabricator for spans over 10".
When adding brackets, space them no more than 24" apart along the overhang run. Hidden steel L-brackets fastened to the cabinet top and underside of the counter are the cleanest solution for finished interiors. Visible corbels work well in rustic or traditional builds and add structural depth without compromising aesthetics.
| Material | Typical unsupported limit | Support required beyond |
|---|---|---|
| Solid wood (1.5"–2") | 12" | 12" |
| 2 cm stone slab | 6" | 6" |
| 3 cm stone slab | 12" | 12" |
| Live-edge slab | 10" | 10" |
Pro Tip: Pre-drill corbel mounting holes before the top goes on. Trying to fasten corbels after the slab is set is one of the most avoidable headaches in a bar install. For wood countertop builds, laminating two layers of 3/4" plywood as a substrate under the finish top adds stiffness and gives you a solid fastening surface for brackets at any spacing.
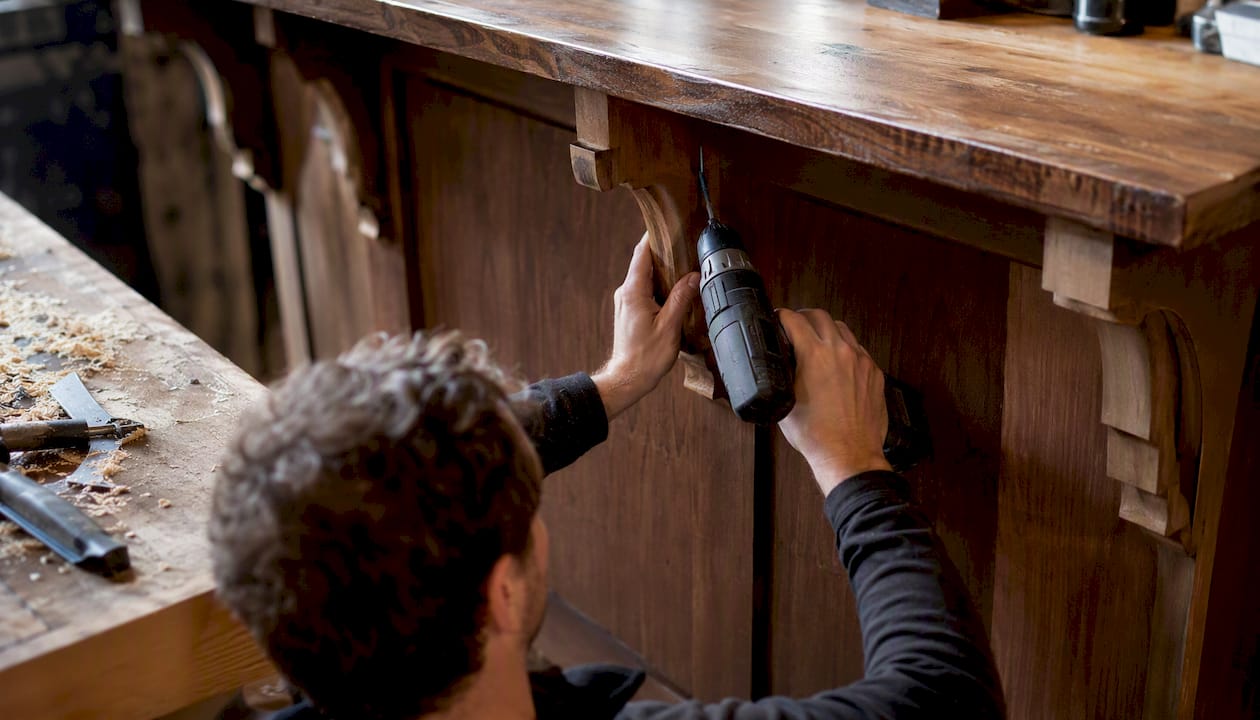
For stone overhangs beyond material thresholds, the slab fabricator — not the carpenter — carries the engineering responsibility. Get their sign-off in writing before installation.
How many seats fit, and which stool width works best?
Bar length planning starts with a simple spacing rule, and getting it wrong is expensive to fix after the top is installed.
Seating spacing guidelines:
- Comfortable standard: 24"–30" center-to-center between stools — 26"–28" suits most residential builds.
- Tight layout minimum: 20" center-to-center; workable for a narrow home bar where guests know each other.
- Corner and service zones: leave at least 12"–18" of dead space at each end and at any service station.
Stool width drives the center-to-center number more than anything else. A 17"–18" wide stool fits comfortably at 24" spacing; a 20"–22" wide stool with arms needs 28"–30". Swivel stools require a few extra inches of clearance because the seat rotates past the stool base when guests stand up.
Measurement callout: always measure stool width at the widest point — usually the seat or the footrest ring, not the legs. Swivel stools and stools with footrest rings can be 2"–4" wider in use than their listed seat width.
Match stool back style to overhang depth, too. A deep 12" overhang pairs well with a backless stool or a low-back counter stool; a shallower 8" overhang works better with a full-back stool that provides lumbar support since guests sit closer to the bar face. For a well-planned upscale bar setup, stool selection and overhang depth should be confirmed together, not sequentially.
What ADA and commercial code requirements apply to bar tops?
Commercial bar operators carry a compliance obligation that home builders do not, and the overhang dimension is one place where that obligation shows up concretely.
The ADA Standards for Accessible Design require at least one accessible seating position at a bar or counter. That position needs a counter surface no higher than 34" above the finished floor, with knee clearance of at least 27" high, 30" wide, and 19" deep beneath the surface. An accessible kitchen or bar layout typically incorporates a lowered section rather than dropping the entire bar height. Verify current ADA dimensions directly with the ADA National Network or your local building authority — code language is updated periodically and local amendments apply.
Measurement callout: the 11" bartender interior overhang is an ergonomic standard, not a code requirement. It keeps the bartender’s reach within a comfortable arc and positions underbar equipment — ice bins, speed rails, glass washers — at the right depth relative to the working surface.
Pro Tip: For commercial permit submissions, document every overhang dimension and support location on your construction drawings. A code consultant or licensed architect can flag accessibility conflicts before the inspector does. Woodmadeillinois recommends including a dimensioned cross-section drawing of the bar top, cabinet, and stool in the permit package — it answers most inspector questions before they are asked.
Food service operations also need to account for underbar equipment depth when setting guest overhang. A deeper guest overhang can push the total top depth beyond what the underbar equipment footprint allows. Lock in equipment specs before finalizing bar top dimensions.
A measurement checklist to hand your carpenter or fabricator
Bring this list to your first site meeting. Gaps in any of these items cause change orders.
- Finished floor height at the bar location (confirm level; note any slope).
- Desired finished top height (42"–44" for bar height; 36" for counter height).
- Stool seat height of the specific stool model you have selected or purchased.
- Guest overhang target in inches (confirm with stool and knee-clearance calculation above).
- Bartender interior overhang (~11" for commercial; note if bartender side is against a wall).
- Top material and thickness (solid wood species and thickness, or stone slab thickness and finish).
- Support positions — mark on a plan drawing where corbels or brackets will land.
- Edge treatment and profile (square, eased, bullnose, waterfall) and whether the edge affects the overhang measurement.
- Underbar equipment clearance — list equipment model numbers and their depth/height specs.
- Notes on tolerances — specify ±1/8" as the acceptable field tolerance for overhang depth.
Additional carpentry notes for durable installs:
- Use 5/16" lag screws or 3/8" structural bolts to fasten steel L-brackets to cabinet framing, not just to the cabinet skin.
- Specify bracket size: a 10"×10" heavy-duty L-bracket handles most residential overhangs; commercial builds with stone tops warrant a 12"×12" bracket at minimum.
- For wood tops, pre-finish the underside before installation to reduce seasonal movement and warping.
- Whoever measures last signs off on the dimensions. Get that signature on the contract drawing before fabrication begins.
A countertop installer who receives this checklist complete can price the job accurately and build without surprises. Missing even one line item — typically the underbar equipment depth — is how a well-planned bar ends up with a top that cannot seat a glass washer.
What the Woodmadeillinois team has learned from real bar builds
The most expensive mistake in bar construction is not a wrong measurement. It is a right measurement applied to the wrong reference point. Builders who measure overhang from the cabinet face rather than the finished face of the toe kick or applied panel end up 3/4"–1.5" short on knee clearance — enough to make the bar uncomfortable for taller guests without being obviously wrong at a glance.
Three mistakes appear repeatedly on job sites: underestimating knee room by skipping the worked-example calculation, leaving stone slab cantilevers unsupported because the fabricator’s threshold was not confirmed in writing, and forgetting service zones at bar ends where staff need to pass. That last one is almost always caught too late, after the top is set.
The shortcuts that actually save time: pre-drill and dry-fit corbels before the top arrives, use laminated breadboard ends on solid wood tops to resist cupping over seasonal cycles, and mock up the overhang in cardboard at full scale before committing to a dimension. A 10-minute cardboard test has saved more than one client from a 10" overhang that felt right on paper but cramped in practice. The Woodmadeillinois team — drawing on over 100 years of combined carpentry experience — recommends that mock-up on every custom bar build, home or commercial.
Woodmadeillinois builds custom solid wood bars sized exactly to your space
Getting bar top overhang dimensions right the first time requires more than a spec sheet. It requires a carpenter who has set enough tops to know where the standard numbers need adjusting for your specific stools, your underbar equipment, and your floor.

Woodmadeillinois designs and builds custom solid wood bars for homes and businesses across Central Illinois, handling everything from the initial overhang calculation through bracket selection, top fabrication, and final installation. The team brings the checklist above to every site visit and documents final dimensions in the contract drawings before a single cut is made. To get a quote or schedule a design consultation, reach out to the trusted local carpentry experts at Woodmadeillinois and describe your bar height, stool preference, and top material — the team will take it from there.
Sources
- How to Choose a Countertop Overhang
- Bar Dimensions & Bar Layout Clearances (The Complete Guide)
- What is the Standard Bar Top Overhang? A Comprehensive Guide – ElevatingKitchen
- Countertop Overhang Guidelines: Standard Depths And Support – Defusco Industrial Supply
Note: for any overhang that exceeds the material thresholds listed above, consult your stone fabricator or a licensed structural engineer before installation. For commercial projects, verify ADA seating dimensions and local building code requirements with the authority having jurisdiction over your project.