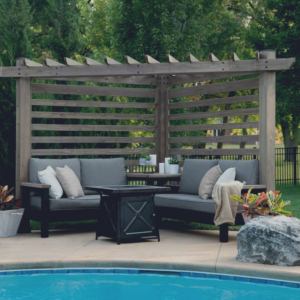
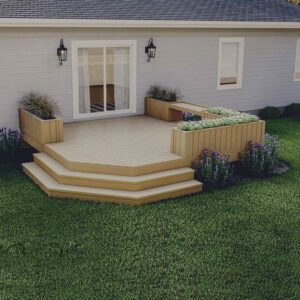
A cost-effective interior facelift checklist is a targeted plan for refreshing your home’s interiors through high-impact, low-cost upgrades without touching load-bearing walls or major systems. The industry term for this approach is a “cosmetic renovation,” and it covers everything from repainting walls to swapping light fixtures and rearranging furniture. Whole-home facelifts typically cost between $1,500 and $4,000, while individual room refreshes run as low as $20. The key is structure. Without a prioritized checklist, homeowners overspend on decorative accents before fixing the foundational elements that drive the most visual change.
1. What are the highest-impact, low-cost projects to start your facelift?
The single most effective starting point is repainting walls and ceilings. Fresh paint is the skin of a room. It covers years of wear, unifies mismatched surfaces, and sets the tone for every other upgrade that follows. A gallon of quality interior paint costs $30–$60 and covers roughly 400 square feet.
Lighting is the second lever. Switching to warm-tone bulbs in the 2700K–3000K range transforms a room’s mood without rewiring a single fixture. Add a floor lamp or table lamp in a dim corner, and the room reads as larger and more inviting. Layered lighting, meaning overhead plus task plus accent, is the standard used in professional interior design and costs far less than a new fixture.

Before spending a dollar, decluttering and rearranging furniture consistently delivers higher visual impact than most budget purchases. Moving a sofa away from the wall, centering a coffee table, or clearing a cluttered shelf reveals the room’s actual bones. This zero-cost step often eliminates purchases you thought were necessary.
Other high-return, low-cost projects include:
- Replacing dated cabinet hardware in kitchens and bathrooms
- Adding mirrors to small rooms to reflect light and expand perceived space
- Swapping throw pillows, curtains, and area rugs for updated textiles
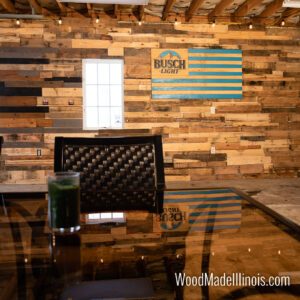
- Painting an accent wall in a bold or contrasting color
- Deep cleaning grout, baseboards, and windows
Pro Tip: Choose one accent wall per room rather than repainting all four. This cuts paint costs by 75% and creates a stronger focal point than a uniform color change.
2. How to budget and prioritize your projects
Allocating 40% of your budget to foundational layers like paint and lighting is the recommended starting point. The remaining 60% covers anchor pieces and decorative accents. This split prevents the common mistake of buying decorative items first, then running out of money before the walls are painted.
The “Room Impact Score” method is a practical tool for deciding which room to tackle first. Rate each room by three factors: time spent in the space daily, frustration level with its current condition, and estimated fix cost. The room with the highest combined score gets the first slice of your budget. This keeps spending tied to daily quality of life rather than aesthetics alone.
A phased approach works best for most homeowners. Phase one stabilizes the space by addressing repairs and cleaning. Phase two improves it through paint, lighting, and hardware. Phase three upgrades with new textiles, furniture accents, and custom elements. Each phase has a defined budget ceiling before the next begins.
Pro Tip: Before replacing any furniture, assess each piece for reuse. Reupholstering a solid-frame sofa costs $200–$400 and produces a result that looks custom-built.
Always build in a contingency buffer of 15–30% above your planned total. Unexpected costs in cosmetic renovations include surface damage hidden behind old paint, subfloor issues revealed during flooring removal, and plumbing surprises in bathroom updates. A buffer prevents a single surprise from stopping the entire project.
3. Room-by-room facelift checklist with upgrade ideas
A room-by-room breakdown turns a broad budget into a concrete plan. Each room has a different cost profile and a different set of high-return upgrades.
Living room ($150–$500)
- Repaint walls and ceiling
- Add layered lighting with floor and table lamps
- Replace throw pillows and curtains
- Rearrange furniture to open sightlines
- Add a correctly sized area rug (front legs of all major furniture on the rug)
Bedroom ($100–$350)
- Repaint in a calming neutral or deep accent color
- Replace bedding and add euro shams for a finished look
- Install a simple headboard using reclaimed wood or upholstered panels
- Add blackout curtains for both function and visual weight
- Replace nightstand hardware
Kitchen ($50–$300 for cosmetic updates)
- Paint or refinish cabinet faces
- Replace cabinet pulls and drawer handles
- Add under-cabinet LED strip lighting
- Install a peel-and-stick backsplash tile
- Deep clean and regrout existing tile
For budget-conscious kitchen updates in Illinois, the most consistent return comes from cabinet refinishing combined with new hardware. This combination costs a fraction of full cabinet replacement and produces a comparable visual result.
Bathroom ($30–$100)
- Replace the mirror and light bar above the vanity
- Swap the faucet and towel hardware
- Regrout tile and recaulk the tub surround
- Add a new shower curtain and rings
- Paint the vanity cabinet
Entryway ($20–$150)
- Paint the front door a bold color
- Add a console table or floating shelf
- Install a coat hook rail
- Place a durable, patterned rug
- Add a mirror to reflect light
| Room | Estimated cost range | Highest-ROI upgrade |
|---|---|---|
| Living room | $150–$500 | Repaint walls and add layered lighting |
| Bedroom | $100–$350 | New bedding and accent wall paint |
| Kitchen | $50–$300 | Cabinet refinishing and new hardware |
| Bathroom | $30–$100 | New mirror, faucet, and regrout |
| Entryway | $20–$150 | Bold front door color and mirror |
4. Common mistakes to avoid in a budget facelift
The most expensive mistake in a cosmetic renovation is buying before planning. Impulsive purchases made without a finalized design direction produce rooms that feel assembled rather than designed. Early, realistic pricing tied to completed schematic designs is the most reliable safeguard against budget overruns.
Common errors that derail affordable facelifts:
- Undersized area rugs. An undersized rug disrupts room cohesion and makes a space look unfinished. The front legs of all major seating should sit on the rug in a living room.
- Rushing paint curing. Painting cabinets requires strict adherence to curing times. Paint that feels dry to the touch may not be fully cured for 7–30 days. Closing cabinet doors too early causes peeling within weeks.
- Chasing trends over character. Trendy designs date quickly and require costly follow-up updates. A home’s original architectural character is a more durable design foundation than any seasonal trend.
- Skipping the pre-makeover audit. Photograph every room before purchasing anything. This documentation reveals what you already have, what can be reused, and what gaps actually need filling.
- Ignoring scale. Oversized furniture in a small room and undersized art on a large wall are both scale errors that no amount of decorating can fix.
“The homes that age best are the ones where the owners resisted the urge to gut everything and instead worked with what the house was already saying.” This principle applies equally to a $200 refresh and a $4,000 facelift.
Preserving original home character rather than chasing trends is a discipline, not a limitation. It produces results that feel intentional and last far longer than trend-driven choices.
Key takeaways
A cost-effective interior facelift delivers the highest return when foundational updates like paint and lighting come before decorative spending.
| Point | Details |
|---|---|
| Start with foundational layers | Allocate 40% of your budget to paint and lighting before buying any decor. |
| Use the Room Impact Score | Prioritize rooms by daily use, frustration level, and fix cost for best results. |
| Build in a contingency buffer | Reserve 15–30% above your planned budget to cover unexpected repair costs. |
| Avoid undersized rugs and rushed paint | Both are common, costly errors that undermine an otherwise well-executed facelift. |
| Declutter before you spend | Rearranging and cleaning often eliminates purchases you thought were necessary. |
What I have learned after years of working inside people’s homes
The homeowners who get the most from a budget facelift are rarely the ones who spend the most. They are the ones who spend last. They clean first. They rearrange. They live in the space for a week before buying anything. By the time they open their wallets, they know exactly what the room needs and what it does not.
Paint and lighting are the two upgrades I recommend without hesitation to every homeowner, regardless of budget. A $40 can of paint and a $15 warm-tone bulb will do more for a room than a $300 accent chair placed in the wrong corner. I have seen it play out this way more times than I can count.
The contingency buffer is the piece most homeowners skip, and it is the piece that saves projects. On more than one occasion, a client’s facelift revealed a surface problem that needed fixing before any cosmetic work could proceed. The buffer covered it without derailing the timeline or the budget.
The hardest lesson to teach is restraint. A home’s character is built over time. Chasing a trend resets that accumulation. The best facelifts I have seen work with the house, not against it. They honor the bones, fix what is worn, and add only what genuinely belongs.
— Wood
Woodmadeillinois can help you get more from your facelift budget
Woodmadeillinois brings over 100 years of combined carpentry experience to homeowners across Central Illinois who want real results without overspending. The team specializes in custom millwork, built-in storage, and finish carpentry that adds lasting value to any room refresh.
Whether you need a custom home office built from common materials or a full room transformation using pallet wood and reclaimed lumber, Woodmadeillinois delivers craftsmanship that fits your budget and your timeline. The team’s trusted local carpentry experts work with you from the first consultation through final installation, so nothing gets left to guesswork. Reach out to discuss your project and get a realistic estimate before you spend a dollar.
FAQ
What does a cost-effective interior facelift checklist include?
A cost-effective interior facelift checklist covers high-impact, low-cost upgrades like repainting walls, updating lighting, replacing hardware, and refreshing textiles. It prioritizes foundational changes before decorative spending.
How much does a room refresh typically cost?
Individual room refreshes cost between $20 and $800 depending on the room and scope. Living room refreshes average $150–$500, bedrooms $100–$350, and bathrooms as little as $30–$100.
What is the biggest budgeting mistake in a home facelift?
Spending on decorative accents before fixing foundational elements like paint and lighting is the most common error. Realistic pricing tied to a finalized plan prevents scope creep and budget overruns.
Should I hire a professional or DIY my facelift?
Painting, hardware swaps, and textile changes are reliable DIY projects for most homeowners. Custom millwork, built-ins, and structural carpentry produce better results and longer lifespans when handled by experienced professionals like Woodmadeillinois.
How do I decide which room to refresh first?
Use the Room Impact Score: rate each room by daily time spent, frustration level, and estimated fix cost. The room with the highest combined score delivers the greatest return on your first investment.