Yes, wainscoting earns its keep in a bathroom. Done right, it protects lower walls from splashes and humidity while giving a plain room the kind of architectural texture that a coat of paint alone can’t deliver. The styles worth your attention right now are beadboard, board-and-batten, shiplap, and tile or stone half-walls, each suited to a different bathroom size and budget. Most panels sit between 32 and 48 inches high, roughly one-third of an eight-foot wall, which lines up with a vanity backsplash or a chair-rail sightline.
- Beadboard: classic, affordable, forgiving in small powder rooms
- Board-and-batten: vertical lines that visually stretch low ceilings
- Shiplap: horizontal warmth for farmhouse or coastal looks
- Tile or stone half-wall: the go-to where water actually hits the wall
- Moisture rule of thumb: choose PVC, moisture-rated MDF, or sealed wood, never raw untreated lumber
Key Takeaways
Bathroom wainscoting protects lower walls from moisture while adding architectural character, provided the material and height match the room’s actual water exposure.
| Point | Details |
|---|---|
| Pick the right style | Beadboard suits small baths, board-and-batten lifts low ceilings, raised panel fits larger primary baths. |
| Match material to moisture | Use PVC, vinyl, or moisture-rated MDF near water; save raw wood for dry powder rooms. |
| Follow the height rule | Install panels 32 to 48 inches high, roughly one-third of an eight-foot wall. |
| Back-paint every board | Sealing the hidden face stops moisture from wicking through and causing hidden rot. |
| Hire a pro for complex jobs | Woodmadeillinois handles raised panels, full-height wraps, and moisture-safe installations across Central Illinois. |
Table of Contents
- Bathroom Wainscoting Ideas Worth Copying
- Which Materials Actually Hold Up in a Humid Bathroom
- Getting the Height and Layout Right
- Styling Choices That Make Wainscoting Look Intentional
- DIY vs Hiring a Pro for Your Bathroom Wainscoting
- Keeping Bathroom Wainscoting Looking Good for Years
- What Bathroom Wainscoting Actually Costs
- Mistakes That Undermine an Otherwise Good Design
- What I’ve Learned Watching Clients Choose
- Let Woodmadeillinois Handle the Moisture-Safe Install
- Sources
Bathroom Wainscoting Ideas Worth Copying
Every style on this list behaves differently once steam and splash enter the picture, so the right pick depends less on taste and more on where the wall sits relative to your tub, shower, and sink.
1. Classic Beadboard
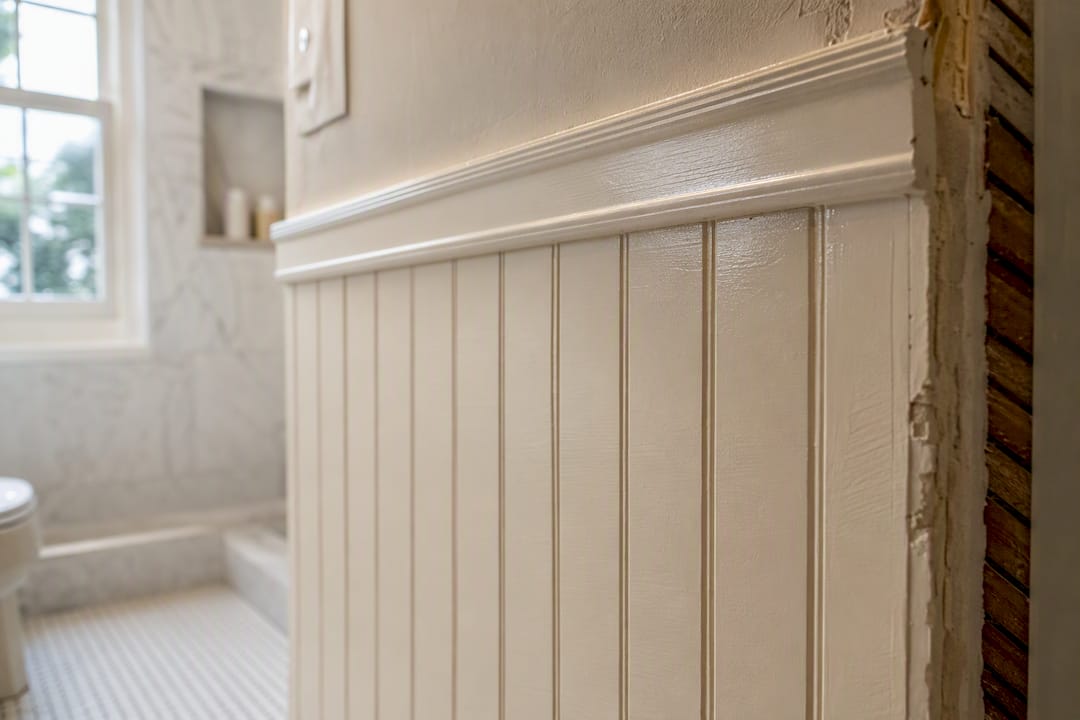
Beadboard remains the workhorse of bathroom wall paneling ideas because it’s inexpensive, easy to cut around outlets, and forgiving of a slightly uneven wall. It reads best in small powder rooms or guest baths, painted a soft white or pale blue-gray. Because the grooves trap moisture if left bare, bathroom-specific installations almost always call for a semi-gloss enamel over a moisture-rated substrate.
2. Board-and-Batten
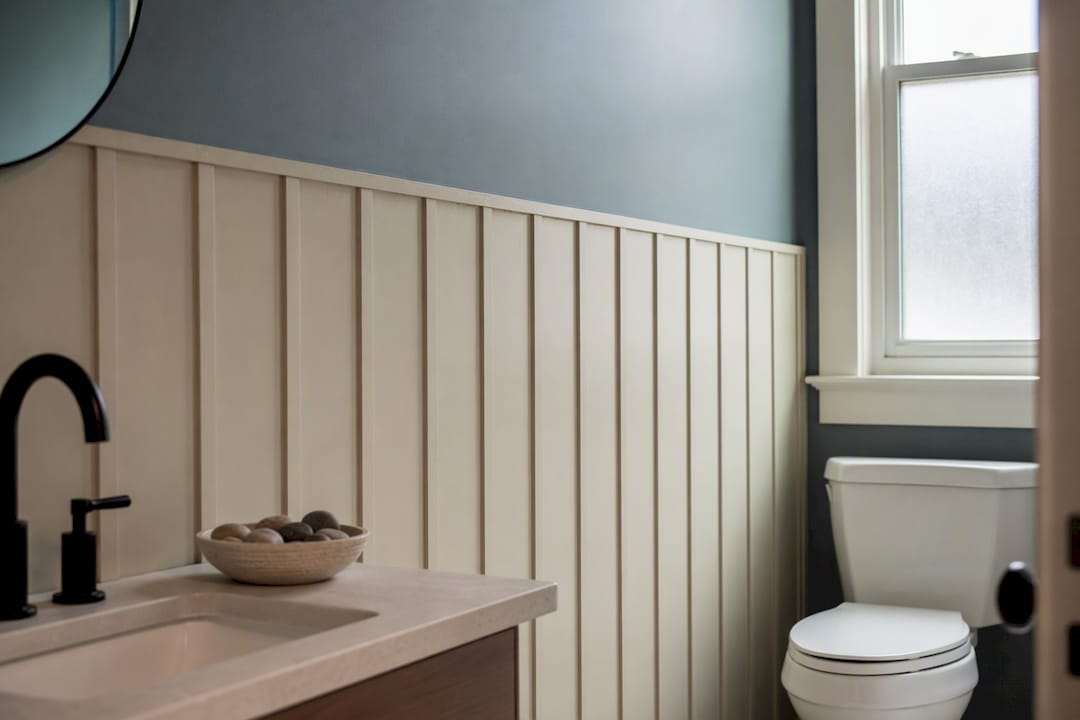
Board-and-batten swaps horizontal beadboard grooves for vertical battens over a flat panel, and that vertical line does real work in a room with an eight-foot or lower ceiling. It suits modern farmhouse and cozy cottage baths particularly well, and it’s less fussy to install than raised panel because there’s no interior molding to miter.
3. Raised or Flat Panel
This is the formal option, the one that belongs in a primary bath with real square footage rather than a cramped hall bathroom. The joinery is more involved, with stiles, rails, and recessed or flat center panels, which is why it costs more in both materials and labor than beadboard or board-and-batten.
4. Shiplap
Shiplap can run horizontal for a coastal feel or vertical for a leaner, more contemporary look. It photographs well and pairs naturally with black hardware or brass fixtures, but the overlapping boards create small horizontal ledges where moisture and dust can settle if the finish isn’t tight.
5. Tile or Stone Half-Wall
Wherever water actually contacts the wall, tile or quartz half-walls beat any wood-look product. Around a tub, inside a walk-in shower nook, or behind a pedestal sink, tile paneling paired with a painted upper wall gives you the wainscoting silhouette with zero risk of swelling.
6. Feign-Scoting and Applied Molding
Applied molding, sometimes called feign-scoting, creates the look of raised panels using flat trim strips glued and nailed to a painted wall. It skips the deep joinery entirely, which makes it one of the more approachable cheap wainscoting options for a weekend project.
7. Bold Variations
Extra-tall wainscoting that climbs to 60 inches or higher, two-tone treatments that split a wall between a deep color below and white above, or matte black and forest-green panels all push the style further. These choices work best in a primary bath where the room can absorb a stronger statement.
Pro Tip: Before you fall in love with a raised-panel photo online, measure your actual wall height and outlet placement. A design that looks effortless in a gallery photo often needs custom-cut returns around switches and vents that a standard kit won’t include.
Which Materials Actually Hold Up in a Humid Bathroom
Material choice matters more in a bathroom than almost anywhere else in the house. Choosing the wrong material leads to swelling, peeling, or warping, which is the single most common regret homeowners report after a wainscoting project.
- PVC and vinyl panels: essentially waterproof, ideal for full baths with a tub or shower
- Moisture-rated MDF: a reliable middle ground for powder rooms with a sink but no shower spray
- Solid wood: acceptable only when primed, back-painted, and kept in a low-humidity powder room away from direct splash
- Tile or quartz: the safest choice directly around wet zones
Whatever material you choose, back-paint every board before installation. Sealing the hidden face is a step many DIY projects skip, yet it’s one of the most effective ways to stop moisture from wicking through from behind and rotting the panel from the inside out. Finish exposed surfaces with a satin or semi-gloss enamel, since flat paint absorbs moisture and stains faster in a bathroom environment.
Getting the Height and Layout Right
Getting the proportions wrong is the fastest way to make an otherwise good design idea look off. The standard reference point is 32 to 48 inches, roughly a third of the wall on a typical eight-foot ceiling, though taller rooms can support a slightly higher rail.
- Align the top rail with your vanity backsplash or window sill so the eye reads one continuous line around the room
- On rooms with a walk-in or semi-open shower, extend the panel height to meet the shower’s tile line rather than stopping short
- Plan outlet and switch cutouts before you cut a single board, not after
- Decide between partial-height and full-height paneling based on whether the upper wall will carry wallpaper or a bold paint color
Vertical panels, in particular, help a low-ceiling bathroom feel taller by drawing the eye upward, which is worth remembering if your bathroom already feels boxy.
Styling Choices That Make Wainscoting Look Intentional
The paneling itself is only half the design. What you do above it and around it determines whether the room looks finished or half-done.
- Paint the wainscoting and the upper wall the same color for a quieter, more unified look in a small bathroom
- Reserve contrasting colors for rooms with more square footage, where the visual break reads as a feature rather than clutter
- Use removable wallpaper above the panel line, away from direct spray, paired with a patterned or classic subway tile below
- Lean into navy, deep green, or matte black panels when pairing with brass or matte black fixtures for a more tailored, carpentry-forward look
Designer galleries consistently show durable materials like tile or quartz used near wet zones, with painted wood panels reserved for drier stretches of wall, a pairing strategy worth copying rather than reinventing.
DIY vs Hiring a Pro for Your Bathroom Wainscoting
Some of this work genuinely suits a weekend and a miter saw. Trim-based beadboard kits, peel-and-stick tile, and short shiplap runs on a single accent wall are all reasonable DIY projects for a homeowner comfortable with basic tools.
Raised panels, complex joinery, and full-height wrap-around installations are a different story. The margin for error grows with every mitered corner and every outlet cutout, and a bathroom’s humidity punishes sloppy sealing faster than any other room in the house.
Back-painting every board before it goes on the wall isn’t optional if you want the installation to last. It’s the step that separates a wainscoting project that looks good for a season from one that still looks good in ten years.
Pro Tip: Ask any estimate to specify the substrate and sealant, not just the visible finish. A quote that skips this detail is usually a quote that skips the prep work too.
A typical professional bathroom wainscoting job runs anywhere from a single day for a small powder room to a few days for a full-height, multi-wall installation with tile transitions.
Keeping Bathroom Wainscoting Looking Good for Years
- Choose satin or semi-gloss enamel, then clean with a damp microfiber cloth and mild soap, never abrasive scrubbers
- Watch for soft spots, dark edges, or bubbling paint near the floor line, which signal moisture getting behind the panel
- Touch up a single damaged board or a scuffed section rather than repainting the whole wall
What Bathroom Wainscoting Actually Costs
Cost swings widely depending on style, material, and how much of the room you’re covering. Beadboard kits sit at the affordable end, since the panels are thin, lightweight, and quick to install, especially in a powder room with limited wall area. Board-and-batten runs a step above that, mostly because of the added batten strips and the paint labor involved in getting crisp lines.
Shiplap sits in a similar range to board-and-batten when using engineered or MDF boards, though real wood shiplap costs more and needs more aggressive sealing in a humid room. Raised or flat panel wainscoting is the most expensive style to install, since the joinery, the stiles and rails, and often custom millwork all add labor hours that beadboard or shiplap simply don’t require.
Material choice moves the number just as much as style. PVC and vinyl panels carry a premium over MDF for their waterproof performance, but they eliminate the risk of a callback for swelling or peeling down the line. Tile or quartz half-walls are typically the priciest per square foot once you factor in tile setting labor, though they’re also the most durable option directly around a tub or shower.
Full-height wrap-around installations across an entire bathroom cost noticeably more than a single accent wall or a partial-height perimeter treatment, simply because of the added material and labor. If budget is the main constraint, a single feature wall in board-and-batten or a partial-height beadboard treatment delivers most of the visual impact at a fraction of the cost of wrapping the whole room. For homeowners weighing options against a set budget, browsing project examples across different budget ranges is a useful way to calibrate expectations before requesting a quote.
Mistakes That Undermine an Otherwise Good Design
The biggest mistake is material mismatch: choosing a raw wood product for a wall that will see regular shower spray, then watching it swell or peel within a year or two. The fix is simple in theory and easy to skip in practice: match the material to the actual moisture exposure of that specific wall, not the room as a whole.
A close second is skipping the back-paint or prime step on hidden surfaces. Boards that look fully finished on the front can still wick moisture through an unsealed back, which is exactly how rot starts from the inside where nobody notices until the damage is advanced.
Getting the height wrong is a subtler but common error. Panels installed too low look like an afterthought, while panels that stop short of a window sill or vanity backsplash break the visual line the whole design depends on. Measure against existing fixtures before cutting, not after.
Skipping proper substrate prep is another frequent issue, especially in homes with older, uneven plaster walls where panels get nailed directly over a surface that was never leveled. And a final, easy-to-avoid mistake: choosing a bold two-tone treatment or extra-tall paneling in a small bathroom, where the contrast overwhelms the room instead of elevating it. Save the bolder choices for primary baths with enough square footage to support them, and consider how a door style and hardware finish will read against the new paneling, since door choice affects the room’s overall moisture handling as much as the walls do.
What I’ve Learned Watching Clients Choose
Clients who choose moisture-rated MDF or PVC over raw wood rarely regret it. One recent powder room refresh went from bare drywall to finished beadboard in a single afternoon.
Let Woodmadeillinois Handle the Moisture-Safe Install
Woodmadeillinois builds wainscoting the way a pro should: back-painted boards, moisture-rated substrates where panels meet water, and sealed top caps that keep the whole assembly performing for years, not just looking good on install day.

If you’ve read this far because raised panels or a full-height wrap-around feels like more than a weekend project, that instinct is correct. Woodmadeillinois handles design consultations and custom installations across Central Illinois, matching material and joinery to your specific bathroom’s humidity and layout rather than applying a one-size template. Schedule a consultation through Woodmadeillinois’s trusted local carpentry experts page to get a real estimate and timeline for your bathroom.
Sources
- Wainscoting height guidance — BobVila
- 30 Bathroom Wainscoting Ideas to Add Character and Charm — The Spruce (May 9, 2026)
- Wainscoting bathroom ideas gallery — Houzz