A built-in dresser wall replaces freestanding furniture with drawers and cabinetry fitted to your bedroom wall, giving you maximum storage and a finished, furniture-free look. It suits homeowners who want to reclaim floor space and tie the room together. Two checks come first: map your wall obstructions and stud layout, then plan secure anchoring before a single drawer is built.
TL;DR:
- Measure the wall at floor, midheight, and ceiling, then map trim, outlets, door swings, drawer clearance, and stud locations before designing.
- Anchor every cabinet to studs or solid blocking, never drywall alone; a steel anchor advertised for 400 pounds works only when correctly installed into studs.
- Installed full wall cabinetry can cost $12,000–$28,000; painted plywood, standard drawer sizes, and simple fronts help reduce the bill.
- Keep daily use drawers between knee and shoulder height, split wide runs into narrower drawers, and leave enough room to stand before an open drawer.
- Closet systems commonly use 12 or 16 inch shelving, but drawers need more depth, so design the drawer layout around what you plan to store.
Table of Contents
- Four built-in dresser wall designs to consider
- How to measure your wall before you plan
- Choosing drawers, slides, and casework materials
- Anchoring a built-in dresser wall safely
- Placing the built-in around your bed, windows, and closet
- What a built-in dresser wall costs
- Caring for your built-in dresser wall
- Designing for comfortable, everyday use
- Timeline from design to installation
- How we approach built-in dresser walls
- Start your built-in dresser wall with a consultation
- FAQ
- Sources
Four built-in dresser wall designs to consider
Most successful designs fall into one of four patterns, and the right one depends on wall length, ceiling height, and how much floor space you want back.
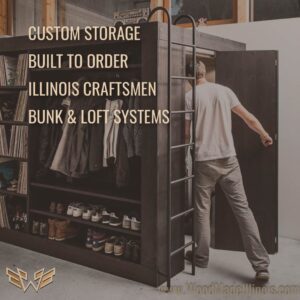
- Full-wall cabinetry: floor-to-ceiling units replace the freestanding dresser, wardrobe, and nightstand shelving in one run. This is the most dramatic option, and full-wall built-ins appear alongside floor-to-ceiling wardrobes and built-in dressing tables in popular bedroom roundups.
- Niche dresser: a drawer bank recessed between studs or tucked into an alcove, often flanked by shelves. It works well where a wall is too short for a full run.
- Vanity or window-seat integration: drawers below a dressing table or a seat under the window combine storage with a place to sit.
- Stacked drawer banks: framed dresser runs inside a closet suit compact bedrooms, and our own guide to maximizing bedroom closets covers that approach in detail.
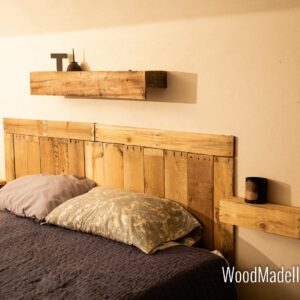
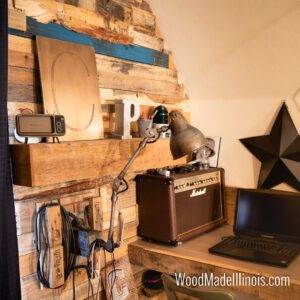
Finishes change the character of any of these. Painted built-ins read clean and modern, while stained solid wood feels warmer and more traditional. We also build pallet-wood accent panels for texture, and a single panel behind open shelves can give a plain drawer wall real depth.
How to measure your wall before you plan
Careful measuring decides whether drawers glide open or hit a bedpost. Work through these steps with a pencil, a tape, and a stud finder:
- Measure the full wall width at the floor, mid-height, and ceiling, since walls rarely stay true.
- Record ceiling height, then note the baseboard, crown molding, chases, and every receptacle or switch.
- Measure door swings and window clearances, and confirm that drawer fronts can open fully without hitting anything.
- Mark stud locations early, and decide where blocking will be needed for anchoring or a recessed opening.
- Plan reveal and gap tolerances, typically a small, consistent margin around doors and drawers.
Uneven walls call for scribing, which means shaping the edge of a cabinet or filler panel to follow the wall’s actual line. This Old House recommends measuring to scale, using blocking, and scribing for imperfect walls when building closet built-ins. For recessed installations, inspect the wall first: some walls cannot take a recessed unit without removing studs and adding blocking to frame the opening.
Pro Tip: Photograph the wall with your tape visible at each key measurement, so you can double-check numbers later without standing in the room.
Choosing drawers, slides, and casework materials
Drawer depth matters more than most homeowners expect. Shallow drawers suit socks and underwear, mid-height drawers fit folded shirts, and deep ones handle bulky sweaters. Closet system makers note that typical shelving depths include 12 and 16 inches, and drawer frame sizes affect what fits, so plan the drawer layout around what you actually store.
- Slides: undermount slides hide the hardware and usually pair with soft-close action, while side-mount slides are simpler and often easier to adjust. Check the load rating against your heaviest drawer.
- Soft-close: soft-close hardware is recommended on built-in drawers to prevent slamming.
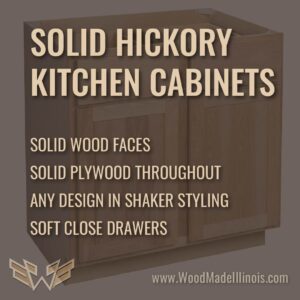
- Carcass material: plywood holds screws better and resists sagging, which makes it our usual choice for drawer boxes and cabinet sides. MDF takes paint smoothly but needs more care around fasteners.
- Face-frame or frameless: face-frame cabinets look traditional and add rigidity. Frameless cabinets maximize drawer width and give a sleek, flush look.
- Trim: simple shaker panels, flush fronts, or pallet-wood accents all work, as long as the trim hides the scribed edge.
Our write-up on closet built-in drawers that don’t sag goes deeper on hardware and box construction.
Anchoring a built-in dresser wall safely
A tall or loaded cabinet can tip, so anchoring is the one step we never shortcut. Secure every unit to wall studs or solid blocking, and never rely on drywall alone.
- Use professional-grade anti-tip kits, such as steel brackets or aircraft-grade cables, rated for the weight of the furniture.
- Confirm the load rating before you buy, and remember that the rating only holds when the anchor goes into a stud.
- Read the manufacturer’s instructions. Many standard anti-tip kits are not intended for attachment to plywood without proper backing.
- Check buyer reviews for the kit you choose, because retail kits vary in quality, with some reviewers reporting weak cables or missing anchors.
Anchors worth looking for: retail steel anchors advertise a 400 lb load capacity, and that capacity applies only when the anchors are installed correctly into studs.
Some jobs belong with a professional carpenter: complicated framing, cutting into studs, or rerouting electrical or plumbing. When a wall hides surprises, a carpenter finds them before the cabinets go up.
Placing the built-in around your bed, windows, and closet
Where the wall sits in the room matters as much as how it is built. These layout rules keep the result balanced:
- Keep the built-in out of your primary sightline from the door, and match its visual weight to the bed wall.
- Mix closed drawer banks with open shelves or display niches, which breaks up a heavy, monolithic look.
- Choose a toe-kick or recessed base to preserve floor clearance and make cleaning easier.
- Decide on outlets, wall-mounted mirrors, and TV mounts now, since wiring behind finished cabinetry is far harder than wiring before.
If your plan includes a narrow section, our built-in wardrobe ideas show how to fit useful storage into tight spaces.
What a built-in dresser wall costs
Costs swing widely with materials, hardware, and finish complexity. Full-wall built-ins are the most expensive bedroom option, and installed costs can range roughly $12,000–$28,000 depending on those factors. A smaller niche or drawer bank costs far less.
- Lower-cost route: painted plywood with standard-size drawers and simple shaker fronts.
- High-end route: custom solid-wood construction with specialty compartments and detailed trim.
- Where to save: standard drawer sizes and simpler finishes cut cost without hurting function.
Our project ideas for every budget show how scope changes the price.
Caring for your built-in dresser wall
A built-in is a long-term fixture, so a little routine care helps keep it looking and working well. Think of it as a marathon, not a sprint: small, steady habits beat a rescue job later.
Dust the face frames, trim, and open shelves regularly with a dry microfiber cloth. For painted surfaces, use a barely damp cloth and mild soap, then dry right away, because standing moisture can lift paint and swell edges. Stained wood benefits from a wipe with a cleaner made for finished wood, and you should avoid silicone sprays that build up and make future refinishing harder.
Every few months, open each drawer fully and look at the slides. Vacuum out debris, and check that screws on handles and hardware are snug. If a drawer starts to sag or rub, adjust the slide or the drawer-box mounting early, before the box racks out of square.
Watch for humidity swings. Solid wood moves with the seasons, so hairline gaps at trim joints in dry winter air are normal. Caulk or touch-up paint handles most of them. Keep the bedroom between roughly comfortable indoor humidity levels, and avoid placing a humidifier directly against the cabinetry.
Finally, protect the finish where hands and clothing touch it most. A felt pad inside shallow drawers, and a quick touch-up of paint at high-contact corners, keeps wear from showing.
Designing for comfortable, everyday use
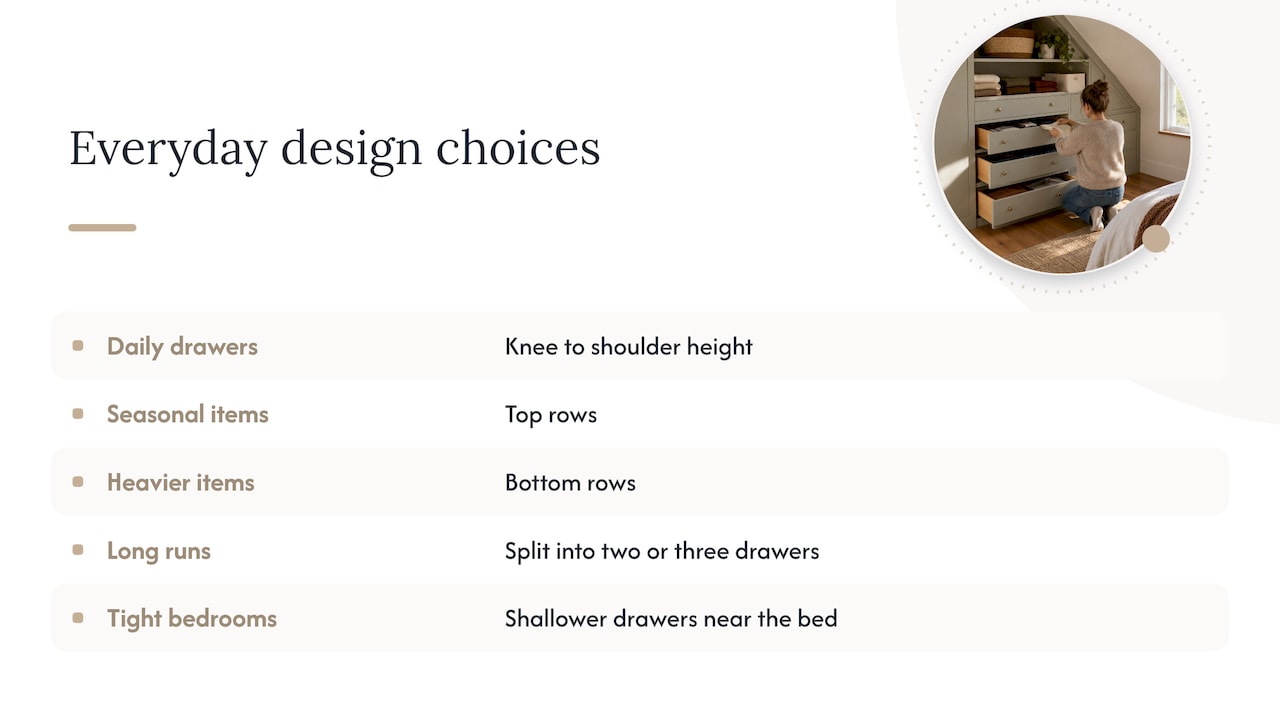
A built-in should work for the person using it every morning. Start with reach: the drawers you open daily belong between roughly knee and shoulder height, where you can see inside without stooping or stretching. Reserve the top rows for items you use seasonally and the bottom for heavier things, like sweaters, that you want to lift as little as possible.
Drawer width deserves thought too. Very wide drawers sag under load and make it hard to find things, so splitting a long run into two or three narrower drawers often works better than one deep trough. Inside each drawer, shallow dividers keep small items sorted and stop piles from sliding forward each time you close it.
Clearance in front of the wall decides whether the design is comfortable or merely attractive. Leave enough room to stand in front of an open drawer and bend slightly without bumping the bed. In a tight bedroom, consider shallower drawers on the side nearest the bed, so every drawer can open fully.
Lighting makes a bigger difference than people expect. Low-profile LED strips under shelves or inside a niche let you see what you own, and a switch within easy reach avoids fumbling in the dark. Pull style matters as well: a finger-friendly bar pull or a cup pull works better than a small knob for loaded drawers. Think about the people in your home, too. A lower bank of drawers can serve a child, while higher storage stays out of reach.
Timeline from design to installation
Built-in dresser walls move through several phases, and knowing them keeps expectations realistic. The exact calendar depends on the project’s size and our shop schedule, so treat this as a sequence rather than a promise.
Design and measuring. This starts with a consultation, either on site or virtual, followed by wall measurements, a layout sketch, and decisions on drawer sizes, finishes, and trim. Settling details here, including outlets and lighting, is the best way to avoid delays later. Approving the design and materials closes this phase.
Fabrication. Cabinet boxes, drawer boxes, and face frames or fronts are built, then sanded, primed, and painted or stained. Finishing takes patience, because coats need time to cure properly. Any special material, such as a pallet-wood accent panel, is prepared in this phase as well.
Installation. On site, we locate studs, set blocking where needed, and install and anchor the cabinets. Then we scribe filler pieces to the wall, hang drawers, add trim, and touch up paint. A full-wall unit takes longer to set than a single niche, and recessed work that needs framing adds time.
Having measurements and photos ready at the consult, and making decisions on finish and hardware quickly, can speed a project along. Changes after fabrication starts and surprises behind the wall, such as wiring or plumbing that needs rerouting, can slow it down. We flag those early, so they rarely become a scramble.
How we approach built-in dresser walls
Our approach is hands-on and practical. We offer personalized design consultations, use materials creatively (pallet wood accents included), and work toward a quick, budget-conscious turnaround, backed by our team’s over 100 years of combined carpentry experience. The bedrooms we solve most often are tight ones with uneven walls, where a built-in does the work of a dresser, a nightstand shelf, and a bit of display space all at once.
We keep the scope honest: we show you options at different price points, then build the one that fits your room and your budget. Browse our project gallery to see finished work, and ask us for a consultation when you are ready to talk through your own wall.
— Wood
Start your built-in dresser wall with a consultation
Saving money on a built-in often starts with a clear plan, and we help you get one. Schedule a consultation, and bring wall measurements, a few photos of the room, and any style examples you like. We will talk through layout, drawers, and budget, and tell you what your wall can handle. Request your consultation with Wood Made Illinois and send us your photos to get started.

FAQ
How do I anchor a built-in dresser to the wall?
Secure it to wall studs or solid blocking, never drywall alone. Use steel brackets or cables from an anti-tip kit rated for the furniture’s weight, and follow the maker’s guidance on plywood backing.
Can I build a built-in dresser wall myself?
Simple versions are doable if you are comfortable measuring, using blocking, and scribing to uneven walls, as this closet built-ins guide outlines. Projects involving framing changes, cut studs, or rerouted wiring are better left to a carpenter.
What is the typical size of a 5-drawer dresser?
Sizes vary by design, so there is no single standard. For a built-in, we size the drawers to your wall and to what you store, so use your measurements and drawer heights rather than a store-bought dresser as the guide.
How deep should a wall closet be?
Closet makers list 12 and 16 inches as typical shelving depths. Drawer units usually need more depth than shelves, so plan the drawers first and set the closet depth around them.
Sources
- Picturehangsolutions
- How to Make DIY Closet Built-Ins – This Old House
- 25 Bedroom Built Ins Ideas That Add Storage, Style, and Resale Value
- WINSOON 1-9/16 in. H Steel 400 lb. Load Capacity Utility Cabinet Furniture Anchors Anti Tip Furniture Wall Straps (4-Pack)