For most homeowners, an LED strip mounted in a frosted diffuser channel handles both task and accent lighting better than any other option. Puck lights work best when you want a focused pool of light on a single object, and rigid bars earn their place where you need sturdy, consistent brightness across a long run. The one rule that governs every layout: front-mounted light illuminates work surfaces, backlighting creates a halo effect, and recessed placement disappears into the shelf itself. Plug-in strips suit most DIY budgets; hardwiring costs more upfront but disappears completely once the wall is closed up.
TL;DR:
- Mounting under-shelf lights at the front edge provides the best task lighting for surfaces like kitchen counters, reducing glare on glossy backsplashes.
- Backlighting creates a halo effect that enhances floating shelves and glass cabinets but can wash out dense book collections if overused.
- LED strips in aluminum channels with frosted diffusers extend lifespan and produce a continuous, glare-free line of light; driver sizing should be about 20% above total wattage.
- Power sources influence the installation’s permanence, with plug-in strips being easiest for DIY, hardwiring best for built-in permanence, and batteries suited for rentals or tight spaces.
- Built-in lighting during shelf construction offers a cleaner look, hides wiring completely, and avoids common mistakes like dust adherence or flickering caused by underpowered drivers.
Table of Contents
- Under Shelf Lighting Ideas for Every Room
- Where You Mount the Light Changes Everything
- Strip, Bar, or Puck: Which Fixture Format Fits?
- Plug-In, Hardwired, or Battery: Which Power Option Works?
- How to Install Under Shelf Lighting Without the Common Mistakes
- How Carpenters Build Lighting Into Shelf Joinery
- What Actually Matters When You Light a Shelf
- Get a Shelf Lighting Install That’s Built In, Not Bolted On
- Sources
Under Shelf Lighting Ideas for Every Room
The right concept depends less on your budget and more on how the shelf gets used. A kitchen counter needs even task light. A floating shelf in a living room wants drama. A closet just needs to turn on when you walk in.
Here are the layouts that consistently work, organized by room:
- Kitchen counters and backsplashes. Front-mounted strips or low-profile rigid bars with a dimmable driver light the countertop directly, cutting glare off tile or stone backsplashes during prep work.
- Floating shelves. A back-edge recessed strip, or a hidden channel routed into the underside, creates the illusion that the shelf is glowing from within rather than sitting on a bracket.
- Bookcases and display shelving. Low-output strips inside a diffuser keep spines readable without washing out a dense row of books; puck lights work better for spotlighting a single vase or framed photo.
- Pantries and closets. Battery-powered or plug-in bars with motion sensors turn on the moment you open the door, which explains why they’ve become the go-to choice for hands-free convenience in tight storage spaces.
- Glass-front cabinets and display cases. Mount strips along the top interior panel, or drop in recessed pucks for diffused light without glare bouncing off the glass.
A few styling notes worth keeping in mind:
- Rentals do best with adhesive puck lights or battery strips since nothing gets drilled into the wall.
- Warm white in the 2700 to 3000 Kelvin range flatters natural wood tones and reads as cozy rather than clinical.
- Higher CRI ratings matter most where color accuracy counts, like a kitchen counter where you’re checking if produce looks fresh.
Where You Mount the Light Changes Everything
Placement decides whether under-shelf lighting reads as functional or decorative, and the difference comes down to three mounting positions.
Mounting the strip at the front edge sends light straight down onto the surface below, which is exactly what you want over a kitchen counter. It reduces the glare that bounces off a glossy backsplash and puts light precisely where knives and cutting boards need it.
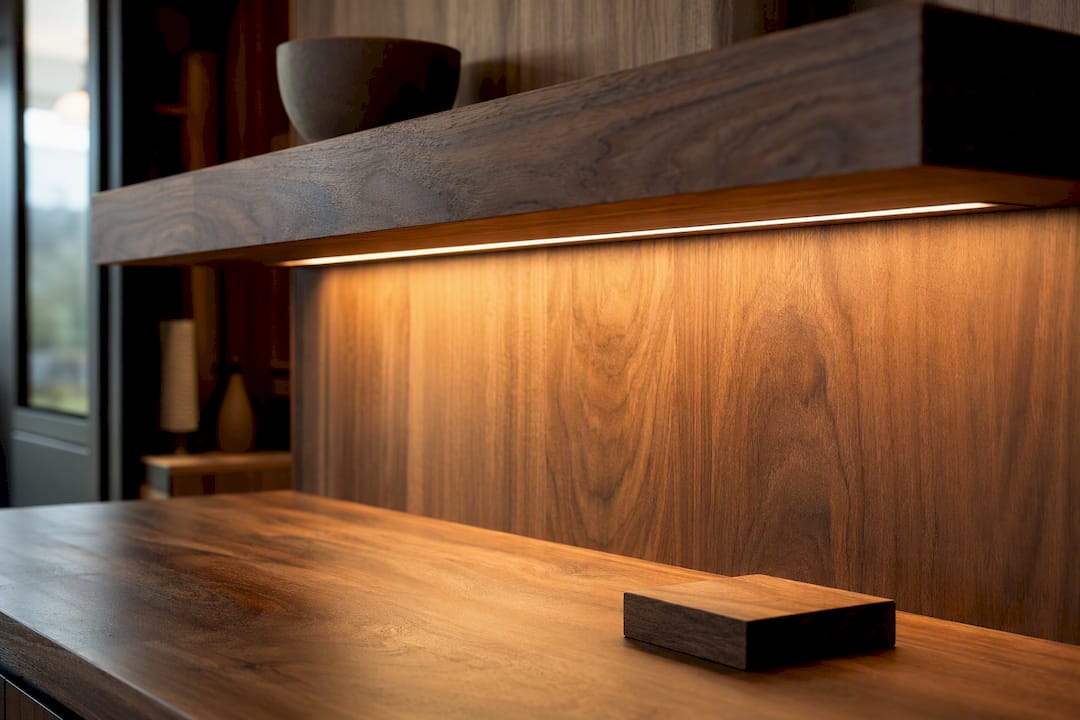
Move that same strip to the back edge and the effect flips entirely. Backlighting behind a small upstand or gap produces a halo that makes a floating shelf look like it’s hovering, with real depth behind it. It’s the technique that makes glassware and reflective objects glow, though a dense wall of books can look washed out under the same treatment. Dial the output down or backlight only select shelves in a full library.
Recessing the strip into a routed channel gives you a clean, continuous line with no visible hardware. Quick guidance on sizing:
- Deeper shelves (12 inches or more) need higher lumens per foot to reach the front edge.
- Task zones like kitchen prep areas should run brighter than display shelves.
- Darker wood finishes absorb more light and may need one step up in output from what a lighting calculator suggests for a light oak or painted surface.
Pro Tip: If you’re torn between front and back placement on a single shelf, run a short test strip with painter’s tape before committing to adhesive. Five minutes of testing beats redoing a whole run.
Strip, Bar, or Puck: Which Fixture Format Fits?
Three formats cover nearly every under-shelf lighting need, and each one solves a different problem.
LED strips work best for continuous runs where you want one unbroken line of light. Mounting the strip in an aluminum channel with a frosted diffuser prevents the visible dotting you get from bare diodes, and the metal channel pulls heat away from the LEDs, which extends their working life.
Linear bars are the sturdier cousin of the strip. They mount faster, hold their shape without a channel, and handle long runs at higher brightness without sagging.
Puck lights and mini spots exist for accent work. Downlights and pucks create focused pools, while strips give you continuous ambient or task coverage, and bars split the difference with low-profile brightness over distance.
Before buying anything, check these specs against your shelf’s actual needs:
- Lumens per foot — match to task (bright) versus accent (dim) use.
- Color temperature — 2700 to 5000K covers everything from cozy to clinical.
- CRI rating — aim for 90 or above anywhere color accuracy matters, like a kitchen or a display case.
- IP rating — required for anything near a sink, stovetop, or damp basement shelf.
One spec catches more DIYers off guard than any other: driver sizing. A driver rated about 20% above your total strip wattage prevents the overload and flicker that come from running a transformer at its exact limit.
Plug-In, Hardwired, or Battery: Which Power Option Works?
How you power the light determines how permanent, and how visible, the installation ends up.
- Plug-in strips are the easiest DIY route. Plan your cord routing before you stick anything to the wall, and use a slim cord channel to keep the cable from becoming an eyesore.
- Hardwired installs give you the cleanest, most permanent result, but this route usually calls for a licensed electrician to keep the wiring code-compliant and safe.
- Battery or rechargeable fixtures suit closets, pantries, and rental units where drilling isn’t an option. Check the runtime and brightness ratings carefully. Battery units dim faster than their plug-in counterparts as the charge drops.
- Smart controls need a matching protocol. Confirm your driver and controller both speak the same language, whether that’s Wi-Fi, Bluetooth, or Zigbee, and verify dimmer compatibility before you buy.
When you’re chaining multiple runs off one transformer, calculate total wattage first. Exceeding the recommended run length is one of the most common reasons a shelf light dims unevenly from one end to the other.
How to Install Under Shelf Lighting Without the Common Mistakes
A clean install comes down to preparation more than skill. Follow this sequence and you’ll avoid the mistakes that send most DIYers back to the hardware store:
- Measure the full length of the shelf and check available depth for a channel or recess.
- Buy about 10% more strip than your measurement calls for. Cutting mistakes happen, and LED strip can only be cut at marked points.
- Clean the mounting surface with isopropyl alcohol. Dust and oil are the number one reason adhesive fails within a few months.
- Use an aluminum channel on any surface where standard adhesive might struggle, like textured wood or painted MDF.
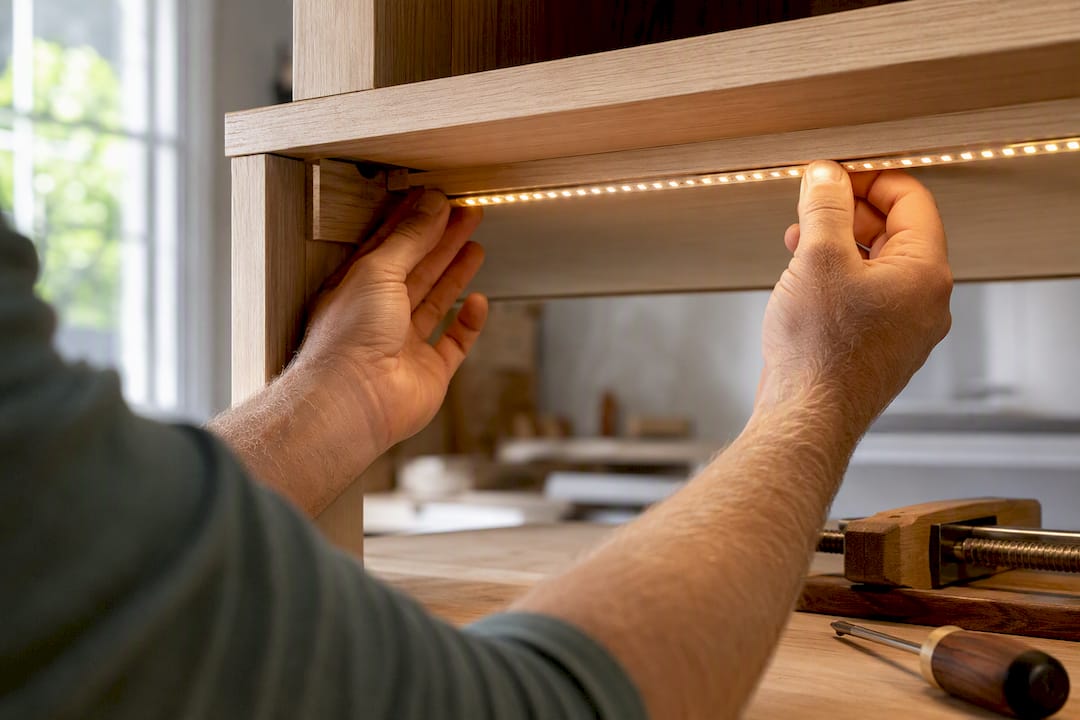
- Test the full run with power connected before the adhesive fully sets. Catching a dead section now saves you from prying up a permanently bonded strip later.
- For deep shelves, stagger two strips or use a deeper recess to avoid visible diode dotting on the surface below.
Common problems trace back to a short list of causes: peeling adhesive means the surface wasn’t clean or the channel wasn’t used; flicker usually points to an underpowered driver; a color temperature that looks wrong in person almost always means the Kelvin rating was mismatched to the room’s other lighting.
Pro Tip: Test every strip and connection before the glue sets, not after. It’s the single step that prevents the most re-dos in a shelf lighting project.
Any hardwired run needs a licensed electrician and a proper junction box. That’s not a place to cut corners.
How Carpenters Build Lighting Into Shelf Joinery
Lighting looks best when it’s planned into the shelf, not added after the fact. A routed channel cut along the underside edge during construction hides the strip and its wiring completely, which is the same principle behind hidden lighting in floating shelves that reads as seamless rather than retrofitted.
A few things we account for when building shelving with lighting in mind:
- Small upstands at the back edge give backlighting somewhere to hide while still throwing a halo onto the wall.
- Warm Kelvin temperatures (2700 to 3000K) pull the best color out of walnut, oak, and other common wood tones we work with.
- We recommend hardwiring during a remodel, when walls are already open, and plug-in retrofits for finished spaces where cutting into drywall isn’t worth the disruption.
Readers planning a full custom shelving or floating shelf project get the cleanest results when lighting is part of the design conversation from day one, not an afterthought bolted on after the wood is already cut.
What Actually Matters When You Light a Shelf
Most articles on this topic treat under-shelf lighting as a shopping decision: pick a strip, pick a color temperature, done. That advice undersells the real variable, which is the shelf itself. A strip that looks flawless on a thin, painted MDF shelf will dot and shadow differently on a thick slab of walnut, because the wood’s depth and finish change how light scatters across the surface.
The conventional wisdom also overweights brightness. Homeowners default to buying the highest lumen output available, assuming brighter always reads as better. In practice, a dimmable driver at 60% output usually looks more intentional than a fixed strip blasting at full strength, especially over open shelving where the light bounces back into the room.
If you take one thing from this guide, prioritize the mounting method over the fixture brand. A cheap strip in a well-routed aluminum channel outperforms an expensive one stuck directly to raw wood with nothing to diffuse or cool it. Get the joinery and placement right first. The fixture choice matters far less than where and how it’s installed.
— Wood
Get a Shelf Lighting Install That’s Built In, Not Bolted On
Custom shelving, floating shelves, built-in storage, and full kitchen installs can be built with lighting routed into the joinery from the start, not stuck on after the fact. That’s the real advantage over a weekend adhesive-strip project: no visible cords, no guesswork on driver sizing, and no exposed channel where dust collects.

Hire a professional when you want a recessed route cut cleanly into solid wood, code-compliant hardwiring during a remodel, or a stain and Kelvin pairing that actually matches the rest of your kitchen. Homeowners can start with a design consultation to walk through placement, power options, and finish choices before any wood gets cut. Visit our trusted local carpentry experts page to see current project examples and request a quote for your space.
Sources
- Bookcase, Shelf and Joinery Lighting Ideas – John Cullen Lighting
- Shelf lighting ideas: how to light up shelves for a chic look | Dako Furniture
- Undershelf Lighting: A Complete Guide – D and G Flooring
- The Essential Guide to Floating Bookshelf Lighting – Shelfology