Yes, weatherstripping wood windows is almost always worth the effort, but the order of operations matters more than the strip you buy. Repair the sash and frame, air-seal the gap between the frame and the rough opening, then install kerf-insert or spring bronze weatherstripping suited to each location, and finish with storm panels. Sealing air leaks this way can cut heating and cooling costs by 10% to 20%, with older, draftier homes often seeing more.
TL;DR:
- Weatherstripping with kerf-insert or bronze profiles lasts longer and performs better than adhesive foam, especially in high-motion sash channels.
- Repair rot, scrape paint buildup, and seal the gap between the frame and rough opening before installing weatherstripping to maximize efficiency.
- Proper installation includes routing grooves, sizing profiles carefully, and evenly spacing nails or brads to avoid warping and ensure long-term performance.
- Pairing weatherstripping with storm windows improves thermal performance, but proper ventilation is essential to prevent moisture buildup.
- Regularly inspect, reseat, and fix issues with weatherstripping annually to maintain air seals and prevent drafts.
Table of Contents
- Quick checklist: inspect, gather tools, then decide
- Weatherstripping profiles and where to use them
- Repair and air-seal the frame before you weatherstrip
- Step-by-step: weatherstrip a double-hung wood window
- Using storm windows and piggyback panels with weatherstripping
- Maintain seals and fix common issues
- Why we believe in repairing wood windows before replacing them
- Sources
- FAQ
Quick checklist: inspect, gather tools, then decide
Before you buy a single foot of weatherstripping, walk the window like a carpenter would. A few minutes of honest inspection save hours of wasted material later.
- Check for rot at the sill, bottom rail, and lower corners of the stiles, where water collects and paint fails first.
- Test sash operation: does it slide freely, bind, or refuse to stay open without a prop?
- Look at paint buildup in the channels where weatherstripping will seat, since thick paint layers prevent a tight fit.
- Measure the gap between sash and jamb with a feeler gauge or playing card to size your weatherstripping correctly.
- Inspect sash cords, chains, or spring balances for fraying, breakage, or uneven tension.
For tools, a basic kit covers most double-hung projects: a router with a straight bit for kerf cuts, a flat pry bar, a sharp utility knife, a small hammer or brad nailer, and a caulk gun for air-sealing work. Add sandpaper, wood filler, and a scraper for paint removal.
Pro Tip: If a sash wobbles in its channel or the wood feels soft under an awl, address the structure before you weatherstrip. A tight strip on a loose or rotted sash just masks a bigger problem.
Windows with widespread rot, failed glazing, or structural sag are better candidates for a wooden window repair specialist than a weekend project.
Weatherstripping profiles and where to use them
Not every strip belongs in every channel. The trade distinction that matters most is between sliding surfaces, which need low friction, and fixed contact points, which can tolerate more compression.
- Pile or brush weatherstripping slides easily and suits the vertical jamb channels where the sash moves up and down.
- Silicone or vinyl bulb strips compress well against a fixed stop, making them a good fit for the head jamb or sill.
- Spring or leaf bronze is a thin metal strip that flexes against the sash without adding friction, a longtime favorite for jamb sides and meeting rails.
- Interlocking metal weatherstripping offers excellent air sealing at the meeting rail but requires precise installation.
- Kerf-insert strips fit into a routed groove and combine durability with a low profile, ideal for both jambs and meeting rails.
- Adhesive foam tape is the cheapest option and the least durable, prone to failure in any channel with regular sliding motion.
Trade sources consistently favor kerf-insert and nail-on spring or bronze profiles for wood sash, noting that adhesive-backed foam often fails where the sash moves against it repeatedly. Avoid compression-style strips on vertical sliding channels: they create drag, wear unevenly, and shorten the life of the seal.
Reducing air leakage around window perimeters and sashes is one of the more reliable ways to lower a home’s heating and cooling costs. Budget tiers run roughly from basic adhesive foam at the low end, to pile and vinyl bulb in the middle, to bronze and kerf-insert systems at the top, which cost more upfront but often outlast the paint job around them.
Repair and air-seal the frame before you weatherstrip
Weatherstripping performs only as well as the surface it seats against. Skipping repair steps is the most common reason a fresh installation still feels drafty.
- Remove the interior stop carefully, prying gently near each nail to avoid splitting the old wood.
- Assess the sash rails and stiles for rot, probing with an awl at corners and joints.
- Replace any soft or crumbling sections rather than filling over them, since filler alone won’t hold a fastener or a groove.
- Scrape and sand paint buildup from the channels where weatherstripping will seat, restoring the original clearance.
- Lubricate pulleys, replace frayed sash cords, or convert to spring balances if the counterweight system is failing.
- Seal the gap between the window frame and the rough opening with low-expansion foam, backer rod, and paintable caulk, following the same logic building scientists use for new installations.
That last step carries more weight than most homeowners expect. Oak Ridge testing found that sealing the interior side of the gap between a window unit and the rough opening reduced equivalent leakage area from 28.2 cm2/m2 to 0.5 cm2/m2, a reminder that the biggest drafts often come from the wall-to-frame joint, not the sash perimeter itself.
Pro Tip: A window can look drafty at the sash and actually be leaking hardest around the frame. Check both before you assume the weatherstripping is the problem.
Extensive rot, reglazing needs, or structural sag in the frame are signs to bring in a window sash repair professional rather than pushing forward with cosmetic fixes.
Step-by-step: weatherstrip a double-hung wood window
This sequence covers the most common project type homeowners tackle: a double-hung sash with worn or missing weatherstripping.
- Remove the interior stop, then lift out the lower sash, noting the cord or chain attachment before disconnecting it.
- Remove the parting bead to free the upper sash, storing it intact if it can be reused.
- Rout a groove along the meeting rail and bottom rail for kerf-insert strip, keeping the cut centered and consistent in depth.
- Insert the kerf strip, or fit pile weatherstripping into new or existing beads, depending on the profile chosen for that location.
- Cut and fit new side beads with pile or spring bronze, sized to the jamb channel width you measured earlier.
- Reinstall both sashes, replace the parting bead and interior stop, and test the full range of motion before setting nails permanently.
A few technical details make the difference between a seal that lasts and one that fails within a season:
- Keep kerf depth shallow enough that the strip sits proud without being crushed at rest.
- Space brads or nails evenly along beads, roughly every 6 to 8 inches, to avoid warping the strip.
- Recess the weatherstrip slightly in the meeting-rail kerf so the bulb or pile is only partially compressed at contact, since over-compression shortens service life and obstructs operation.
Once reassembled, run a few informal performance checks. Slide the sash through its full range and feel for binding. Hold a lit incense stick or a lightweight tissue near the seams on a windy day and watch for movement, an easy stand-in for a blower-door test. A tight, even seal should let the sash glide without letting outside air through at any point along the frame.
Using storm windows and piggyback panels with weatherstripping
Weatherstripping alone closes the gaps around a sash. Storm windows add a second layer that traps still air and multiplies the benefit.
- Exterior storm windows mount on the outside of the frame and are the traditional choice for period homes, visible from the street but effective and reversible.
- Interior removable storm panels fit inside the primary sash and can be taken down seasonally, a common approach in colder climates.
- Permanent interior storm windows, sometimes called piggyback panels, stay in place year-round and blend into the window trim.
Building America guidance recommends rehabilitating the primary sash and pairing it with interior or exterior storm windows as an effective upgrade that preserves historic character while improving thermal performance. Restored wood sash with a well-fitted storm can approach the performance of a new replacement window, without losing the original glass, muntins, or proportions that define an older home’s character.
Pairing weatherstripping with a storm panel is one of the more effective ways to improve a historic window’s performance without replacing it. The one caution is condensation: a tightly sealed primary sash paired with a poorly ventilated storm can trap moisture between the two. Rehab the primary sash first, choose a storm with weep holes or slight ventilation, and the risk drops considerably.
Maintain seals and fix common issues
Weatherstripping is not a one-time install. Even the best profile needs an annual check to keep performing.
- Inspect pile and bulb strips each fall for compression, tears, or gaps where the sash no longer contacts evenly.
- Reseat strips that have shifted in their channel rather than replacing them outright, when the material itself is still sound.
- Fix bunching by re-routing the strip path or trimming excess length, since bunched pile catches and wears faster.
- Address binding by reorienting spring or leaf bronze strips, which can lose their set shape over years of use.
- Replace adhesive foam that has hardened, cracked, or lost its bond, since it rarely holds up past a few seasons.
If the sash itself has developed new gaps, warping, or glazing failure, another strip won’t fix it. That’s a sign the window needs deeper rehabilitation, not another round of weatherstripping.
Why we believe in repairing wood windows before replacing them
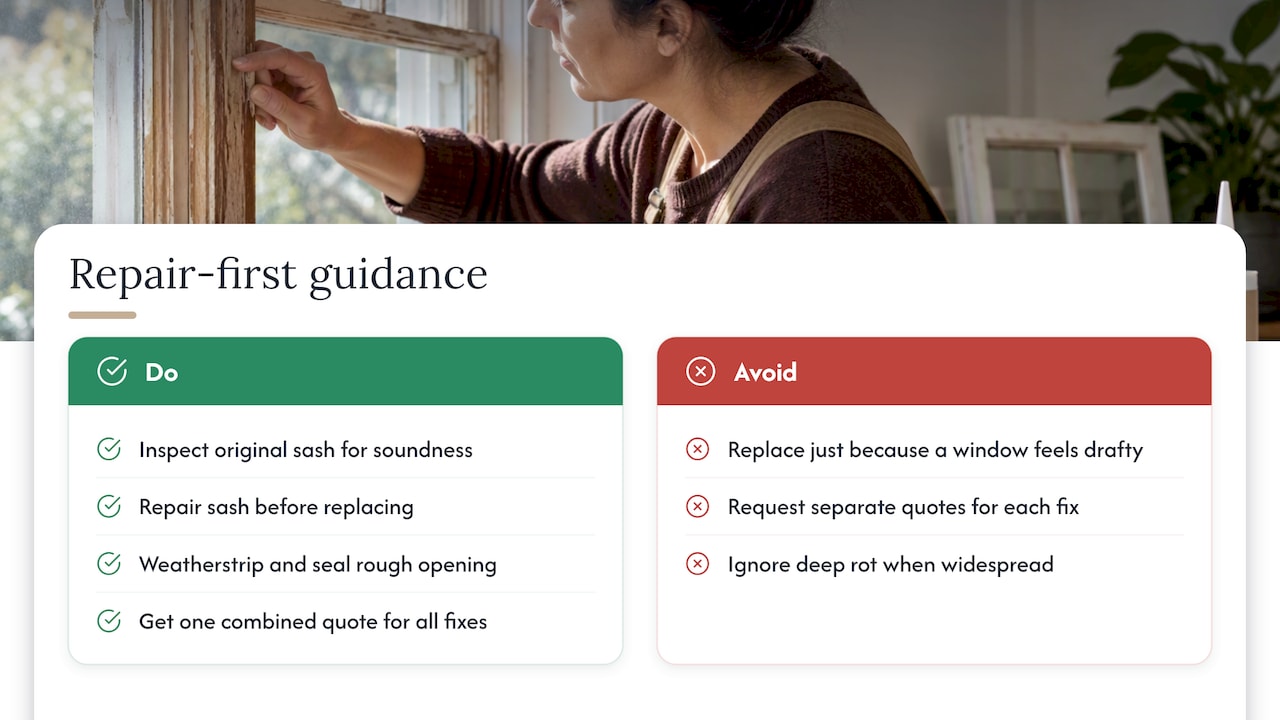
Old-growth wood sash were built to last generations, and in our experience, most of them still can with the right attention. The instinct to rip out an original window because it feels drafty is usually a mistake: the wood is often sound, and the draft is a symptom of failed weatherstripping or an unsealed rough opening, both fixable without losing the window’s original glass and proportions.
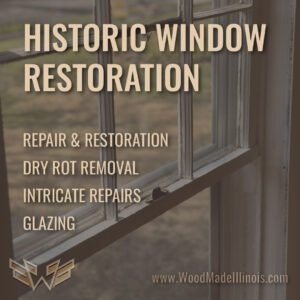
A company with extensive combined carpentry experience can handle projects like these, including historic window restoration for homeowners. When rot runs deep, a house has many windows needing attention, or the time investment outweighs the DIY appeal, a realistic quote should cover sash repair, weatherstripping, and rough-opening sealing as one job, not three separate fixes. If that sounds like your project, reach out to see what a tailored plan looks like for your home.
— Wood
Sources
For technical depth on air sealing, the Energy Star guidance and Building Science Education’s rough-opening research are strong starting points. For rehabilitation strategy, consult the Building America measure guide. For hands-on steps, Fine Homebuilding’s weatherstripping guide and This Old House offer practical, trade-tested instruction.
- Energy Star — Why seal and insulate
- Building Science Education — Rough-opening flashing: air sealing
- Building America measure guide — Wood window repair, rehabilitation, and replacement
- Fine Homebuilding — Weatherstripping traditional wood windows
FAQ
What is the best weatherstripping for old wood windows?
Kerf-insert strips and nail-on spring or leaf bronze tend to outlast adhesive foam, especially in channels where the sash slides regularly. Trade sources note that adhesive-backed foam often fails in high-motion side channels, while bronze and kerf-insert profiles hold up over many seasons.
How do you seal a wood window?
Start by repairing any rot and sealing the gap between the window frame and the rough opening with foam, backer rod, and caulk. Then install weatherstripping suited to each location: pile or bronze on sliding jamb channels, and bulb or kerf-insert strips at the head, sill, and meeting rail.
What are the common problems with weatherstripping on windows?
Bunching, binding, and adhesive failure are the most frequent issues, often caused by the wrong profile for a sliding surface or a strip installed over unrepaired paint buildup. Reorienting spring strips, re-routing bunched pile, or switching to a kerf-insert profile usually resolves these without a full window replacement.
How do you weatherstrip around a window?
Remove the interior stop and sash, rout or fit grooves at the meeting rail and side channels, then install the appropriate profile for each location before reassembling. Testing sash operation and air-sealing the frame-to-wall gap afterward ensures the new weatherstripping performs as expected.