You can tame home office cable chaos in a single afternoon by following five focused actions. The single most impactful move is relocating your power strip under the desk, which eliminates most floor cable runs and simplifies every routing decision that follows. According to a practical setup guide, a tidy desk takes about 30 minutes and $55–$120 in common accessories, with under-desk trays, cable sleeves, and Velcro ties delivering the highest visible return.
Here are five immediate actions, each with a time and cost estimate:
- Move the power strip under the desk. 20 minutes, $0–$25 for a clamp bracket if needed. This one change removes more visible cable than anything else.
- Bundle vertical drops with a zipper sleeve. 15 minutes, $8–$15 for a JOTO-style sleeve. Gathers four to six cables into one clean column.
- Stick adhesive cable clips along the desk edge. 10 minutes, $6–$12 for a pack of VAMRONE-style clips. Routes chargers and data cables out of the work surface.
- Label both ends of every cable. 10 minutes, $0 with masking tape and a marker. Saves significant time during any future swap or troubleshooting.
- Secure loose slack with hook-and-loop Velcro ties. 5 minutes, $5–$10 for a roll. Keeps bundled cables from unraveling over time.
Pro Tip: If you rent, start with every no-drill option before committing to adhesive or screw-mounted hardware. Clamp-on trays, hook-and-loop ties, and pressure-fit grommets are fully reversible and leave no marks.
Key Takeaways
Effective home office cable management starts with moving the power strip under the desk, then building outward with sleeves, clips, and raceways before committing to any permanent in-wall or carpentry solution.
| Point | Details |
|---|---|
| Start with the power strip | Moving it under the desk eliminates most floor runs and simplifies all subsequent routing. |
| Budget $55–$120 for quick fixes | Under-desk trays, Velcro ties, and cable sleeves cover most desks in about 30 minutes. |
| Label both ends of every cable | Labeling before routing saves significant time during any future swap or troubleshooting session. |
| Choose reversible fixes first | Clamp-on trays and adhesive clips solve most problems without drilling; upgrade only if needed. |
| Woodmadeillinois for permanent finishes | Custom built-ins with integrated cable chases deliver a finished result no surface product matches. |
Table of Contents
- How do you map cable lanes before buying anything?
- What are the fastest, cheapest fixes for cable clutter?
- Under-desk trays and surface pass-throughs: which mounting style fits your setup?
- How do you handle vertical cable drops and wall-mounted devices?
- When does a permanent in-wall or carpentry solution make sense?
- Tools, materials, and realistic time and cost for each project
- When should you DIY, and when is it worth hiring a pro?
- A carpenter’s perspective on what a tidy cable outcome really changes
- Woodmadeillinois builds permanent cable solutions for Central Illinois home offices
- Where to buy the recommended products and read further
- Sources
How do you map cable lanes before buying anything?
The audit comes first. Unplug every cable, lay them across the desk, and count them by type. Labeling both ends before you re-route is the step most people skip, and it costs them an hour of confusion the next time they swap a monitor.
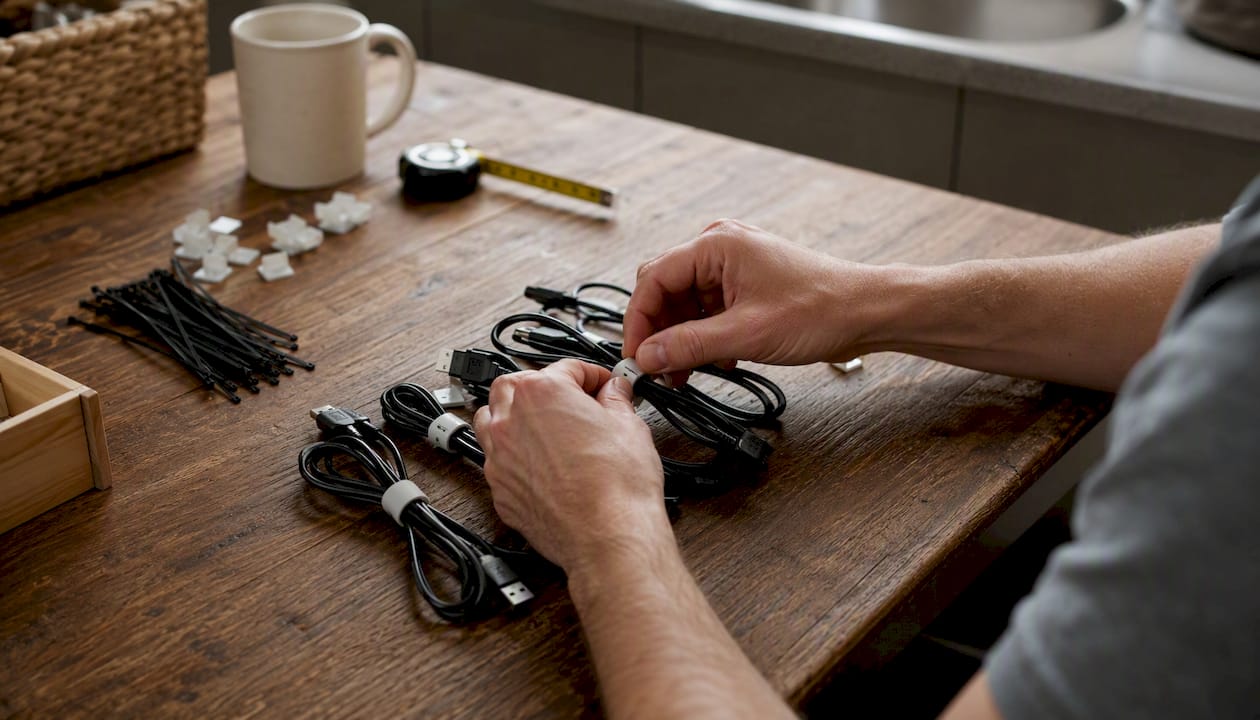
Once labeled, sort cables into three functional lanes:
Power lane (rear of desk): power bricks, the strip’s main cord, and any UPS unit. These are heavy, rarely moved, and benefit from a dedicated tray or J-channel raceway running along the back edge.
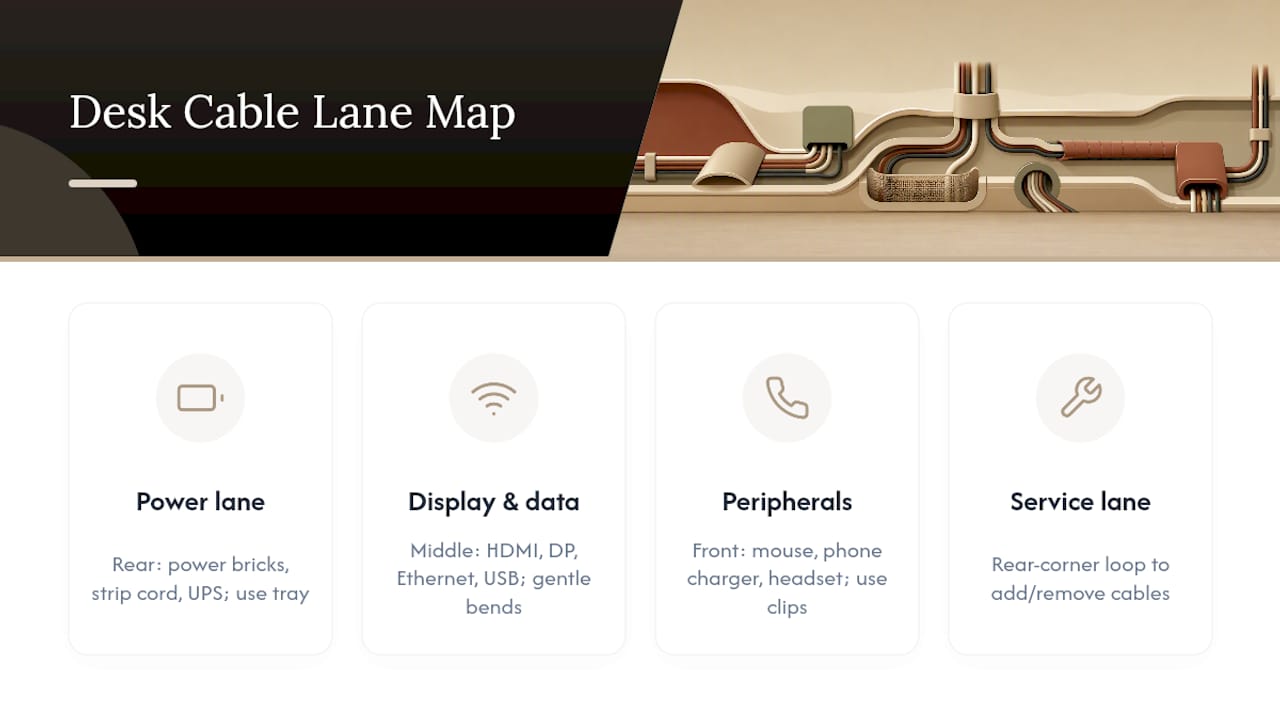
Display and data lane (middle): HDMI, DisplayPort, Ethernet, and USB-A hubs. These cables are thicker and stiffer, so they need a wider path and gentle bends. Route them in the center of any tray or sleeve to avoid sharp kinks at connectors.
Peripherals and chargers lane (front edge): mouse cable, phone charger, headset, and anything you plug and unplug daily. Keep this lane accessible. Adhesive clips along the front desk edge work well here because you can pop a cable in or out without disturbing the other two lanes.
Plan one “service lane” — a short, easily reached section of each bundle where you can add or remove a cable without dismantling the whole run. This is especially useful near the desk’s rear corner, where a small loop of extra slack lets you pull a cable forward without yanking the bundle apart.
Pro Tip: On a standing desk, test the full height travel before finalizing any route. A cable that clears the motor column at sitting height may bind or pull taut at full standing height. Add a loose S-loop near the column to absorb the travel.
What are the fastest, cheapest fixes for cable clutter?
Five targeted fixes — adhesive clips, zipper sleeves, grommets, raceways, and in-wall kits — address nearly all desk cable problems and cost well under $100 when combined. For most home offices, the first three are enough.
Adhesive cable clips
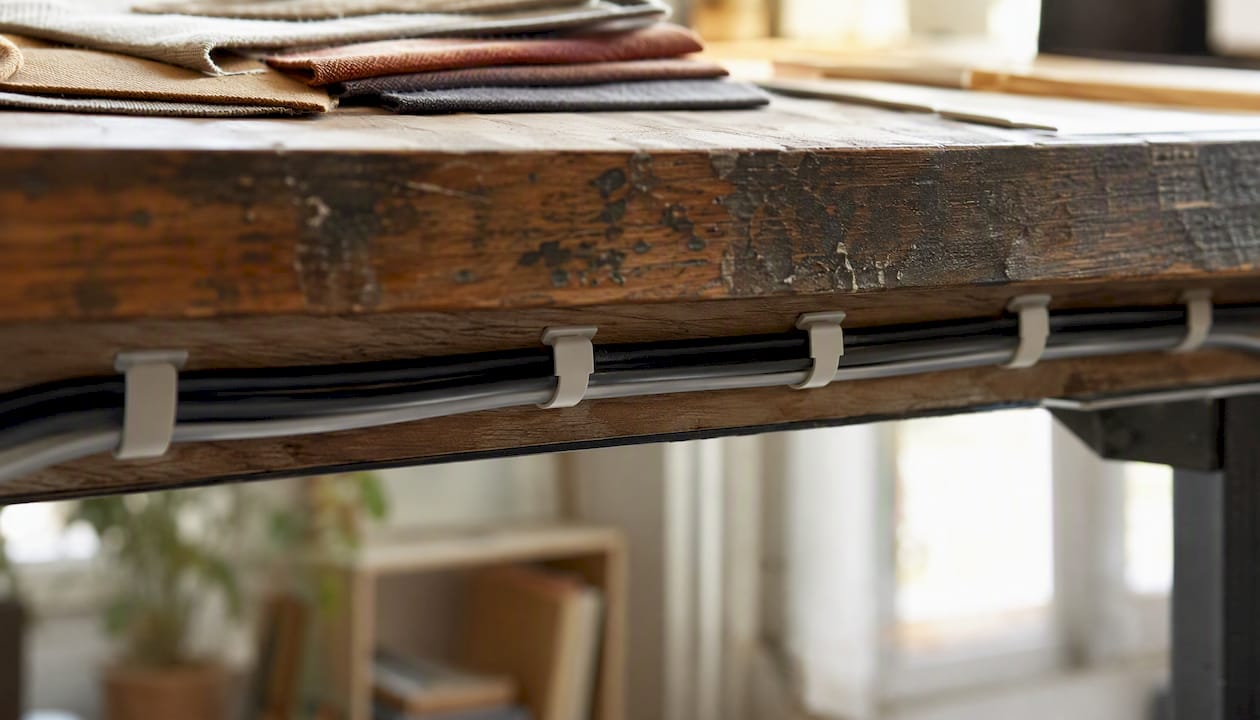
VAMRONE-style self-adhesive clips (available on Amazon, typically $6–$12 for 20–30 clips) stick to the underside of the desk edge or along the back panel. Press the clip base firmly for 30 seconds, wait 24 hours before loading cables, and route one cable per clip for the cleanest result. Label the cable before clipping so you can identify it without pulling the whole run.
Hook-and-loop Velcro ties
Reusable hook-and-loop ties outperform zip ties in nearly every home office scenario. Zip ties are permanent; one wrong cut and you’re re-routing the whole bundle. A roll of Velcro tie material (roughly $5–$10) lets you adjust, add, or remove cables without tools. Use them every 8–10 inches along a bundled run to keep the shape consistent.
JOTO zipper cable sleeve
The JOTO zipper sleeve is a flexible neoprene tube with a zipper running its full length. It accepts four to six cables comfortably and allows mid-run exits — you can unzip a section, pull out one cable, and re-zip without disturbing the rest. Sizes run from 19 to 39 inches; measure your vertical drop before ordering. Price: $8–$15.
Desk grommets
A grommet gives cables a clean pass-through from the desk surface to the tray below. Most require a 2.5-inch hole saw and about 20 minutes. Plastic snap-in grommets cost $4–$8 each and come in black, white, or brushed nickel to match most desks.
Pro Tip: Choose Velcro ties over zip ties for virtually every home office application. They cost about the same, take no longer to install, and make every future update a two-second task instead of a cable-cutting exercise.
Under-desk trays and surface pass-throughs: which mounting style fits your setup?
The under-desk tray is the backbone of any durable cord management solution. It holds the power strip off the floor, contains slack, and keeps the entire power lane invisible from the front. Grommets handle the surface side of the same problem, giving cables a tidy path from desk top to tray below.
| Feature | No-drill clamp/adhesive tray | Screw-mounted tray |
|---|---|---|
| Installation time | 15–20 minutes | 30 minutes |
| Weight capacity | 5–10 lbs typical | 15–25 lbs typical |
| Renter friendly | Yes | Requires patching holes |
| Long-term durability | Adhesive may weaken over time | Stable for years |
| Best for | Lighter strips, thin desks | Heavy strips, thick desktop |
For a professional-grade option, the Humanscale NeatTech is an under-desk channel system designed to hold a full power strip and route cables in a structured, enclosed channel. It mounts via clamp or screw and keeps cables accessible from the front panel. It suits setups where cable access and airflow both matter, particularly multi-monitor workstations with several power bricks.
Mount the power strip inside the tray first, then route cables into it from above. This sequence prevents the common mistake of loading cables before the strip is secured, which forces you to re-route everything when the strip shifts.
For standing desks, position the tray away from the motor column by at least two inches. Cables routed too close to the column can bind during height adjustment, stressing connectors over time.
Pro Tip: Mount the power strip to the inside of the tray with a small Velcro strap before attaching the tray to the desk. A strip that slides inside an open tray will shift every time you pull a plug.
How do you handle vertical cable drops and wall-mounted devices?
Vertical runs are where most home office setups unravel visually. A tidy desk surface means nothing if six cables cascade down the leg in a loose tangle. The fix is a two-part approach: a zipper sleeve for the bundled drop, and a raceway for any wall segment that runs to an outlet or wall-mounted device.
- JOTO zipper sleeve for vertical bundles: Measure the drop from desk height to the floor or cable exit point, then cut the sleeve to length. Leave a 3-inch service exit at the top where cables enter, so you can add or remove one without unzipping the full run.
- Adhesive J-channel raceways: These plastic channels stick to the wall or baseboard and snap closed over cables. They work well for short horizontal runs from a wall outlet to the desk leg. Install them every 12–18 inches with the provided adhesive strips, or use screws for a more permanent hold.
- D-Line paintable raceways: D-Line makes a flat-profile raceway that accepts standard latex paint, making it nearly invisible against a painted wall. This is the right choice for any run longer than 24 inches on a finished wall. Available at Home Depot and online, typically $15–$30 for a starter kit.
Safety note: never pinch a power cord inside a closed raceway. Power cords generate heat under load, and compression can damage insulation over time. Keep power cables in a raceway only when the raceway is sized generously and the cord is not coiled inside it. Keep surge protectors accessible, not buried behind furniture, so you can reach the reset switch and the individual outlets.
Secure raceways every 12–18 inches to prevent sagging, which creates stress points on cables at each clip location.
When does a permanent in-wall or carpentry solution make sense?
Reversible fixes solve most problems. But when a monitor is wall-mounted, when a TV sits above a fireplace, or when the finished look of a room genuinely matters, an in-wall solution is worth the additional effort.
The Legrand OnQ in-wall cable management kit is the most widely available DIY option for this category. The kit includes two recessed wall boxes, a low-voltage mounting bracket, and a pre-wired power connection that avoids hardwiring. The basic workflow: cut two holes in the drywall (one behind the device, one near the outlet), feed cables through the wall cavity, and snap the recessed boxes into place. No new circuits, no permit required for the low-voltage portion in most jurisdictions — though you should confirm local code before cutting.
Pro Tip: Use the Legrand kit only for signal cables (HDMI, Ethernet, USB) and the kit’s own power solution. Never run a standard extension cord through a wall cavity — it violates the National Electrical Code and creates a fire risk. For hardwired power at a new location, call a licensed electrician.
For a fully finished result — flush panels, matching trim, integrated cable chases built into the wall or desk surround — custom carpentry is the appropriate next step. A built-in desk with a routed cable chase and an access panel behind it produces a result no surface-mounted kit can match, and it adds to the room’s character rather than working around it.
DIY in-wall kit: 2–4 hours, $40–$80 in materials. Hiring a pro for a custom built-in with integrated cable routing: typically a half-day to full-day project, priced per site visit and scope.
Tools, materials, and realistic time and cost for each project
Measure the actual cable runs before buying anything. A cable that looks like 36 inches on a desk often needs 48 inches once routed around corners and through a tray.
Tools you’ll likely need: a drill (for screw-mounted trays and grommets), a 2.5-inch hole saw (for grommets), a clamp driver or screwdriver, a utility knife (for trimming sleeves and raceways), and a measuring tape. For in-wall work, add a drywall saw and a stud finder.
Adhesive products lose grip over time, particularly in warm rooms or on surfaces with any texture or finish. If a tray or raceway will carry significant weight or must stay put for years, prefer screws or clamps over adhesive pads. Test one adhesive clip in an inconspicuous spot before committing to a full installation.
Buy one of each product type, install it, and live with it for a week before ordering multiples. What looks right in a product photo often needs adjustment once it meets your actual desk geometry.
When should you DIY, and when is it worth hiring a pro?
Most quick-fix cable work is genuinely within reach for any careful homeowner. Adhesive clips, Velcro ties, zipper sleeves, and clamp-on trays require no special tools and carry no safety risk. The no-drill, reversible approach is the right starting point for nearly everyone: if a clamp-on tray and an adhesive raceway solve the problem, you may never need anything more permanent.
Hire a professional when the work involves:
- Drywall cutting or patching for in-wall cable chases
- New electrical circuits or hardwired outlets at non-standard locations
- Custom built-ins where cable routing integrates with cabinetry, shelving, or a desk surround
- Standing-desk travel complexity that requires custom cable management integrated into the desk frame
- Finish quality that must match existing millwork or trim
Questions worth asking any contractor before signing: Does this work require a permit in my municipality? Will you leave an access panel for future cable changes? What is the warranty on the installation? How do you handle cable additions after the job is complete?
Before the contractor arrives, photograph your current cable layout from three angles and sketch a labeled diagram showing which cable runs where. This saves time during the site visit and prevents miscommunication about what stays and what moves.
Pro Tip: Document your cable layout with photos and a simple labeled sketch before any contractor visit. A five-minute photo session can save an hour of on-site explanation and prevents the “I didn’t know that cable was there” conversation mid-project.
For home office builder projects in Central Illinois, Woodmadeillinois offers site visits to assess routing needs before any work begins, which removes the guesswork from scoping a built-in cable solution.
A carpenter’s perspective on what a tidy cable outcome really changes
The before-and-after of a well-executed cable project is rarely about the cables themselves. What changes is the room. A desk with cables cascading to the floor reads as unfinished, regardless of how good the monitor or chair is. Once the cables disappear into a tray, a sleeve, or a built-in chase, the eye moves to the things that actually matter: the work surface, the light, the materials.
One project that illustrates this well: a client in Central Illinois had a corner desk with two monitors, a NAS drive, and a standing-desk frame. The cable run from the desk to the wall outlet crossed 14 feet of open floor. After a built-in desk surround with an integrated cable chase and a recessed outlet box, that 14-foot run became invisible. The client’s comment was that the room finally felt like an office rather than a storage space with a desk in it. That shift in perception is what a finished cable solution actually delivers — not just tidiness, but a room that takes itself seriously.
Woodmadeillinois builds permanent cable solutions for Central Illinois home offices

For homeowners who want a result that goes beyond surface-mounted products, Woodmadeillinois designs and installs custom built-in solutions that integrate cable routing directly into the carpentry. A built-in desk surround, a recessed cable chase, or a wall-panel installation with an access door produces a finish that no tray or raceway can replicate — and it holds up for the life of the room.
The service covers a site visit and custom routing plan, in-wall or built-in cable concealment, permit coordination where required, and a clean finish that matches your existing trim and materials. Most small home-office jobs in Central Illinois complete within one to two days, and the team cleans up completely before leaving. Browse home office makeover examples to see finished projects, then reach out to trusted local carpentry experts to schedule a consultation.
Where to buy the recommended products and read further
- Amazon desk wire management: The broadest selection of trays, clips, sleeves, and raceways in one place, with user reviews that reflect real desk dimensions and mounting surfaces.
- Workstationsetup: Detailed setup walkthrough with product recommendations and time estimates for each stage.
- MakeUseOf: five cable management tricks: Practical coverage of the five core product types, including JOTO, D-Line, and Legrand examples.
- Gruv: Step-by-step renter-friendly workflow with a two-pass install method.
- CircuitSeek: desk cable management in 20 minutes: Focused on the power-strip-first approach with practical placement photos.
- DeskSetup Pro: how to organize desk cables: Labeling and measurement checklist plus cable-length guidance.
- Home organization systems: For readers in the Chicagoland area who want professional organization beyond cable management.
- Woodmadeillinois home office builder: Project gallery and contact point for Central Illinois homeowners who want a custom built-in solution with integrated cable routing.
Sources
- Desk Cable Management | Complete Setup Guide (2026)
- 5 cable management tricks every desk setup needs
- Cable Management Home Office Setup for No-Drill Easy Updates
- Desk Cable Management: How to Get Rid of Cable Chaos in 20 Minutes
- How to Organize Cables on Your Desk — DeskSetup Pro