A corner pantry build comes down to four decisions made in this order: the type of pantry (walk-in, blind cabinet or open shelving), the footprint your corner allows, the shelf depth and spacing for what you store, and whether the walls are square enough to build into. Get those right on paper and the construction is mostly careful measuring, level supports and patient fitting. This guide walks through each decision with the numbers, then the build steps, then the mistakes that cost homeowners the most.
TL;DR
- Measure the corner first and check that the walls meet at 90 degrees. Out-of-square walls throw off a build before it starts.
- Typical pantry shelves run 14 to 16 inches deep, with 10 to 12 inches for high shelves. Deeper shelves hide food.
- Space shelves 16 to 18 inches apart for large items and 8 to 10 inches for small ones, with the bottom shelf 18 to 24 inches off the floor.
- Use 2×2 supports secured into studs, add a middle support on any span over 1 foot, and plan door clearance before you cut anything.
- Tight, out-of-square or historic corners are worth handing to a finish carpenter. We build these in Central Illinois.
Table of Contents
- Choose the type of corner pantry first
- Measure the corner before you design anything
- Pantry cabinet dimensions that work
- Corner pantry shelving: reach the back of the corner
- Materials and tools for a built corner pantry
- Step-by-step: build corner pantry shelving
- Mistakes that ruin a corner pantry build
- Our perspective: where DIY ends and carpentry begins
- Have us build it
- FAQ
- Sources
Choose the type of corner pantry first
A corner can hold three very different pantries, and the choice drives every dimension that follows.
- Walk-in corner pantry. A full-height room-within-the-kitchen. It holds the most, but it needs floor space for you to stand and turn, plus a door that does not collide with anything.
- Blind corner pantry cabinet. A tall cabinet set into the corner, usually with a face-frame door on one wall and storage that runs back into the corner. It reads as part of your cabinetry.
- Open corner shelving. Shelves that wrap two walls. This is the cheapest and fastest option and works well in a mudroom, a laundry room or the end of a galley kitchen.
If a pantry has enough side wall space, shelving can continue around the corner, which is how most open corner builds get their capacity. For a closed corner, the rule of thumb from one design roundup is that the ideal space is at least 27 inches wide, though a corner pantry can be fitted into tighter spots.
Measure the corner before you design anything
Most corner pantry failures start with a tape measure that was used once. This Old House recommends measuring the corner, accounting for obstacles and checking that the walls meet at 90 degrees before you sketch the design. Do it like this:
- Measure the length of each wall at three heights: near the floor, at waist height and near the ceiling. Old plaster and settled framing can vary by half an inch or more across a wall.
- Measure the ceiling height at both walls and at the corner itself.
- Mark every obstacle: outlets, switches, a return-air vent, a window casing, a baseboard, a door swing from the next room.
- Check the corner with a framing square. If a gap shows at the top or bottom, note its size. You will scribe your trim to it later.
- Find the studs with a stud finder and mark them in pencil. They decide where your supports go.
Homes in Central Illinois built before the middle of the last century are especially likely to have walls that wander. A plumb line or a four-foot level on each wall tells you more than any single corner measurement.
Allow for door clearance
Door clearance is one of the two mistakes This Old House names most often. To avoid bottlenecks, Martha Stewart’s kitchen renovation guidance suggests mapping clearances with a tape measure and making sure door and drawer hardware clears perpendicular items. In practice:
- Open the pantry door fully in your mind, then on the floor with painter’s tape. Does it hit the refrigerator, a drawer pull or an oven door?
- In tight kitchens, consider a pocket door, a barn-style slider or a bifold in place of a swing door. A swing door that blocks the aisle is the most common regret.
- Leave room for the door to open past 90 degrees so you can reach the shelves nearest the hinge.
Pantry cabinet dimensions that work
There is no single code-mandated pantry size, so use the conventions cabinet makers follow. Here is a working set.
| Element | Typical dimension | Why |
|---|---|---|
| Shelf depth, main shelves | 14 to 16 inches | Fits most containers and boxes without items disappearing behind each other |
| Shelf depth, high shelves | 10 to 12 inches | Easier to see and reach from a step stool |
| Spice or can shelves | About 6 inches | One row deep, every label visible |
| Base cabinet depth | 24 inches | Matches standard kitchen base cabinets |
| Spacing, large items | 16 to 18 inches | Cereal boxes, small appliances, stockpots |
| Spacing, small to average items | 8 to 10 inches | Cans, jars, spices |
| Bottom shelf height | 18 to 24 inches above floor | Keeps the floor clear for cleaning and heavy items reachable |
The simple formula for every shelf: add 2 inches to the height of what you plan to store so it comes out easily. Measure your tallest cereal box, your biggest olive oil bottle and your stand mixer before you fix a single shelf height.
How deep should pantry shelves be?
Shallower than most people expect. Deep shelves feel generous in a plan drawing, but anything behind the first row gets forgotten. The other mistake This Old House flags is shelves so deep that items become hard to see and reach. If you need the capacity of a deep shelf, use a pull-out tray or a lazy Susan instead of a longer fixed board.
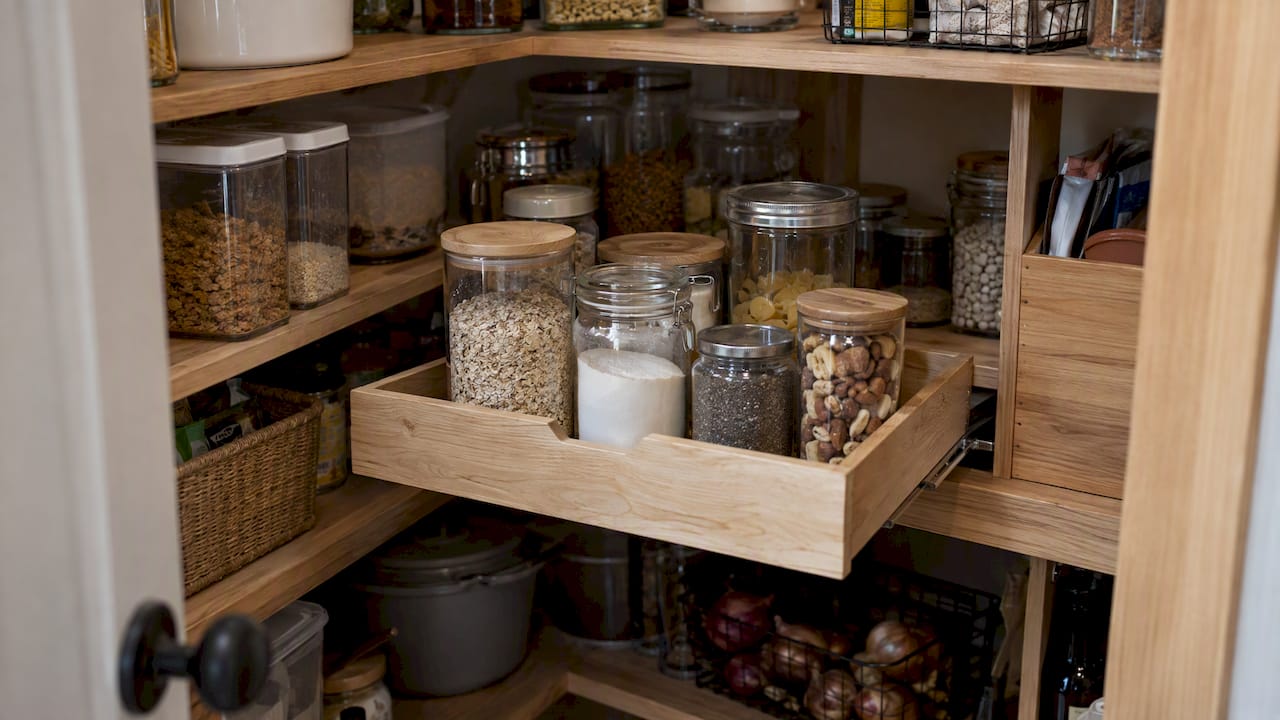
For genuinely deep shelves, this guide to organizing shelves over 16 inches deep shows how bins and risers keep the back row visible.
Corner pantry shelving: reach the back of the corner
The corner itself is the hard part. A fixed shelf wrapping an inside corner leaves a dead zone that no hand can reach. These are the fixes that work.
- Lazy Susans. Helpful in L-shaped pantries where items get lost in the corners. They suit oils, jars and baking supplies.
- Pull-out shelves and sliding trays. They use the full depth of a corner cabinet without making you crawl in. Swing-out organizers bring items within reach and can help with heavier things.
- Door shelving. A shallow rack on the back of the door adds storage for spices and packets with no floor space at all.
- Vertical storage with bins. Group like items and pull the whole bin out. Before buying, measure the cabinet’s depth and width and check the bins’ weight limits.
- Adjustable shelves. Drill rows of pin holes so you can change spacing later. This Old House suggests starting the bottom shelf about 11.5 inches up and keeping the top shelf about 2 feet below the ceiling.
That same source recommends using the hard-to-reach upper zone for display, such as a platter or seasonal serveware, and keeping everyday items between knee and shoulder height.
Keep the pantry cool and dry
Food stores better in the right conditions. This Old House advises keeping a pantry below 70 degrees Fahrenheit and 45% humidity. Avoid a corner that backs onto a range hood duct, a hot water line or an uninsulated exterior wall that bakes in summer. This matters more in an Illinois summer than a spec sheet suggests.
Materials and tools for a built corner pantry
For an open or semi-open corner shelving build, The Spruce lists finish-grade plywood, 2×2 support lumber, 1×2 trim and wood glue. The tools are a miter saw, a brad nailer, a stud finder and a level. Add a framing square, a drill with a countersink bit, a pencil and painter’s tape.
Some practical choices on top of that list:
- Plywood grade. Buy finish-grade plywood, not construction sheathing. Edges are visible, and you will want to cover them with 1×2 face trim.
- Shelf span. Keep unsupported spans modest. For any shelf run over 1 foot, add at least one 2×2 middle support.
- Pre-finish. Prime and paint or seal the boards before installation. Cutting in a painted line inside a finished corner is slow and unforgiving.
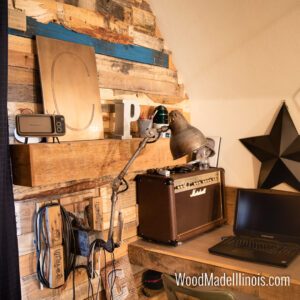
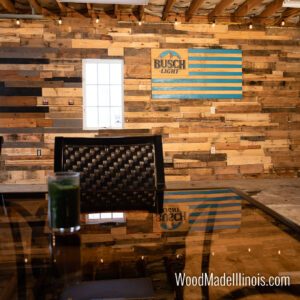
- Solid wood or pallet wood. For a rustic or farmhouse pantry, solid boards or reclaimed pallet wood make a good door panel or back wall. Sand it well and seal it, because pantry surfaces touch food packaging.
Step-by-step: build corner pantry shelving
This sequence suits an open corner or an L-shaped shelf run. A closed cabinet or walk-in adds framing, a door and trim on top of it.
- Plan and sketch. Draw each wall in elevation with shelf heights from your item list. Mark stud locations.
- Prep the walls. Patch, prime and paint first, while the corner is open and empty.
- Cut your supports. Cut 2×2 cleats for each shelf on both walls and one for the front of the corner if the shelf spans across it.
- Mark level lines. Use a long level to draw a line for each shelf. Making supports level is critical, and a line that drifts 1/8 inch will show on a long shelf.
- Fasten the cleats. Screw into studs wherever you can. Where there are none, use wall anchors, and pre-drill pilot holes so the holes stay aligned.
- Add middle supports. Any span over 1 foot gets a center support, as above.
- Cut and fit the shelves. Scribe the corner shelf to the wall rather than trusting the 90 degrees. A framing square will tell you how far off it is.
- Fix the shelves. Glue and brad-nail the plywood to the cleats, then add 1×2 face trim to hide the plywood edge and stiffen the front.
- Finish. Caulk the trim, touch up the paint and let it cure before you load it with canned goods.
For a cabinet-style pantry, the frame must be square. Check the frame with a carpenter’s square at each corner before you fasten it, then shim it plumb and level into the room.
Mistakes that ruin a corner pantry build
- Trusting the corner. Walls that are not square cause alignment problems that throw the build out before it starts, as This Old House notes.
- Ignoring the door. A door that hits a drawer pull or a refrigerator is a daily annoyance.
- Shelves that are too deep. Items vanish at the back and expire there.
- One shelf height for everything. Mix tall and short zones, or use adjustable pin holes.
- Skipping studs. A shelf of canned goods is heavy. Anchors alone are a last resort.
- Forgetting ventilation and heat. A warm, humid pantry shortens the life of food.
Our perspective: where DIY ends and carpentry begins
We have spent a combined century at the bench, and corners are where we see homeowners get into trouble. A straight run of shelves forgives a wall that is a quarter inch out. A corner does not, because two errors meet there.
Our view is simple. Build open corner shelving yourself if the walls are square, the span is short and you own a miter saw and a level. Bring in a carpenter when any of these is true:
- The corner is out of square or the ceiling is not level, common in older Central Illinois homes.
- You want the pantry to look like part of the kitchen, with matching doors, trim and finish.
- You are adding a pocket or barn door to solve a clearance problem.
- The corner sits in a historic house where we need to protect original plaster, trim or windows.
We design around how you cook and how much space you really have, and we can use solid wood, plywood and, where it suits the look and budget, reclaimed pallet wood. A pantry should be easy to use every day, which is why we spend more time on the measuring than on the cutting.
— Wood
Have us build it
If you would rather have a pantry that fits your corner to the sixteenth of an inch, we build custom storage and built-ins for homes and small businesses across Central Illinois. Start with a design consultation: we measure the corner, talk through what you store and give you a plan before any wood is cut. You can see our built-to-order storage and carpentry services, or look at our custom shelving work for examples.
If the pantry is part of a larger kitchen update, our kitchen renovation services and kitchen cabinet services cover cabinets, countertops and doors in the same project. We do not publish a price for built-in storage, because each corner is different. Tell us about yours and we will quote it.
FAQ
How deep should pantry shelves be?
For most pantries, 14 to 16 inches works for main shelves, and 10 to 12 inches suits high shelves you reach less often, according to a standard dimensions reference. Spice shelves can be about 6 inches. If you need more capacity, add pull-out trays instead of making shelves deeper.
What is the minimum size for a corner pantry?
A corner pantry can fit tiny spaces, but one design guide puts the ideal width at 27 inches or more. Your actual minimum depends on your door type and whether you need to step inside. A pocket or sliding door saves the swing space a hinged door needs.
How far apart should pantry shelves be?
Allow 16 to 18 inches for large items and about 8 to 10 inches for small to average ones. Place the bottom shelf 18 to 24 inches above the floor. Adjustable pin holes let you change spacing as your storage needs change.
What is the best way to reach items in a corner?
Lazy Susans, pull-out shelves and swing-out organizers all work, and the right one depends on what you store. Pull-outs use the full depth of a corner cabinet and help with heavier items. Lazy Susans suit jars and bottles.
Can I build a corner pantry myself?
Open corner shelving is a realistic weekend project if your walls are square and you can locate studs and keep supports level. A cabinet-style or walk-in pantry takes more framing and finish skill. If you want it to look built-in, a carpenter will usually give a better result.
Sources
- Step by Step Guide to Building a Corner Kitchen Cabinet, This Old House
- Read This Before You Put In a Pantry, This Old House
- How to Build DIY Pantry Shelves and Corner Shelves, The Spruce
- 37 Corner Pantry Ideas That Maximize Space and Style, The Spruce
- 10 Best Ways to Organize a Kitchen Corner Cabinet, The Kitchn
- 10 Kitchen Renovation Mistakes to Avoid, Martha Stewart
- Pantry Storage Heights Dimensions and Drawings, Dimensions.com
- How to Build Corner Pantry Shelves, Angela Marie Made
- How To Build A Corner Pantry Cabinet, Storables
- Shelves Over 16 Inches: Deep Pantry Organization, Flawlessly Functional