Start with the four moves that change a room in an afternoon: standardize your bulbs to one warm-white temperature, swap tired cabinet and door hardware, touch up scuffed trim and walls with fresh paint, and seal drafty gaps with weatherstripping. Each task takes an hour to a weekend and costs under $150. Wood Made Illinois has spent over a century of combined shop time watching which small fixes actually hold up, and these four are where that experience keeps pointing.
TL;DR:
- Standardizing lighting to a warm-white temperature and upgrading hardware can instantly create a cohesive, high-quality look across multiple rooms.
- Focus on quick cosmetic fixes like paint, hardware, lighting, and styling details to generate a significant visual impact without full remodeling.
- Prioritize maintenance tasks such as re-caulking, sealing grout, and replacing HVAC filters to prevent bigger repair costs before making cosmetic upgrades.
- Complete small projects like painting accent walls, installing peel-and-stick tiles, or hanging shelves within a weekend for a noticeable transformation.
- When hiring professionals, handle safety and structural issues first, then proceed with cosmetic upgrades, and always seek fixed-price quotes for small jobs.
Table of Contents
- What Quick Home Upgrades Make the Biggest Visual Difference?
- Room-by-Room Quick Upgrade Checklist
- Maintenance-First Fixes That Prevent Bigger Repair Bills
- The Weekend Sprint Plan: 1 Hour, 1 Afternoon, or 1 Weekend
- When to DIY vs. Hire a Pro
- Carpentry-Savvy Quick Upgrades From Wood Made Illinois
- How We Prioritize Quick Upgrades for Clients
- Small Projects, Professional Finish: What Wood Made Illinois Offers
- Sources
What Quick Home Upgrades Make the Biggest Visual Difference?
A house doesn’t need a gut renovation to feel new again. It needs a handful of touch points corrected, because those are the spots your eye and hand find first. Budget-conscious renovators know this instinctively: keep the layout, keep the plumbing where it is, and pour your dollars into the surfaces people actually see and touch. That approach can capture most of a full renovation’s visual payoff at a fraction of the cost.
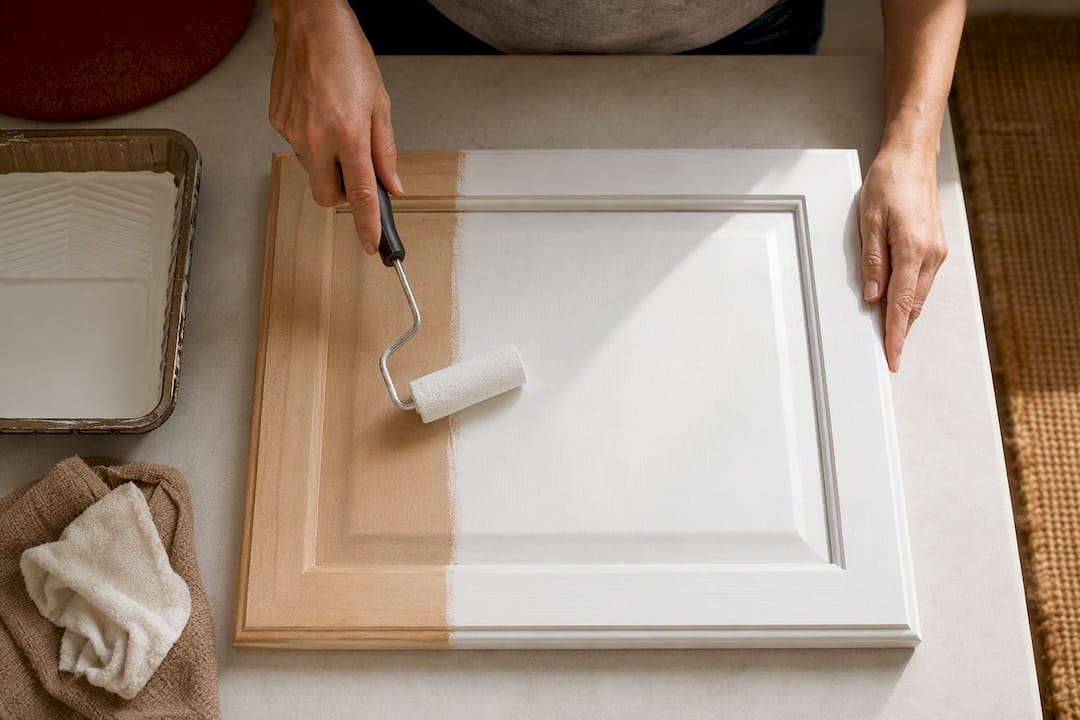
Paint does the heaviest lifting per dollar spent. An accent wall in a saturated color resets an entire room’s mood in a weekend. Trim touch-ups erase years of scuffs in an afternoon. Cabinet paint, done with a proper degreasing wipe-down and two coats of enamel, can look nearly as good as full refacing for a quarter of the price, though refacing wins if the boxes underneath are already solid and you want factory-level durability.
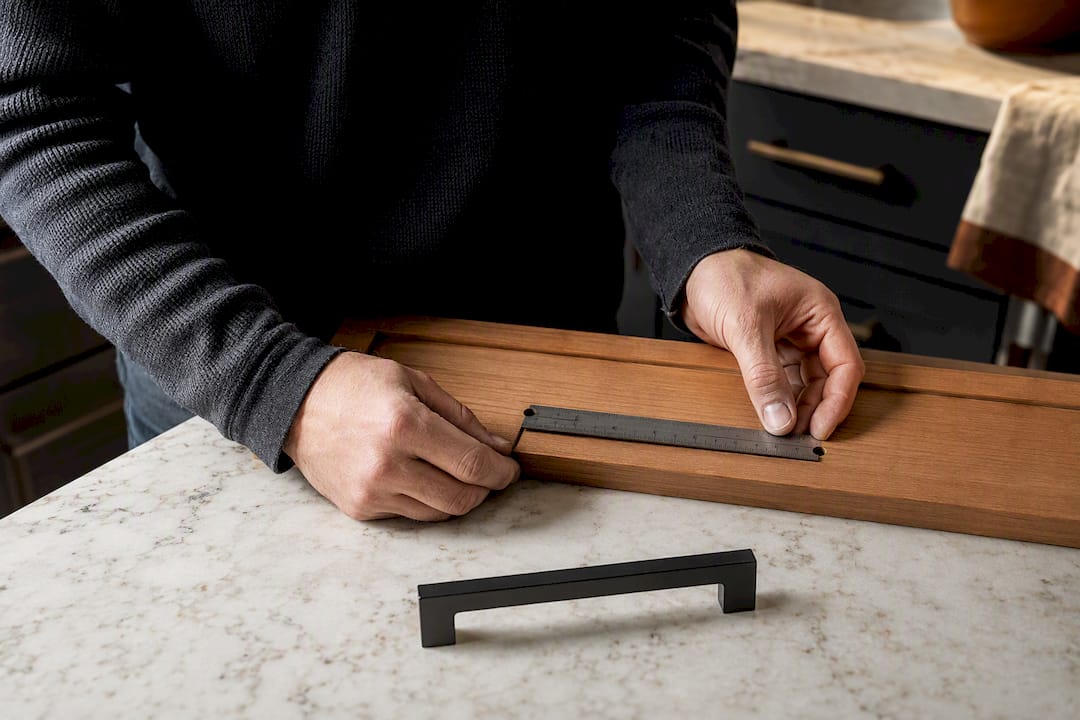
Hardware is the detail people register without knowing why. Measure center-to-center on your existing pulls before ordering replacements, and lean toward weightier, solid-feel finishes over hollow, lightweight stock. Heavier hardware reads as higher quality even when the cabinet behind it hasn’t changed at all.
Lighting is the most underrated lever in the house. Mismatched bulb temperatures make a room feel unfinished even when everything else is right. Standardizing to a 3000K to 4000K warm-white LED across every fixture instantly makes a space look coordinated. Adding a $20 dimmer switch to your main overhead fixture, and a floor or table lamp to fill dark corners, does the rest.
Window treatments and styling fixes round it out:
- Hang curtain rods a few inches from the ceiling and wider than the window frame. It fools the eye into reading a taller room.
- Size rugs to fit under the front legs of your furniture, not floating in the middle of the floor.
- Hang mirrors at eye level, not decoration height, so they actually reflect light and space.
- Clear countertops and shelves down to a third of their usual clutter. Empty space reads as intentional, not sparse.
Pro Tip: Group your budget by room instead of spreading it thin across the whole house. One finished-looking room beats five half-updated ones every time.
Room-by-Room Quick Upgrade Checklist
Different rooms reward different fixes. Here’s where to spend your first weekend, broken down by cost bracket.
- Kitchen. Swap cabinet hardware first (under $50), then add peel-and-stick backsplash tile over a properly cleaned and degreased surface ($50 to $150), following tips from this Small Kitchen Upgrade Guide. Under-cabinet LED strip lighting runs $50 to $150 installed and transforms how the counters function at night. A new faucet is a $150 to $500 job if you’re paying attention to supply-line compatibility. The most common pitfall: buying a faucet before checking your existing hole spacing and countertop thickness.
- Bathroom. Regrouting or sealing existing grout costs under $50 in materials and an afternoon of labor. A new showerhead is a fifteen-minute swap for under $50. Framing a builder-grade mirror with simple trim molding runs $50 to $150 and looks custom. Fresh caulk around the tub, done right, is one of the cheapest fixes with the highest damage-prevention payoff in the house.
- Living room and bedroom. Layer your lighting with a floor lamp, a table lamp, and a dimmed overhead fixture instead of one harsh ceiling light (under $150 total). Hang curtains high and wide as described above. Size area rugs correctly. These are near-zero-cost changes that only require attention to proportion.
- Exterior and curb appeal. A freshly painted front door in a bold color is one of the highest-ROI projects in the under-$150 bracket. New house numbers and a modern mailbox run under $50. Power-washing siding and walkways costs under $50 in rental fees and takes an afternoon. Simple landscaping, like edging beds and adding mulch, is best done in spring or fall when plants aren’t stressed by heat.
Maintenance-First Fixes That Prevent Bigger Repair Bills
Cosmetic upgrades matter, but they mean less if a water leak or an air leak undoes them within a year. Wood Made Illinois builds every project plan on a maintenance-first principle: stabilize what protects the house before you spend a dollar on how it looks. Ask one question before any purchase: is this cosmetic, or is it protective? Protective work goes first, every time.
Run through this priority order before touching paint or hardware:
- Re-caulk around tubs, sinks, and windows where old caulk has cracked or yellowed.
- Scrub and reseal bathroom grout to block moisture from reaching the subfloor.
- Change HVAC filters. A clogged filter strains the whole system and raises energy bills.
- Clean the dryer vent. Lint buildup is a leading cause of house fires and it’s a ten-minute fix.
- Replace a running toilet flapper. It’s a $10 part that stops silent water waste.
On the energy side, weatherstripping around doors and windows, cellular shades on the sunniest windows, and a programmable thermostat are the phased “efficiency” step between safety repairs and cosmetic work that homeowners tend to skip. One small detail that surprises people: ceiling fans should spin counterclockwise in summer to push cool air down, and clockwise in winter to pull warm air back off the ceiling. That switch costs nothing and changes comfort immediately.
The Weekend Sprint Plan: 1 Hour, 1 Afternoon, or 1 Weekend
Match the project to the time you actually have, not the time you wish you had.
- One hour or less. Swap every light bulb in a room to the same color temperature. Replace outlet and switch covers. Rehang a single cabinet door with tightened or replaced hinges. Touch up nail holes and scuffs with matching paint.
- One afternoon (2 to 4 hours). Paint an accent wall, start to finish, including tape-off and two coats. Install dimmer switches on your main fixtures. Replace a kitchen or bathroom faucet, assuming standard connections.
- One full weekend. Paint an entire room, including trim. Install peel-and-stick tile as a backsplash or accent wall, prepping the surface properly first. Build and mount a set of floating shelves, which requires finding studs or using rated anchors.
Keep a basic checklist on hand before you start: painter’s tape, a good angled brush, a 5-in-1 tool, a stud finder, a level, a cordless drill, and a caulk gun. For anything involving ladders above six feet or cutting into drywall near wiring, work with a helper and know where your breaker panel is before you begin. Most of these projects require no permit, but always check local rules before altering exterior structures or load-bearing walls.
Running out mid-project on a Sunday afternoon, when the hardware store is about to close, kills momentum fast.*
When to DIY vs. Hire a Pro
Paint, hardware swaps, and caulk jobs are squarely DIY territory. They’re low-risk, forgiving of small mistakes, and cheap to redo if you get them wrong. Major electrical work, structural plumbing changes, and anything involving a load-bearing wall belong with a licensed professional. Red flags that mean stop and call someone: exposed knob-and-tube wiring, water stains that keep coming back after caulking, or a wall that sounds hollow where it shouldn’t.
Sequence matters as much as skill level:
- Stabilize first: fix safety issues and active leaks before anything cosmetic.
- Handle efficiency next: air sealing, weatherstripping, thermostat upgrades.
- Move to cosmetic work: paint, hardware, lighting fixtures.
- Finish with styling: rugs, art, curtains, the small touches.
When you do call a pro, ask for a fixed price on small jobs, a realistic start-to-finish timeline, and whether they carry liability insurance. A trustworthy budget carpentry plan usually gives you a same-week estimate for anything under a few hundred dollars.
Carpentry-Savvy Quick Upgrades From Wood Made Illinois
Some quick upgrades read as custom work the moment they’re done right, and that’s where carpentry experience earns its keep. Picture-frame molding on a plain wall, shallow built-in shelves flanking a fireplace, upgraded baseboard or door trim, and a floating entry bench with cubbies underneath all deliver a bespoke look without a full remodel.
Call a pro once a project involves concealed fasteners, precise finish-sanding, or fastening into plaster and lath, since a rushed cut there is hard to hide. A few examples worth noting from projects across Central Illinois:
- A mudroom cubby built to fit an oddly narrow hallway, finished in a weekend.
- Picture-frame trim added to a builder-grade living room, changing its whole character for the cost of lumber and a few hours of labor.
- Floating shelves flanking a fireplace, sized and leveled to studs the homeowner couldn’t find on their own.
How We Prioritize Quick Upgrades for Clients
We favor maintenance-first, high-visibility touch points because that’s where a homeowner’s money and peace of mind overlap. Over more than a century of combined shop experience, we’ve learned that a well-caulked tub or a properly hung shelf outlasts a flashy but poorly sequenced project every time. If a quick fix on your list starts to look like it needs a trained hand, we’re glad to take a look.
— Wood
Small Projects, Professional Finish: What Wood Made Illinois Offers
Wood Made Illinois is the option for homeowners who want quick upgrades finished at a level that survives close inspection, not just a quick glance. Where a weekend DIY project stops at “good enough,” our crew handles the fine finish work: crisp miter joints on trim, concealed fasteners on floating shelves, and cabinet paint that’s sprayed and cured correctly instead of brushed and rushed.

Small services we handle on a quick turnaround include trim and molding upgrades, cabinet painting and refacing, floating shelves, and compact built-ins like entry cubbies or window seats. Most of these projects run from a single day to about a week, depending on scope, and small-project pricing typically stays well below a full remodel budget. If you’re weighing cabinet paint against replacement, our cabinet refacing services page walks through both paths side by side.
Ready to see what fits your space and your budget? Visit our trusted local carpentry experts page to request a quote, or browse custom carpentry project ideas for inspiration before you call.
Sources
For cost brackets and phased planning, Modernize’s guide to affordable home upgrades lays out the maintenance-first sequence in detail. For weekend-scale project ideas, HGTV’s list of 50 DIY projects and Better Homes & Gardens’ under-$100 upgrades both offer practical step-by-step depth worth bookmarking.
- Affordable home upgrades that actually save money (Modernize)
- Creating a budget-friendly home renovation plan (AllBetter)
- 50 DIY home improvement projects to tackle this weekend (HGTV)