Custom millwork is the most direct way to transform a living room with carpentry, turning bare walls and wasted corners into purposeful, architectural features. Unlike furniture you buy off a shelf, built-in carpentry becomes part of the room’s structure. It defines proportions, creates storage, and adds the kind of permanence that raises home value by over $10,000 with a well-designed full-wall unit. Woodmadeillinois has spent over 100 years of combined team experience doing exactly this for Central Illinois homeowners, and the results speak for themselves. This guide covers planning, materials, projects, and the pitfalls that trip up most DIYers.
How do you transform a living room with carpentry?
Living room carpentry transformation is the process of designing, building, and installing custom woodwork, including built-ins, shelving, fireplace surrounds, and decorative millwork, that improves both the function and appearance of the space. The key distinction from furniture is permanence. Built-ins utilize vertical space and can be designed shallower than freestanding pieces, which is especially valuable in smaller rooms. They reduce clutter and create the visual impression of a larger, more organized space.
Millwork serves as architectural jewelry for a room. It adds permanence and character that decoration alone cannot achieve. A well-executed built-in does not look like something you added. It looks like something the house was born with.
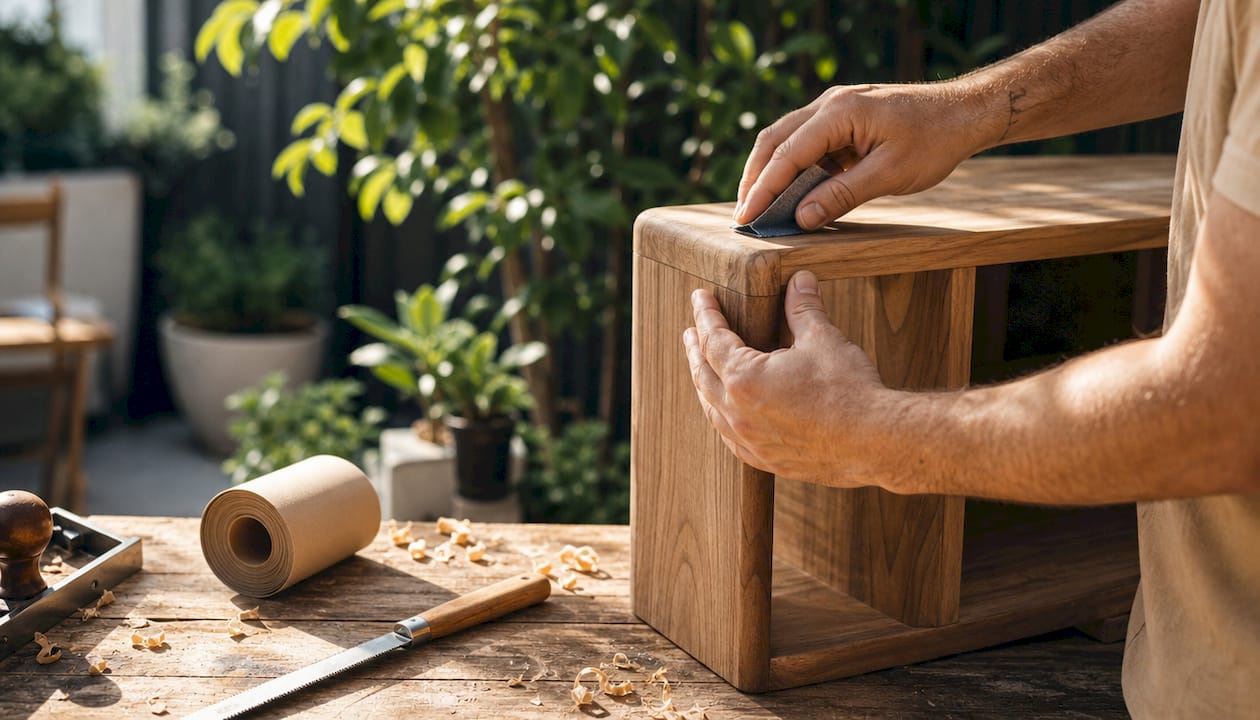
The benefits extend beyond aesthetics. Built-ins save 20–30% of floor space compared to freestanding furniture, according to Fine Woodworking. That space efficiency translates directly into a more livable, organized room.
What to plan before starting a living room carpentry project
Planning is the skeleton of any successful living room renovation with carpentry. Skipping it produces gaps, sagging shelves, and units that fight the room instead of completing it.
Start with accurate measurements. Record wall lengths, ceiling height, window and door placements, and any obstructions like baseboards, outlets, and HVAC vents. Measure at multiple heights because walls are rarely perfectly plumb or square. A difference of even half an inch across a 10-foot span will cause problems during installation.
Next, define the primary function of the built-in. Ask yourself these questions before drawing a single line:
- Storage: Do you need closed cabinets, open shelves, or a combination?
- Display: Will you show books, art, or collectibles that need specific shelf depths?
- Media integration: Does the unit need to house a television, gaming equipment, or a sound system?
- Seating: Would a window seat with storage underneath serve the room better than a standalone bench?
- Traffic flow: Does the layout leave clear pathways and avoid blocking natural light?
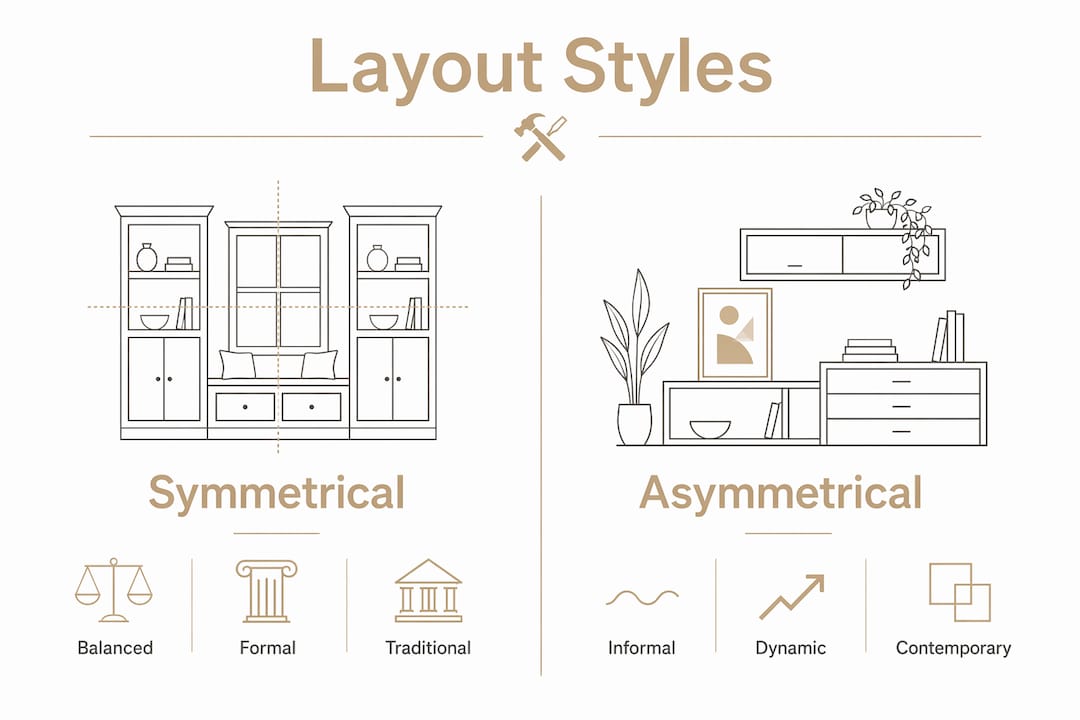
Symmetrical layouts feel formal and balanced, which suits traditional and transitional rooms. Asymmetrical designs read as more casual and contemporary. Neither is wrong. The choice depends on your room’s existing architecture and your personal style.
Plan electrical and ventilation needs before framing begins. Retrofitting outlets or cable conduits after installation is expensive and messy. If you are building a media cabinet, decide now where power will enter and how heat will escape.
Pro Tip: Tape the outline of your planned built-in on the wall with painter’s tape before committing to any cuts. Live with it for a day or two. You will catch proportion problems that drawings miss.
What wood and materials work best for living room built-ins?
Material selection determines how your built-in looks, how long it lasts, and how much work it takes to finish. The choice between hardwoods and softwoods is not just about price. It is about the intended finish and the environment.
Hardwoods vs. softwoods for built-ins
| Wood Type | Best Use | Finish | Stability |
|---|---|---|---|
| White oak | Stained built-ins, shelving | Stain-grade | High |
| Maple | Painted or stained cabinets | Both | High |
| Cherry | Feature pieces, display units | Stain-grade | Medium-high |
| Poplar | Painted built-ins | Paint-grade | Medium |
| Pine | Budget projects, rustic style | Paint or stain | Lower |
Solid poplar for painted built-ins and white oak for stained finishes are the preferred choices among professional carpenters for their dimensional stability and lasting finish quality. Wood moisture content matters as much as species. Lumber with high moisture content will shrink and warp after installation as it acclimates to your home’s humidity level. Always allow new lumber to acclimate in the room for at least 72 hours before cutting.
Paint-grade materials prioritize a smooth, consistent surface. Poplar and MDF (medium-density fiberboard) are both excellent here. Stain-grade materials must show beautiful grain, so knots, mineral streaks, and inconsistent color become visible defects rather than character.
For a DIY project, you need these tools at minimum:
- Circular saw or miter saw for accurate crosscuts
- Table saw for ripping sheet goods to width
- Drill and driver with long screws for stud anchoring
- Level (48-inch minimum) for plumb and level installation
- Pocket hole jig for strong face-frame joinery
- Router for edge profiles and dados
If you are hiring a professional, look for custom carpentry interior design experience specifically in built-ins, not just general construction. Ask to see completed projects and request references from past clients.
Pro Tip: Buy 10–15% more lumber than your cut list requires. Wood has defects, cuts go wrong, and running short mid-project means delays while you match grain and color from a new batch.
Step-by-step carpentry projects for your living room
These are the most impactful living room carpentry ideas, ranked by the combination of visual effect and functional return.
1. Custom built-in shelving and cabinets
Built-in shelving is the foundation of most living room carpentry projects. Professionally designed built-in shelves support 50–100 lbs per linear foot when anchored correctly into wall studs. That load capacity makes them practical for books, media equipment, and decorative objects that would buckle a freestanding unit.
Build a base cabinet first, then stack upper open shelving above it. This creates visual weight at the bottom and lightness at the top, which mirrors how good architecture handles proportion. Use dados (grooved channels cut into the side panels) to seat shelves rather than relying on pins alone. Dados distribute weight across the full shelf width.
2. Fireplace surround carpentry
A fireplace surround is the room’s focal point. Carpentry here means building a mantel, pilasters (the vertical columns flanking the firebox), and an overmantel that frames the space above. High-end custom carpentry achieves 1/8-inch precision for a fit that looks original to the house, not added later.
Design the surround proportions to match the room’s ceiling height. A standard rule: the mantel shelf should sit at roughly 54–60 inches from the floor. The overmantel can extend to within 12 inches of the ceiling in rooms with 9-foot ceilings or higher.
3. Recessed niches and window seats
Recessed niches cut into non-load-bearing walls create display space without consuming floor area. A window seat built across a bay window adds seating, storage in the base, and a sense of architectural intention that transforms an awkward corner into the room’s best feature.
Frame the seat box from 3/4-inch plywood, anchor it to the floor and wall, then wrap it in the same trim profile used elsewhere in the room. Consistency in trim detail is what makes built-ins read as part of the original architecture.
4. Media center with hidden wire management
In-wall conduits and recessed outlet boxes installed during framing allow cord-free media setups with proper ventilation for electronics. Plan ventilated cabinets with thermostat-controlled fans to prevent heat buildup around receivers and gaming consoles.
Build the television alcove slightly wider than the screen to allow for future upgrades. A 65-inch television today may be replaced by a 75-inch model in five years. Designing for that flexibility costs almost nothing upfront and saves a full rebuild later.
5. Lighting and trim details
LED lighting channels integrated into built-in shelving transform storage units into standout room features. Lighting transforms the perception of depth and quality. Recess LED strips into the underside of each shelf, wired to a single dimmer switch. The result looks like a high-end retail display, not a home improvement project.
Crown molding at the top of built-ins, base molding at the floor, and consistent casing around doors and windows tie the entire room together. These details are the difference between a carpentry project and a room that feels designed.
Pro Tip: Paint the inside back panels of open shelves a contrasting color before installation. A deep navy or charcoal behind white shelving creates depth and makes displayed objects pop without any additional cost.
What are the most common carpentry mistakes in living rooms?
Most living room carpentry failures trace back to three root causes: poor anchoring, ignored wood movement, and inadequate planning for technology.
“Proper scribing eliminates gaps and shadows, making built-ins look like original architectural features rather than furniture added after the fact. Built-ins extend the home’s bones and require trim finishing work for seamless integration.” — Ace Kustoms Cabinets & Trim
DIYers most often fail by anchoring cabinets only to drywall or by ignoring wood movement, which results in sagging, warping, or failed joints within the first year. Drywall anchors are not adequate for heavy built-ins. Long screws driven into studs are the only reliable method.
Watch for these specific pitfalls:
- Uneven walls: Use scribing to custom-cut outer panels to the wall’s actual profile. Never rely on caulk to fill structural gaps.
- Ignoring wood movement: Solid wood expands and contracts with seasonal humidity changes. Leave small gaps at panel edges and use elongated screw holes to allow movement without cracking.
- Skipping the stud finder: Mark every stud before building begins. Anchoring into studs is non-negotiable for any unit that will hold significant weight.
- No plan for future tech: Build conduit runs and extra outlet capacity now. Retrofitting later means cutting into finished work.
- Sagging shelves: Shelves longer than 36 inches need a center support or a thicker material, such as 3/4-inch plywood with a hardwood edge band, to prevent deflection under load.
Scribing involves custom-cutting outer panels to fit the exact profile of uneven walls and floors. It eliminates the gaps and shadows that make built-ins look like furniture rather than architecture. It is a skill that separates professional results from amateur ones.
Key takeaways
Custom carpentry is the most effective way to add lasting function, architectural character, and measurable home value to a living room.
| Point | Details |
|---|---|
| Plan before you cut | Measure walls at multiple heights and define function before designing any built-in. |
| Choose materials by finish type | Use poplar or MDF for painted work; use white oak or maple for stained finishes. |
| Anchor into studs | Built-ins must be screwed into wall studs to safely bear 50–100 lbs per linear foot. |
| Scribe for seamless fit | Custom-cut outer panels to match uneven walls so built-ins look original to the house. |
| Plan for technology now | Install conduit and ventilation during framing to avoid costly retrofits later. |
What I have learned after years of living room carpentry work
After working on hundreds of living room projects across Central Illinois, the single biggest mistake I see homeowners make is treating built-ins like furniture. They think about what goes on the shelves before they think about how the unit relates to the room’s architecture. That backwards approach produces results that look added, not integrated.
The rooms that genuinely impress people share one quality: the built-ins feel like they were always there. That happens when the trim profiles match the existing door casings, when the base molding flows continuously from the wall into the unit, and when the proportions respect the ceiling height. Adding architectural character indoors is not about adding more. It is about making what you add feel inevitable.
I also push back on the idea that custom carpentry is only for large budgets. A single well-built bookcase flanking a fireplace, built from poplar and painted to match the trim, does more for a room than a full wall of mediocre cabinetry. Quality of execution matters more than quantity of material. Start with one strong project, live with it, and let it inform what comes next.
The homeowners who get the most satisfaction from these projects are the ones who invest time in the planning phase. They tape outlines on walls. They collect reference images. They think about how the room will function in five years, not just how it looks in the reveal photos. That patience is what separates a room that ages well from one that needs redoing in a decade.
— Wood
Woodmadeillinois: custom carpentry for your living room
Woodmadeillinois brings over 100 years of combined carpentry experience to living room projects across Central Illinois. The team specializes in built-ins, millwork, fireplace surrounds, and media centers built to fit your specific walls, your specific style, and your specific budget.
Whether you are planning a full wall of custom shelving or a single statement fireplace surround, Woodmadeillinois offers personalized design consultations and complete installation. Every project starts with a conversation about how you actually use your space. Browse carpentry project ideas across every budget range, or connect directly with the trusted local carpentry experts at Woodmadeillinois to schedule your consultation today.
FAQ
What is the best wood for painted living room built-ins?
Solid poplar and MDF are the top choices for painted built-ins because both are dimensionally stable and accept paint without grain telegraphing through the finish.
How much weight can built-in shelves hold?
Professionally designed built-in shelves anchored into wall studs support 50–100 lbs per linear foot. Shelves longer than 36 inches need a center support or thicker material to prevent sagging.
Can custom carpentry increase my home’s value?
A well-designed full-wall media unit or built-in system can add over $10,000 in home value. The return depends on quality of materials, craftsmanship, and how well the design integrates with the home’s existing architecture.
What is scribing in carpentry?
Scribing is the technique of custom-cutting a panel’s edge to match the exact profile of an uneven wall or floor. It eliminates gaps and makes built-ins look like original architectural features rather than added furniture.
How do I manage wires in a built-in media center?
Install in-wall conduits and recessed outlet boxes during the framing stage, before panels go up. This approach allows a cord-free setup and proper ventilation for electronics without cutting into finished work later.